Lesson 8 - Introducing Pynautobot
So we just walked through building out a couple of YAML files to use with the Ansible Nautobot module. We will use the python Nautobot module to import not just one pod but all six pods created for this workshop initially. The benefit to using python is we can structure the YAML file using a more nested approach.
Check out the files here
I have several files created under vars that I used to track all of the things I needed inside Nautobot. My pb.transform.data.yaml playbook quickly combines everything into a single file for python to consume.
1
2
3
4
5
6
7
8
9
10
11
12
13
14
15
16
17
18
19
20
---
- name: Load Nautobot
  connection: local
  hosts: localhost
  gather_facts: False

  vars_files:
   - vars/sites.yaml
   - vars/tags.yaml
   - vars/vrfs.yaml
   - vars/devices.yaml
   - vars/nodes_design.yaml
   - vars/custom_fields.yaml
   - vars/device_connections.yaml

  tasks:
  - name: transform into a single file
    template:
      src: "transform.j2"
      dest: "nb_initial_load.yaml"
This new file is called nb_initial_load.yaml
I would like to give a call out to hpreston and everyone willing to answer my dumb questions in the nautobot slack channel.
The next piece of the puzzle is creating the python that will take all of this information and send it to Nautobot. Let’s break down the nautobot_load.py key sections. You will need to install pynautobot, so let’s start off by creating a virtualenv for our project.
In your a new folder
1
2
3
4
pip3 install virtualenv
virtualenv .pynautobot_stuff
source .pynautobot_stuff/bin/activate
pip3 install pynautobot
You should have a prompt that is pre-pended with .pynautobot_stuff. Create a new file, and lets call it nautobot_load.py
1
2
from pynautobot import api
import yaml
Check out the readme here. We need to import the pynautobots API module and YAML. We are using YAML to format the data that this will be using.
1
2
3
4
data_file = "nb_initial_load.yaml"

with open(data_file) as f:
    data = yaml.safe_load(f.read())
Next we open the file and read it into memory.
1
2
nb = api(url="http://localhost:8000", token="YOUTOKEN")
nb.http_session.verify = False
Next, we need to create a variable for our API URL and token. We should already have one of these made from our previous section and use that here. The nb.http_session.verify = False will ensure that the API calls can be done without SSL.
Sites
1
2
3
4
5
6
# sites:
for site in data["sites"]:
    print(f"Creating or Updating Site {site['name']}")
    nb_data = nb.dcim.sites.get(slug=site["slug"])
    if not nb_data:
        nb_data = nb.dcim.sites.create(name=site["name"], slug=site["slug"])
Let us do this in order again the same way we did with the Ansible playbooks. We need the sites first to associate things like VLANs, prefixes, and relay racks. Notice This is similar to how we make for loops in Jinja. The concepts are similar, and so hopefully, there is a little bridge created between the two languages and helps us read what is happening. We will loop through anything inside of the hash of data["sites"] Print simply prints to the terminal, so in our case, we will let the person behind the terminal know what task is being performed. Next we create a variable called nb_data, this variable will be the output of the nb.dcim.sites.get(slug=site["slug"]). So if you are curious what the heck that is doing, we can jump to the python interpreter and see what it does.
In your terminal type python3 and you should see something like this
1
2
3
4
Python 3.8.5 (default, Jan 27 2021, 15:41:15)
[GCC 9.3.0] on linux
Type "help", "copyright", "credits" or "license" for more information.
>>>
Next we need to import pynautobot and create the variables for the api call.
1
2
3
>>> from pynautobot import api
>>> nb = api(url="http://localhost:8000", token="YOURTOKEN")
>>> nb.http_session.verify = False
Now lets see what nb.dcim.sites.get(slug=site["slug"]) does inside of python. Most of the calls we will make will require the slug if you want to get the information by name. All of the data inside the database uses a UUID, and so in a lot of cases, we will need that UUID of the database entry to get the data we want.
1
2
3
4
>>> nb.dcim.sites.get(slug="pod1")
POD1
>>> nb.dcim.sites.get(slug="pod1").id
'c9fd1612-4031-477e-a185-5d2e231e616b'
So we get a response from nautobot, and because it returns a result, we have a site that already exists. Let’s look at a site we don’t have.
1
2
>>> nb.dcim.sites.get(slug="pod26")
>>>
No results are returned, so that tells us we don’t have an object with that slug. Let’s create a site now and see what that looks like; if we look up the API call that will be used to create the site, we will be able to see what items are required and what else can be sent through the API to Nautobot. Navigate to http://localhost:8000/api/docs/ 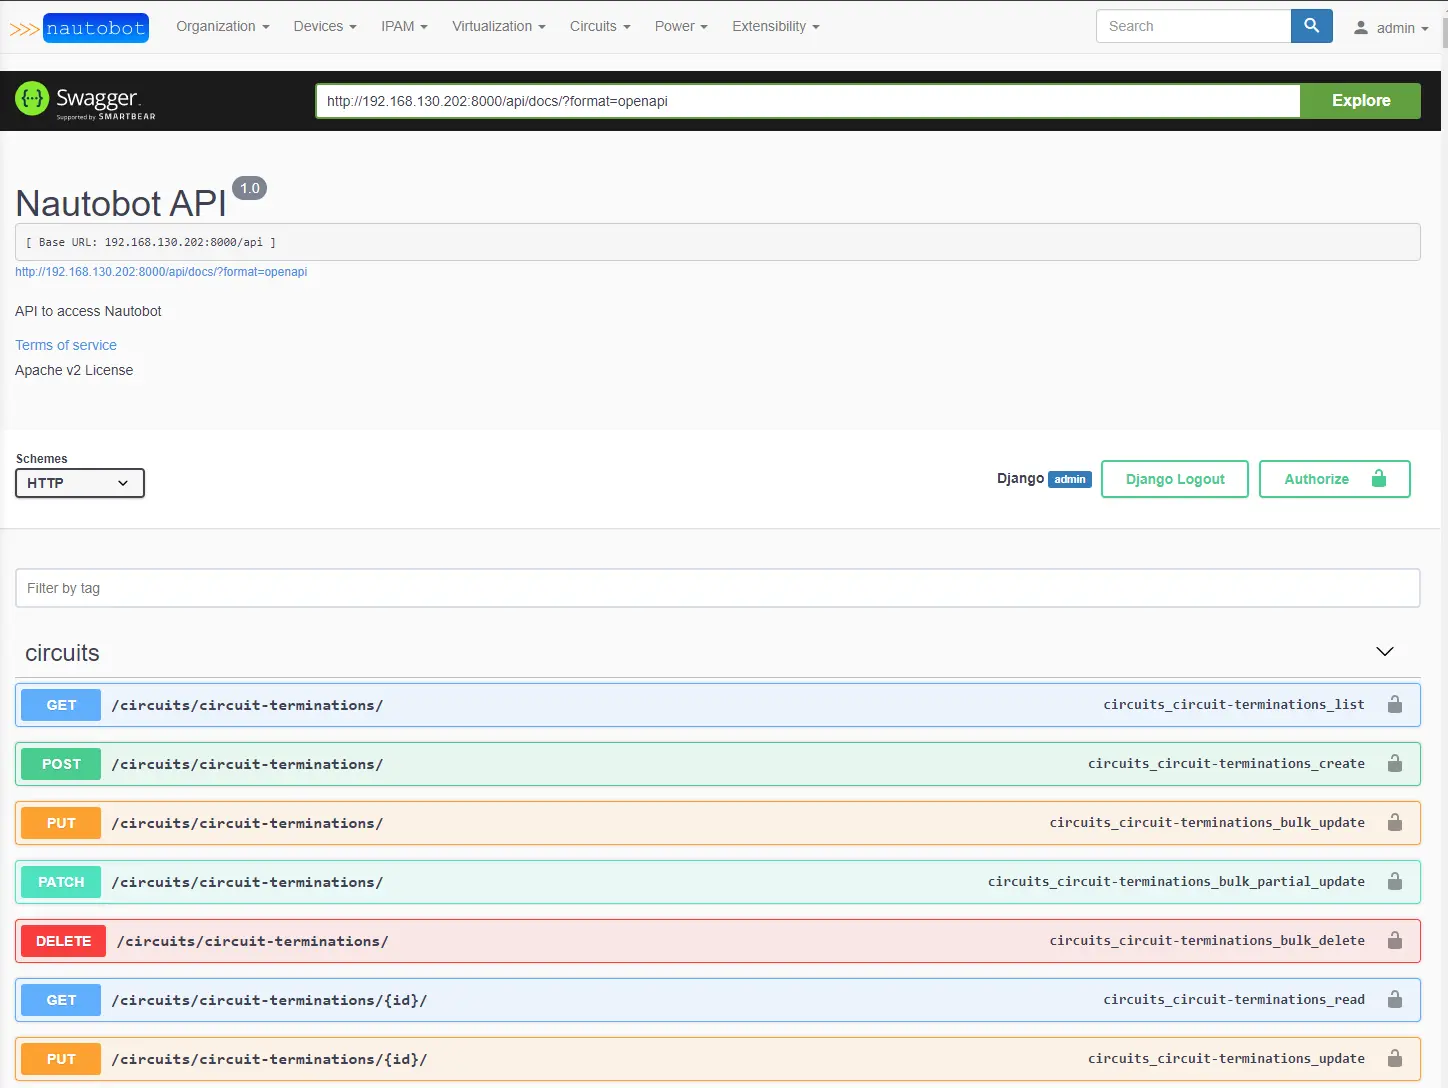
You are seeing a list of the different Nautobot Apps that the API can access or add data to. We will be doing most of our work inside the DCIM App and dealing with other models like sites, manufacturers, and device_types, as you can see below. We will spend a lot of time browsing through the API docs, understanding what is required and what else we can add to each model we are interested in. Let’s look at creating a site. Scroll down to the /dcim/sites and look at the POST section. 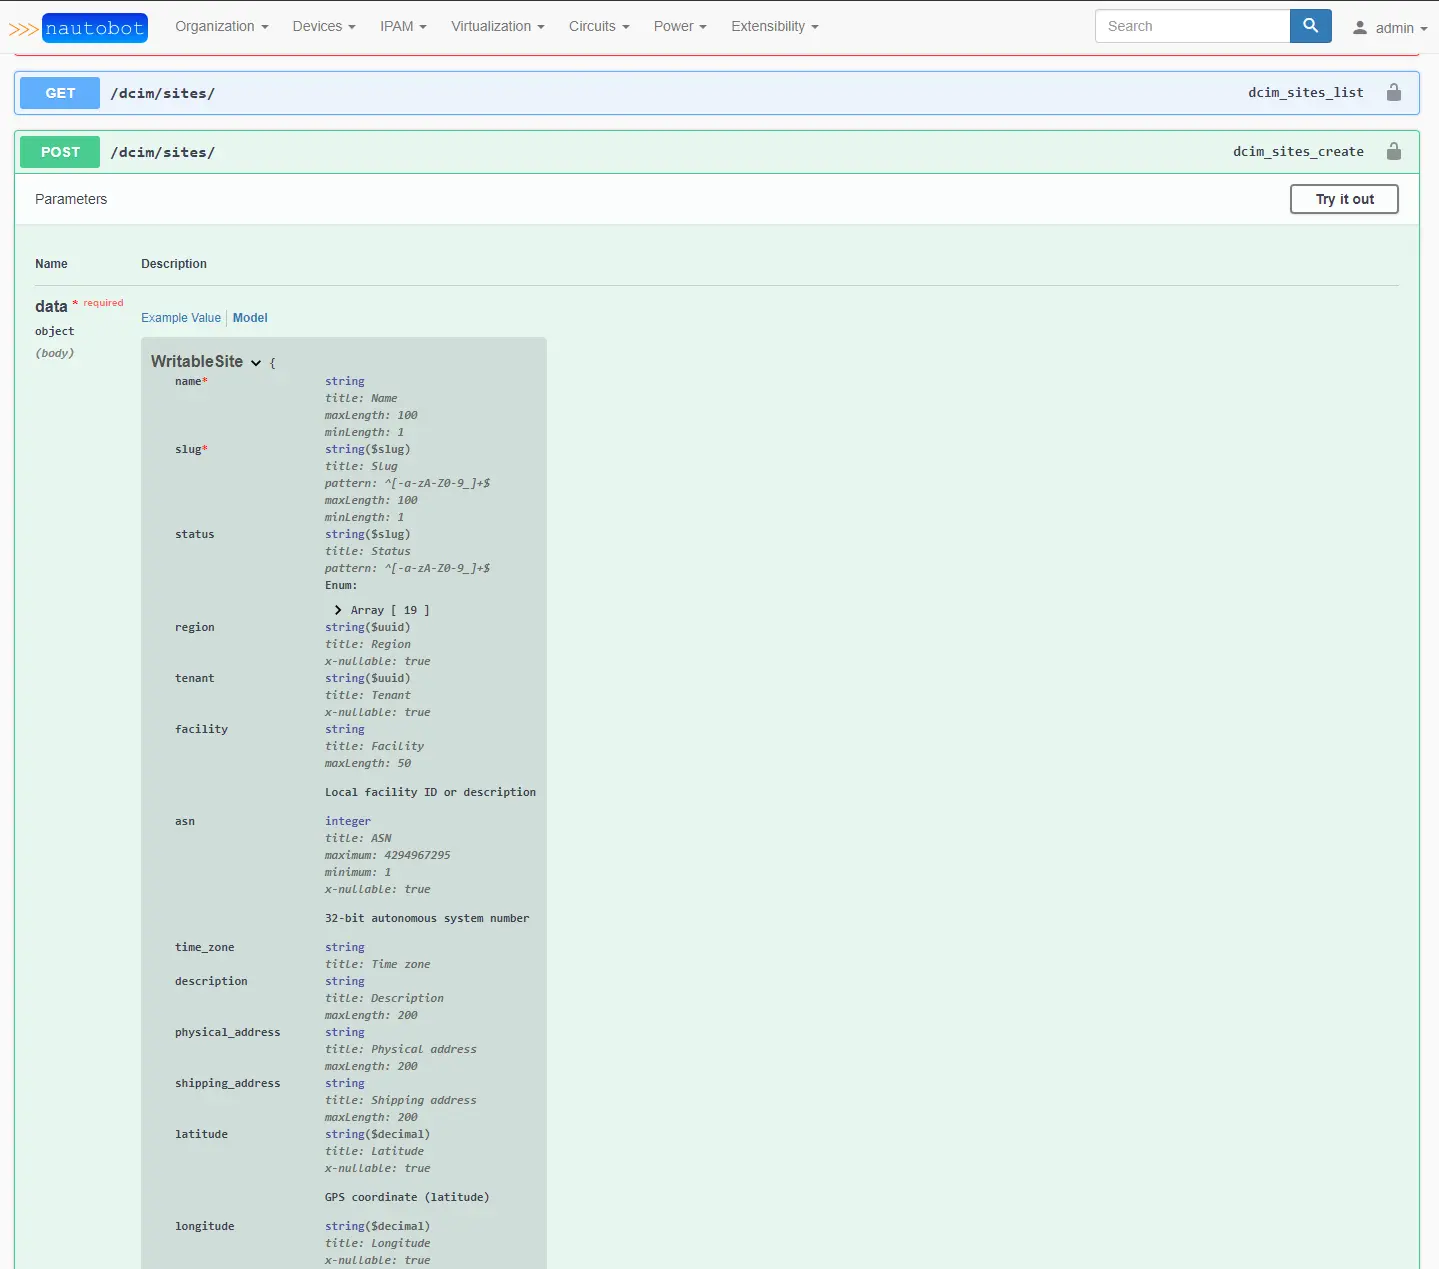 The data that is required to create a site is the name and slug. Everything else is optional and not a requirement. So let’s have a look at creating a site via pynautobot.
1
2
3
4
5
>>> nb.dcim.sites.create(name='POD26', slug='pod26', status='active')
POD26
>>> nb.dcim.sites.get(slug="pod26").id
'80ea0c8e-57bf-4b6a-b507-be4afa475d03'
>>>
We now have a site called POD26. Let’s check the Webapp and see what it looks like as well.
We see that on the right side a record of the change we just made.
We also see that we now have a page for the site created. So perfect, we can see how easy it is to add items to Nautobot via pynautobot.
1
2
if not nb_data:
        nb_data = nb.dcim.sites.create(name=site["name"], slug=site["slug"])
So nb_data = nb.dcim.sites.get(slug=site["slug"]) is looking at our nb_initial_load.yaml looping through all the sites and asking if the site slug exists in nautobot, those results are then checked by an if statement, and if nothing is returned for the site in our nb_initial_load.yaml it will create that site with just the basic data required (name, slug, and the status). What if we wanted to add more than the required items? We want to make sure that the script doesn’t fail if these are not “required,” so pynautobot allows us to update an existing entry, and we will write some if statements to check if the fields are defined before attempting to update the site. Let’s take a look at what an update requires. So models require the slug to update, and some models require the id. In the case of a site, we need to have the slug to edit fields in a specific site.
1
2
3
4
5
nb_site = nb.dcim.sites.get(slug='pod26')
>>> nb_site.asn = '65026'
>>> nb_site.save()
True
>>>
We will create a new variable called nb_site and call for the site’s slug, stored now as nb_site. Then we can take this variable and access or add it to any field available. Here we simply update the BGP ASN and then save this update. 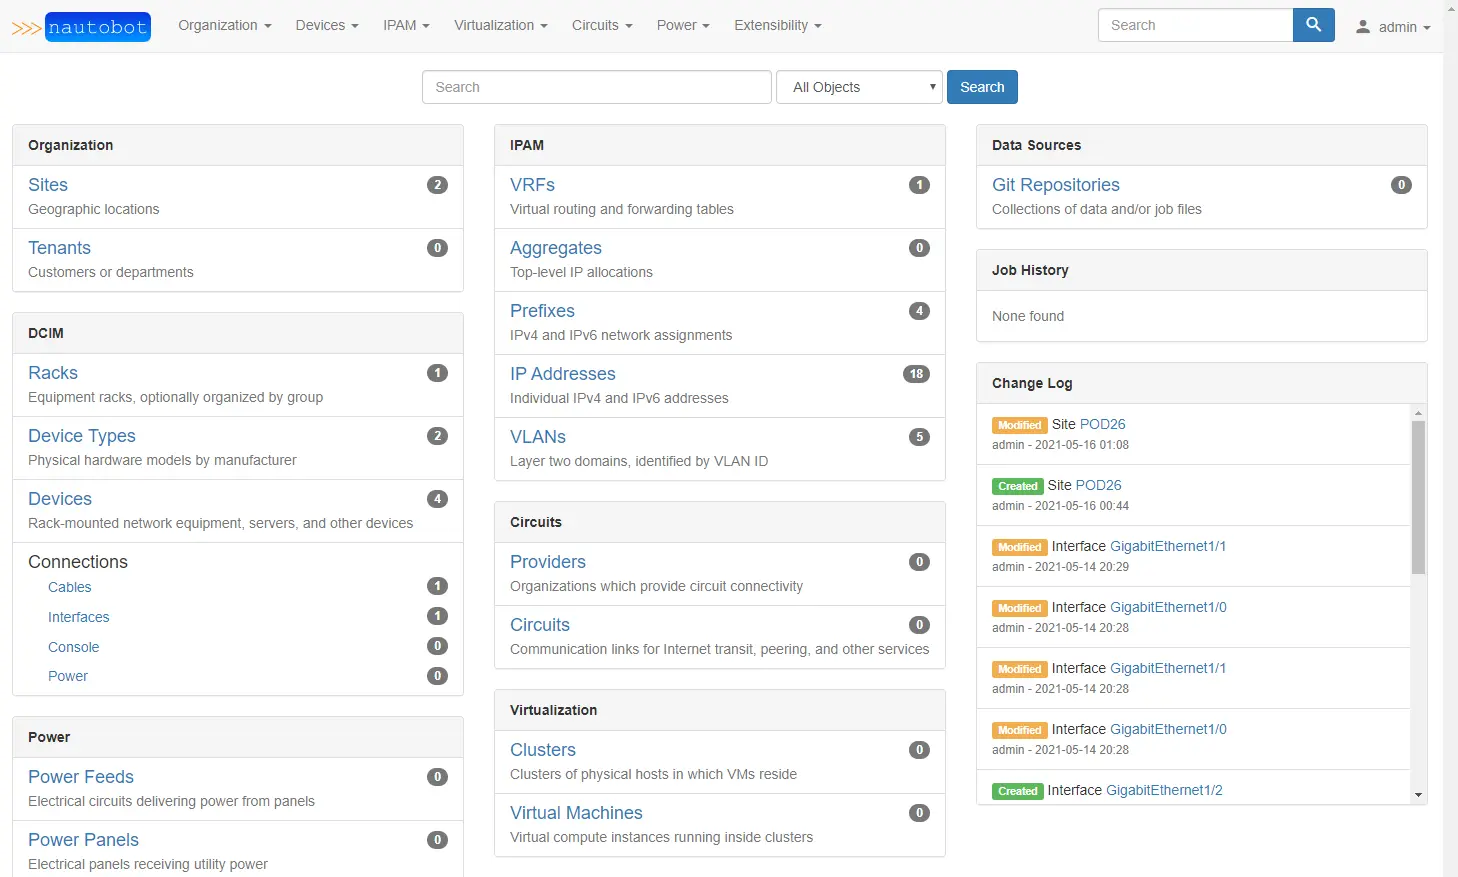
Notice the changelog has POD26 modified, and we can see that the ASN is now populated. 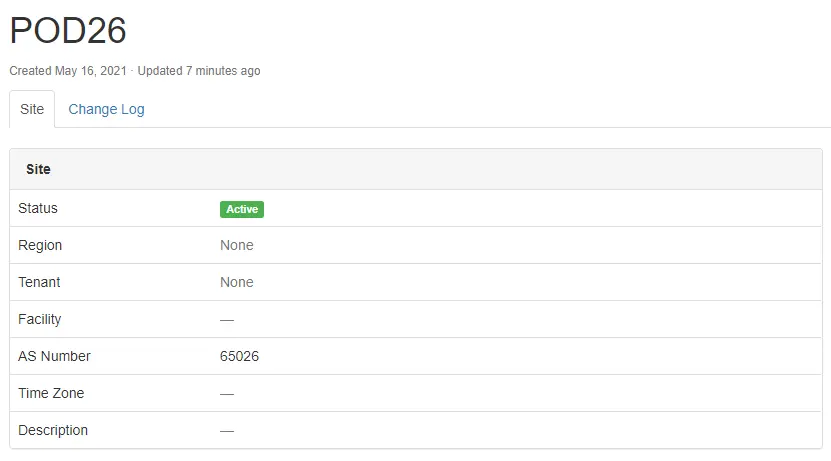
Cool, I think we have a structure to follow from here on out. Once the site has been created, we will stay inside the loop and check for other attributes to add to each site. We will ask first if the attribute exists, and if it does, we will update the site with the attribute data from our nb_initial_load.yaml file that was read into memory in the first couple of steps. Here is the finished product for adding sites to Nautobot.
1
2
3
4
5
6
7
8
9
10
11
12
13
14
15
16
17
18
19
20
21
22
23
24
25
26
27
28
29
30
31
32
33
34
35
36
37
38
39
40
41
42
43
for site in data["sites"]:
    print(f"Creating or Updating Site {site['name']}")
    nb_data = nb.dcim.sites.get(slug=site["slug"])
    if not nb_data:
        nb_data = nb.dcim.sites.create(
            name=site["name"],
            slug=site["slug"],
            status=site["status"],
        )
    nb_site = nb.dcim.sites.get(slug=site["slug"])
    if "asn" in site.keys():
        nb_site.asn = site["asn"]
    if "time_zone" in site.keys():
        nb_site.time_zone = site["time_zone"]
    if "description" in site.keys():
        nb_site.description = site["description"]
    if "physical_address" in site.keys():
        nb_site.physical_address = site["physical_address"]
    if "shipping_address" in site.keys():
        nb_site.shipping_address = site["shipping_address"]
    if "latitude" in site.keys():
        nb_site.latitude = site["latitude"]
    if "longitude" in site.keys():
        nb_site.longitude = site["longitude"]
    if "contact_name" in site.keys():
        nb_site.contact_name = site["contact_name"]
    if "contact_phone" in site.keys():
        nb_site.contact_phone = site["contact_phone"]
    if "contact_email" in site.keys():
        nb_site.contact_email = site["contact_email"]
    if "comments" in site.keys():
        nb_site.comments = site["comments"]
    nb_site.save()
# Relay Racks
    for rack in site["racks"]:
        print(f"Creating or Updating Relay rack {rack['name']} for site {site['name']}")
        nb_rack = nb.dcim.racks.get(site=site["slug"])
        if not nb_rack:
            nb_rack = nb.dcim.racks.create(
                name=rack["name"],
                status=rack["status"],
                site=nb.dcim.sites.get(slug=site["slug"]).id
            )
Manufacturers
This section is pretty straightforward. We are simply creating a name and a slug. A third field can be filled in called description, but typically once you see the vendor name, you know what it is. The device_types will break down all the different devices under a manufacturer, so most of the detail will reside there.
1
2
3
4
5
6
# manufacturers
for manufacturer in data["manufacturers"]:
    print(f"Creating or Updating Manufacture {manufacturer['name']}")
    nb_data = nb.dcim.manufacturers.get(slug=manufacturer["slug"])
    if not nb_data:
        nb_data = nb.dcim.manufacturers.create(name=manufacturer["name"], slug=manufacturer["slug"])
device_types
Here we define the specific devices. We can assign several different attributes. Let’s take a look at the API docs to see what attributes are available.  Three things are required, Manufacturer(This associates it to a previously created one), Model(The name of the device, for example, Cisco C9300-48T), Slug(All lowercase c9300_48t). We can also include a part number, unit height, full depth, comments, tags, and custom fields associated with devices. There is also a sub-device role, like a UCS or something like that. We will stick with the basics and just include the height so that it can be modeled inside our relay rack. These four items are required, so if one is omitted, the script should stop and let us know we don’t have the particular item defined in our nb_initial_load.yaml file.
1
2
3
4
5
6
7
8
9
10
for device_type in data["device_types"]:
    print(f"Creating or Updating device_type {device_type['model']}")
    nb_data = nb.dcim.device_types.get(slug=device_type["slug"])
    if not nb_data:
        nb_data = nb.dcim.device_types.create(
            model = device_type["model"],
            slug = device_type["slug"],
            manufacturer = nb.dcim.manufacturers.get(slug=device_type["manufacturer_slug"]).id,
            height = device_type["height"]
            )
Notice that to associate this device type with a manufacturer, we need to perform a get for the UUID of the manufacturer we created above. We can place these calls inside of variables and just tackle them in a similar way that we did with the sites. We have the variable “manufacturer” manufacturer=nb.dcim.manufacturers.get(slug=device_type["manufacturer_slug"]).id, which is equal to a get for the manufacturer assigned to this device type in the for loop nb.dcim.manufacturers.get and the slug is inside our nb_initial_load.yaml (slug=device_type["manufacturer_slug"]) and we just want to return the UUID of this item inside of our manufacturer variable .id.
1
2
3
4
5
6
>>> nb.dcim.manufacturers.get(slug='cisco').id
'499b6870-ea4f-4863-99e9-470a0bfe705d'
>>> manufacturer = nb.dcim.manufacturers.get(slug='cisco').id
>>> print(manufacturer)
499b6870-ea4f-4863-99e9-470a0bfe705d
>>>
device_roles
Repeat the same process for the device roles. Pick a nice color.
1
2
3
4
5
6
7
8
9
for device_role in data["device_roles"]:
    print(f"Creating or Updating device_role {device_role['name']}")
    nb_data = nb.dcim.device_roles.get(slug=device_role["slug"])
    if not nb_data:
        nb_data = nb.dcim.device_roles.create(
            name=device_role["name"],
            slug=device_role["slug"],
            color=device_role["color"]
            )
platforms
Repeating the same process for platforms. Again we need to associate this with a manufacturer. Furthermore, we perform that same get function as before with device types.
1
2
3
4
5
6
7
8
9
for platform in data["platforms"]:
    print(f"Creating or Updating platform {platform['name']}")
    nb_data = nb.dcim.platforms.get(slug=platform["slug"])
    if not nb_data:
        nb_data = nb.dcim.platforms.create(
            name=platform["name"],
            slug=platform["slug"],
            manufacturer=nb.dcim.manufacturers.get(slug=platform["manufacturer_slug"]).id
            )
tags
Once again repeating our previous process.
1
2
3
4
5
6
7
8
9
for tag in data["tags"]:
    print(f"Creating or Updating tag {tag['name']}")
    nb_data = nb.extras.tags.get(slug=tag["slug"])
    if not nb_data:
        nb_data = nb.extras.tags.create(
            name=tag["name"],
            slug=tag["slug"],
            description=tag["description"]
        )
custom fields
Custom Fields are pretty handy for data that is not modeled in nautobot already. We are going to use it to store a DHCP helper and vrrp configuration items. We again look to make sure there this custom field is not already created, and if not, we create the custom field from our nb_initial_load.yaml
1
2
3
4
5
6
7
8
9
10
for cf in data["custom_fields"]:
    print(f"Creating or Updating Custom Fields {cf['name']}")
    nb_data = nb.extras.custom_fields.get(name=cf["name"])
    if not nb_data:
        nb_data = nb.extras.custom_fields.create(
            name=cf["name"],
            type=cf["type"],
            content_types=cf["content_types"],
            description=cf["description"]
        )
1
2
3
4
5
6
7
8
9
10
11
12
13
14
15
16
17
18
19
20
21
22
23
24
25
26
27
28
# nb_initial_load.yaml

custom_fields:
  - name: dhcp_helper
    description: Used to assign helper address to an interface
    type: text
    content_types:
      - dcim.interface
  - name: vrrp_group
    description:  Used to assign vrrp items to an interface
    type: integer
    content_types:
      - dcim.interface
  - name: vrrp_description
    description:  Used to assign vrrp items to an interface
    type: text
    content_types:
      - dcim.interface
  - name: vrrp_primary_ip
    description:  Used to assign vrrp items to an interface
    type: text
    content_types:
      - dcim.interface
  - name: vrrp_priority
    description:  Used to assign vrrp items to an interface
    type: integer
    content_types:
      - dcim.interface
Custom fields can be attached to several different tables in nautobot. For our use case, we will connect these fields to interfaces only. We could attach them to multiple content types if you needed them. We will fill these out in the interface section.
vrfs
1
2
3
4
5
6
7
8
for vrf in data["vrfs"]:
    print(f"Creating or Updating vrf {vrf['name']}")
    nb_data = nb.ipam.vrfs.get(name=vrf["name"])
    if not nb_data:
        nb_data = nb.ipam.vrfs.create(name=vrf["name"])
        if "rd" in vrf.keys():
            print(f"Configuring vrf {vrf['rd']}")
            vrf_rd = nb.ipam.vrfs.create(name=vrf["name"], rd=vrf["rd"])
Notice here that inside the loop, we have two IF statements. The first looks for just the VRF name, the second is looking for the VRF to have a route Route Distinguisher. This is done so that if we do not have an RD defined, the script does not fail and simply creates the vrf name.
vlans
1
2
3
4
5
6
7
8
9
10
11
12
13
14
15
16
17
18
19
20
21
22
23
24
25
26
for vlan in data["vlans"]:
    print(f"Creating or updating vlan {vlan['name']}")
    nb_vlan = nb.ipam.vlans.get(
        site=vlan["site"],
        vid=vlan["vid"],
    )
    if not nb_vlan:
        nb_vlan = nb.ipam.vlans.create(
            site=vlan["site"],
            name=vlan["name"],
            vid=vlan["vid"],
        )
    if "prefix" in vlan.keys():
        print(f"Configuring prefix {vlan['prefix']}")
        nb_prefix = nb.ipam.prefixes.get(
            site_id=nb_vlan.site.id,
            vlan_vid=nb_vlan.vid,
        )
        if not nb_prefix:
            # print("  Creating new prefix")
            nb_prefix = nb.ipam.prefixes.create(
                prefix=vlan["prefix"],
                status=vlan["status"],
                site=nb_vlan.site.id,
                vlan=nb_vlan.id,
            )
If you recall, from section 6, we had prefixes assigned to VLANs assigned to sites. Notice that when we perform the get call that we need to specify the site and the vid. Because we will have multiple VLANs and various sites, we have to narrow down the search; otherwise, pynautobot will complain about having more than one result.
1
2
3
4
5
6
7
8
>>> nb.ipam.vlans.get()
Traceback (most recent call last):
  File "<stdin>", line 1, in <module>
  File "/home/Nautobot_Ansible_Workshop/python_scripts/.pynautobot_stuff/lib/python3.8/site-packages/pynautobot/core/endpoint.py", line 136, in get
    filter_lookup = self.filter(**kwargs)
  File "/home/Nautobot_Ansible_Workshop/python_scripts/.pynautobot_stuff/lib/python3.8/site-packages/pynautobot/core/endpoint.py", line 206, in filter
    raise ValueError("filter must be passed kwargs. Perhaps use all() instead.")
ValueError: filter must be passed kwargs. Perhaps use all() instead.
Instead, if we want to see everything, we need to use the ALL function. We want to validate that the specific site and VID do not already exist before creating it.
1
2
3
>>> nb.ipam.vlans.all()
[USERS, SERVERS, GUEST, GUESTS, NATIVE_VLAN]
>>>
Take note that we can re-use previously defined variables within the loop. Above, we defined the nb_vlan variable as the results of the get function for a specific site and VID. We use the variable in our IF statement to determining the prefix already exists. Inside of the nb.ipam.prefixes.get function, we create a new variable named site_id and vlan_vid. Let’s run this through the python interpreter.
1
2
3
4
5
6
>>> nb_vlan = nb.ipam.vlans.get(site='pod1', vid='300')
>>> nb_prefix = nb.ipam.prefixes.get(site_id=nb_vlan.site.id, vlan_vid=nb_vlan.vid)
>>> print(nb_vlan)
USERS
>>> print(nb_prefix)
155.1.1.0/26
So from our script’s perspective, if nb_prefixes returned a result, we would not add the prefix again. However, if the result returned was none, it would create the assigned prefix from our YAML file.
1
2
>>> print(nb_prefix)
None
1
2
3
4
5
6
vlans:
  - name: USERS
    vid: 300
    prefix: 155.1.1.0/26
    status: active
    site: pod1
Site Prefixes
1
2
3
4
5
6
7
8
9
10
11
12
13
for pfx in data["prefixes"]:
    print(f"Creating or Updating prefix {pfx['prefix']}")
    nb_prefix = nb.ipam.prefixes.get(
        site=pfx["site"],
        prefix=pfx["prefix"],
    )
    if not nb_prefix:
        nb_prefix = nb.ipam.prefixes.create(
            prefix=pfx["prefix"],
            site={"slug": pfx["site"]},
            description=pfx["description"],
            status=pfx["status"],
        )
Devices
Things become a little more complicated setting up devices simply because there are many components to a device that are not strictly related to the device model. The ones we will be dealing with are manufacturer, site, device role, device type, IP addresses, Relay Racks, VLANs, vrfs, tags, and primary IPs. So we need to pull in the UUID of the attributes and associate them to this device.
1
2
3
4
5
6
7
8
9
10
11
12
for device in data["devices"]:
    print(f"Creating or Updating device {device['name']}")
    nb_device = nb.dcim.devices.get(name=device["name"])
    if not nb_device:
        nb_device = nb.dcim.devices.create(
            name=device["name"],
            manufacturer=nb.dcim.manufacturers.get(slug=device["manufacturer_slug"]).id,
            site=nb.dcim.sites.get(slug=device["site_slug"]).id,
            device_role=nb.dcim.device_roles.get(slug=device["device_role_slug"]).id,
            device_type=nb.dcim.device_types.get(slug=device["device_types_slug"]).id,
            status=device["status"],
            )
We will first check and see if the devices inside our loop have already been created. If not, then we will make them. As you can see, we need several pieces of information from the DCIM app. These are all in their own tables (manufacturer, site, device role, device type). So we will need to perform several gets for each of the UUIDs for these attributes in our create function.
Now that we have the devices created, we also want to make sure they are installed in the relay racks we created. So we will check to see if the device is already installed in a relay rack, and if not, then go ahead and add it to the rack and position we listed in our YAML file.
1
2
3
4
5
6
7
8
9
if nb_device.rack is None:
        print(f"Moving device into rack {device['rack']}")
        if "rack" in device.keys():
            nb_device.rack = nb.dcim.racks.get(site=device["site_slug"]).id
        if "position" in device.keys():
            nb_device.position = device["position"]
        if "face" in device.keys():
            nb_device.face = device["face"]
        nb_device.save()
We move on to the interfaces. This should look pretty familiar as it follows along with our previous loops. This loop will be nested below our original for device in data["devices"] loop.
1
2
3
4
5
6
7
8
9
10
11
12
for interface in device["interfaces"]:
        print(f"Creating or updating interface {interface['name']} on device {device['name']}")
        nb_interface = nb.dcim.interfaces.get(
            device_id=nb_device.id,
            name=interface["name"]
        )
        if not nb_interface:
            nb_interface = nb.dcim.interfaces.create(
                device=nb_device.id,
                name=interface["name"],
                type=interface["type"]
            )
If the interface listed in our YAML file is not seen, then we will create the interface. Once the interfaces are created, we will also add some attributes to the interfaces like descriptions, labels, VLANs, etc.
1
2
3
4
5
6
7
8
9
10
11
12
if "description" in interface.keys():
            nb_interface.description = interface["description"]
        if "label" in interface.keys():
            nb_interface.label = interface["label"]
        if "mtu" in interface.keys():
            nb_interface.mtu = interface["mtu"]
        if "mgmt_only" in interface.keys():
            nb_interface.mgmt_only = interface["mgmt_only"]
        if "enabled" in interface.keys():
            nb_interface.enabled = interface["enabled"]
        if "mode" in interface.keys():
            nb_interface.mode = interface["mode"]
We created custom fields early for assigning DHCP helper addresses and VRRP attributes to our interfaces. Here is an example of a get response from the API on a specific interface.
1
2
3
4
5
6
7
8
9
10
11
12
13
14
15
16
17
18
19
20
21
22
23
24
25
26
27
28
29
30
31
32
33
34
35
36
37
38
39
40
41
42
43
44
45
46
47
48
{
  "count": 1,
  "next": null,
  "previous": null,
  "results": [
    {
      "id": "e6d9e3c7-cc81-4b09-90c9-431b8ba1be9e",
      "url": "http://192.168.130.202:8000/api/dcim/interfaces/e6d9e3c7-cc81-4b09-90c9-431b8ba1be9e/",
      "device": {
        "id": "27363239-a944-44ff-902e-7b22ebada985",
        "url": "http://192.168.130.202:8000/api/dcim/devices/27363239-a944-44ff-902e-7b22ebada985/",
        "name": "pod1sw1",
        "display": "pod1sw1"
      },
      "name": "vlan300",
      "label": "layer3",
      "type": {
        "value": "virtual",
        "label": "Virtual"
      },
      "enabled": true,
      "lag": null,
      "mtu": 1500,
      "mac_address": null,
      "mgmt_only": false,
      "description": "USER_SVI",
      "mode": null,
      "untagged_vlan": null,
      "tagged_vlans": [],
      "cable": null,
      "cable_peer": null,
      "cable_peer_type": null,
      "connected_endpoint": null,
      "connected_endpoint_type": null,
      "connected_endpoint_reachable": null,
      "tags": [],
      "count_ipaddresses": 1,
      "custom_fields": {
        "dhcp_helper": "10.0.1.1",
        "vrrp_description": "USER_VLAN",
        "vrrp_group": 1,
        "vrrp_primary_ip": "155.1.1.1",
        "vrrp_priority": 200
      },
      "display": "vlan300 (layer3)"
    }
  ]
}
Custom fields are presented from the API as a list so we need to use the brackets to target the right field in the list.
1
2
3
4
5
6
7
8
9
10
        if "dhcp_helper" in interface.keys():
            nb_interface.custom_fields["dhcp_helper"] = interface["dhcp_helper"]
        if "vrrp_group" in interface.keys():
            nb_interface.custom_fields["vrrp_group"] = interface["vrrp_group"]
        if "vrrp_description" in interface.keys():
            nb_interface.custom_fields["vrrp_description"] = interface["vrrp_description"]
        if "vrrp_priority" in interface.keys():
            nb_interface.custom_fields["vrrp_priority"] = interface["vrrp_priority"]
        if "vrrp_primary_ip" in interface.keys():
            nb_interface.custom_fields["vrrp_primary_ip"] = interface["vrrp_primary_ip"]
To assign the VLAN to an interface, we need to find the specific VLANs UUID. Perform a get and narrow it down to the site and the VLAN name. Once we have that UUID, we can associate it with the interface. For untagged VLANs, we only need a single VLAN. However, for tagged VLANs (trunk ports), we need to pull in all of the VLANs assigned to this trunk port.
1
2
3
4
5
6
7
8
9
10
11
12
13
14
15
16
# example of a trunk interface from nb_initial_load.yaml
- name: GigabitEthernet0/3
        description: TRUNK TO POD1SW3
        type: 1000base-t
        label: trunk
        enabled: True
        mtu: 1500
        mgmt_only: False
        mode: tagged
        untagged_vlan: NATIVE_VLAN
        tagged_vlans:
          - USERS
          - SERVERS
          - GUESTS
        bside_device: pod1sw3
        bside_interface: GigabitEthernet0/1
So we create a variable “vl,” we then make a dictionary that includes the VLANs that should be tagged on this trunk port by performing a get for the VLAN UUID and loops through each of the VLANs we listed in our nb_initial_load.yaml file.
1
2
3
4
5
6
7
            if "untagged_vlan" in interface.keys():
                nb_interface.untagged_vlan = nb.ipam.vlans.get(site=device["site_slug"],
                    name=interface["untagged_vlan"]
                ).id
            if "tagged_vlans" in interface.keys():
                vl = [ nb.ipam.vlans.get(site=device["site_slug"], name=vlan_name).id for vlan_name in interface["tagged_vlans"] ]
                nb_interface.tagged_vlans = vl
Next, we loop through the IP addresses listed in our file.
1
2
3
4
5
6
7
8
9
10
11
12
13
14
# example of a L3 interface from nb_initial_load.yaml
- name: GigabitEthernet0/0
        description: UPLINK POD1R1
        type: 1000base-t
        label: layer3
        enabled: True
        mtu: 1500
        mgmt_only: False
        ip_addresses:
          - address: 10.10.0.1/31
            status: active
            tags:
              - ospf_area_0
              - p2p
Now we need to associate the IP addresses to our interfaces. We do that from the IPAM app by telling it what device and interface it should be assigned. Once again, we need the UUID of that device’s interface, and we also need to tell the API what the object type is and where it is located.
1
2
3
4
5
6
7
8
9
10
11
12
13
14
15
16
17
18
19
20
21
22
23
24
25
26
        if "ip_addresses" in interface.keys():
            for ip in interface["ip_addresses"]:
                print(f"  Adding IP {ip['address']}")
                nb_ipadd = nb.ipam.ip_addresses.get(
                    address = ip["address"]
                )
                if not nb_ipadd:
                    nb_ipadd = nb.ipam.ip_addresses.create(
                        address = ip["address"],
                        status = ip["status"],
                        assigned_object_type = "dcim.interface",
                        assigned_object_id = nb.dcim.interfaces.get(
                            device=device["name"],
                            name=interface["name"]).id
                    )
                if "vrf" in ip.keys():
                    nb_ipadd.vrf = nb.ipam.vrfs.get(name=ip["vrf"]).id
                if "tags" in ip.keys():
                    tgs = [ nb.extras.tags.get(name=tag).id for tag in ip["tags"] ]
                    nb_ipadd.tags = tgs
                nb_ipadd.interface = nb_interface.id
                nb_ipadd.save()
                if "primary" in ip.keys():
                    nb_device.primary_ip4 = nb_ipadd.id
                    nb_device.save()
        nb_interface.save()
We also want to make sure that the management interfaces are associated with the correct VRF. The tags will be used later with our Jinja templates later on. The primary IP address will be what Nautobot will use to log in and pull information like the current configuration and temperatures.
adding interface connections
The last piece will be to create connections between the devices in each of the pods. Nautobot uses cables to represent the connectivity inside a site, and circuits represent connections outside of the site. We will use the cable APP to tell Nautobot where to model our connections between our devices mounted in a rack inside a site.
Cables need to be associated with two different devices and two different interfaces. We represented this in our YAML file as a field under the specific interfaces. The A-SIDE being represented as the device interface and what it should connect to or the B-SIDE device and B-SIDE interface. In the YAML file we only need to model the north to south end of the connection. So if pod1r1 Gi0/2 connects to pod1sw2 Gi0/0 we only need to describe it once at the north end (A-SIDE) and not again at the south end (B-SIDE).
1
2
3
4
5
6
7
8
9
10
11
12
13
14
15
- name: GigabitEthernet0/2
    description: DOWNLINK POD1SW2
    type: 1000base-t
    label: layer3
    enabled: True
    mtu: 1500
    mgmt_only: False
    bside_device: pod1sw2
    bside_interface: GigabitEthernet0/0
    ip_addresses:
        - address: 10.10.1.2/31
        status: active
        tags:
            - ospf_area_0
            - p2p
We need to do this after all the interfaces have been created so that our connections can be made to an entry that exists. We will need to gather the UUIDs of both sides of the connection so that Nautobot can model the cable correctly. To do this we need to loop through all our devices again and their interfaces.
1
2
3
4
for device in data["devices"]:
    nb_device = nb.dcim.devices.get(name=device["name"])
    for interface in device["interfaces"]:
        nb_interface = nb.dcim.interfaces.get(device_id=nb_device.id, name=interface["name"])
We need to make sure that the cable does not already exist because attempting to create an entry identical to another will throw an error, and we do not want to duplicate connections. To gather information from Nautobot, we use the get function and check if there is already a cable associated with the device interface. Let’s take it step by step inside the interpreter. First thing we need is the device, and we will save that result as nb_device.
1
2
3
4
5
>>> nb_device = nb.dcim.devices.get(name='pod1r1')
>>> print(nb_device)
pod1r1
>>>nb_device.id
'890612b4-1d03-410a-ab21-60abf3d05f4d'
Next we need the interfaces UUID which will require the devices UUID and the name of the interface.
1
2
3
4
5
>>> nb_interface = nb.dcim.interfaces.get(device_id=nb_device.id, name='GigabitEthernet0/1')
>>> print(nb_interface)
GigabitEthernet0/1
>>> nb_interface.id
'e6c85ea5-de61-4b29-b14b-8d1cf3643584'
So because we are performing these function inside of a loop we can loop through our YAML file and get all of the data we need to model these connections. We can also check and see if this interface has a cable already modeled.
1
2
3
>>> nb_interface["cable"]
{'id': '63a8ee47-b4ac-4b6f-a8f3-b45f709068fa', 'url': 'http://192.168.130.202:8000/api/dcim/cables/63a8ee47-b4ac-4b6f-a8f3-b45f709068fa/', 'label': '', 'display': '#63a8ee47-b4ac-4b6f-a8f3-b45f709068fa', 'termination_a_type': 'dcim.interface', 'termination_a_id': 'e6c85ea5-de61-4b29-b14b-8d1cf3643584', 'termination_a': {'id': 'e6c85ea5-de61-4b29-b14b-8d1cf3643584', 'url': 'http://192.168.130.202:8000/api/dcim/interfaces/e6c85ea5-de61-4b29-b14b-8d1cf3643584/', 'device': {'id': '890612b4-1d03-410a-ab21-60abf3d05f4d', 'url': 'http://192.168.130.202:8000/api/dcim/devices/890612b4-1d03-410a-ab21-60abf3d05f4d/', 'name': 'pod1r1', 'display': 'pod1r1'}, 'name': 'GigabitEthernet0/1', 'cable': '63a8ee47-b4ac-4b6f-a8f3-b45f709068fa', 'display': 'GigabitEthernet0/1 (layer3)'}, 'termination_b_type': 'dcim.interface', 'termination_b_id': '6439bd34-a07e-40e7-9103-7bedc0becef0', 'termination_b': {'id': '6439bd34-a07e-40e7-9103-7bedc0becef0', 'url': 'http://192.168.130.202:8000/api/dcim/interfaces/6439bd34-a07e-40e7-9103-7bedc0becef0/', 'device': {'id': '27363239-a944-44ff-902e-7b22ebada985', 'url': 'http://192.168.130.202:8000/api/dcim/devices/27363239-a944-44ff-902e-7b22ebada985/', 'name': 'pod1sw1', 'display': 'pod1sw1'}, 'name': 'GigabitEthernet0/0', 'cable': '63a8ee47-b4ac-4b6f-a8f3-b45f709068fa', 'display': 'GigabitEthernet0/0 (layer3)'}, 'type': 'cat5e', 'status': {'value': 'connected', 'label': 'Connected'}, 'color': '', 'length': None, 'length_unit': None, 'tags': [], 'custom_fields': {}}
>>>
We can see from the output that this interface has a cable already modeled. Here is the same view from the API browser.
1
2
3
4
5
6
7
8
9
10
11
12
13
14
15
16
17
18
19
20
21
22
23
24
25
26
27
28
29
30
31
32
33
34
35
36
37
38
39
40
41
42
43
44
45
46
47
48
49
50
51
52
53
54
55
56
57
58
59
60
61
62
63
64
65
66
67
68
69
70
71
72
73
74
75
76
77
{
  "count": 1,
  "next": null,
  "previous": null,
  "results": [
    {
      "id": "e6c85ea5-de61-4b29-b14b-8d1cf3643584",
      "url": "http://192.168.130.202:8000/api/dcim/interfaces/e6c85ea5-de61-4b29-b14b-8d1cf3643584/",
      "device": {
        "id": "890612b4-1d03-410a-ab21-60abf3d05f4d",
        "url": "http://192.168.130.202:8000/api/dcim/devices/890612b4-1d03-410a-ab21-60abf3d05f4d/",
        "name": "pod1r1",
        "display": "pod1r1"
      },
      "name": "GigabitEthernet0/1",
      "label": "layer3",
      "type": {
        "value": "1000base-t",
        "label": "1000BASE-T (1GE)"
      },
      "enabled": true,
      "lag": null,
      "mtu": 1500,
      "mac_address": null,
      "mgmt_only": false,
      "description": "DOWNLINK POD1SW1",
      "mode": null,
      "untagged_vlan": null,
      "tagged_vlans": [],
      "cable": {
        "id": "63a8ee47-b4ac-4b6f-a8f3-b45f709068fa",
        "url": "http://192.168.130.202:8000/api/dcim/cables/63a8ee47-b4ac-4b6f-a8f3-b45f709068fa/",
        "label": "",
        "display": "#63a8ee47-b4ac-4b6f-a8f3-b45f709068fa"
      },
      "cable_peer": {
        "id": "6439bd34-a07e-40e7-9103-7bedc0becef0",
        "url": "http://192.168.130.202:8000/api/dcim/interfaces/6439bd34-a07e-40e7-9103-7bedc0becef0/",
        "device": {
          "id": "27363239-a944-44ff-902e-7b22ebada985",
          "url": "http://192.168.130.202:8000/api/dcim/devices/27363239-a944-44ff-902e-7b22ebada985/",
          "name": "pod1sw1",
          "display": "pod1sw1"
        },
        "name": "GigabitEthernet0/0",
        "cable": "63a8ee47-b4ac-4b6f-a8f3-b45f709068fa",
        "display": "GigabitEthernet0/0 (layer3)"
      },
      "cable_peer_type": "dcim.interface",
      "connected_endpoint": {
        "id": "6439bd34-a07e-40e7-9103-7bedc0becef0",
        "url": "http://192.168.130.202:8000/api/dcim/interfaces/6439bd34-a07e-40e7-9103-7bedc0becef0/",
        "device": {
          "id": "27363239-a944-44ff-902e-7b22ebada985",
          "url": "http://192.168.130.202:8000/api/dcim/devices/27363239-a944-44ff-902e-7b22ebada985/",
          "name": "pod1sw1",
          "display": "pod1sw1"
        },
        "name": "GigabitEthernet0/0",
        "cable": "63a8ee47-b4ac-4b6f-a8f3-b45f709068fa",
        "display": "GigabitEthernet0/0 (layer3)"
      },
      "connected_endpoint_type": "dcim.interface",
      "connected_endpoint_reachable": true,
      "tags": [],
      "count_ipaddresses": 1,
      "custom_fields": {
        "dhcp_helper": null,
        "vrrp_description": null,
        "vrrp_group": null,
        "vrrp_primary_ip": null,
        "vrrp_priority": null
      },
      "display": "GigabitEthernet0/1 (layer3)"
    }
  ]
}
Before creating any connections we want to see no results, so in our script this interface would be skipped over. Let’s try a different interface.
1
2
3
>>> nb_interface = nb.dcim.interfaces.get(device_id=nb_device.id, name='GigabitEthernet0/3')
>>> nb_interface["cable"]
>>>
No results returned or None. Now we check our YAML file to see if the bside_device is defined under the device interface. We perform a get function and stick those results into two different variables, int_a, and int_b. We use the nb.dcim.cables.create function to provide the termination points associated with the dcim.interface APP. The type refers to the kind of cabling being used. This is all virtualized, so I just used cat5e. We also want to tell Nautobot if this is connected or planned.
1
2
3
4
5
6
7
8
9
10
11
12
13
        if nb_interface["cable"] is None:
            if "bside_device" in interface.keys():
                print(f"  Creating or updating interface connections between {device['name']}-{interface['name']} and {interface['bside_device']}-{interface['bside_interface']}")
                int_a = nb.dcim.interfaces.get(name=interface["name"], device=nb.dcim.devices.get(name=device["name"])).id
                int_b = nb.dcim.interfaces.get(name=interface["bside_interface"], device=nb.dcim.devices.get(name=interface["bside_device"])).id
                nb.dcim.cables.create(
                    termination_a_type="dcim.interface",
                    termination_a_id=int_a,
                    termination_b_type="dcim.interface",
                    termination_b_id=int_b,
                    type="cat5e",
                    status="connected"
                )