Lesson 12 - Nautobot Webhooks

To recap a little bit, we are using Nautobot as our network source of truth. Ansible no longer needs static host_vars or a static inventory. All of these details can be pulled dynamically from Nautobot, then that data is run through a Jinja template and pushed to the devices. So now that the initial configuration is managed in this way, what about day-to-day operational changes? Can we keep the devices and Nautobot in sync?
Like anything, the answer is, it depends. Nautobot provides the ability to create Webhooks that could be used with something like Ansible Tower to kick off jobs if Nautobot detects a change in the database. You can check out the documentation here and look at what is available for you with Webhooks.
We will look at integrating Nautobot and Tower to kick off a Job each time Nautobot sees an update to a device interface. Webhooks allow us to build an API request and insert stuff into the request’s body in a Jinja-style format. In the body of the request, we can build key: values in a Jinja2 form that can be used on Tower when starting a job.
Things we need:
- AWX/Tower running in a development environment (I will be using Version 17.1.0)
- Authorization token from the AWX/Tower environment - These are in different places depending on your version. It will require some googling on your end.
- Git to sync the playbooks to AWX/Tower
- Ansible Playbooks that will be used on AWX/Tower to execute the device changes
AWX/Tower
There are plenty of places to find easy guides to getting an AWX instance up and running Here is one. Once you have your AWX instance running, we need to get a few things configured.
The first thing we want to grab is your user API token. You can find this by navigating in your browser to http://awx_host/api/v2/tokens this should display the user OAuth2 token, which will be needed to launch plays via the API on AWX. 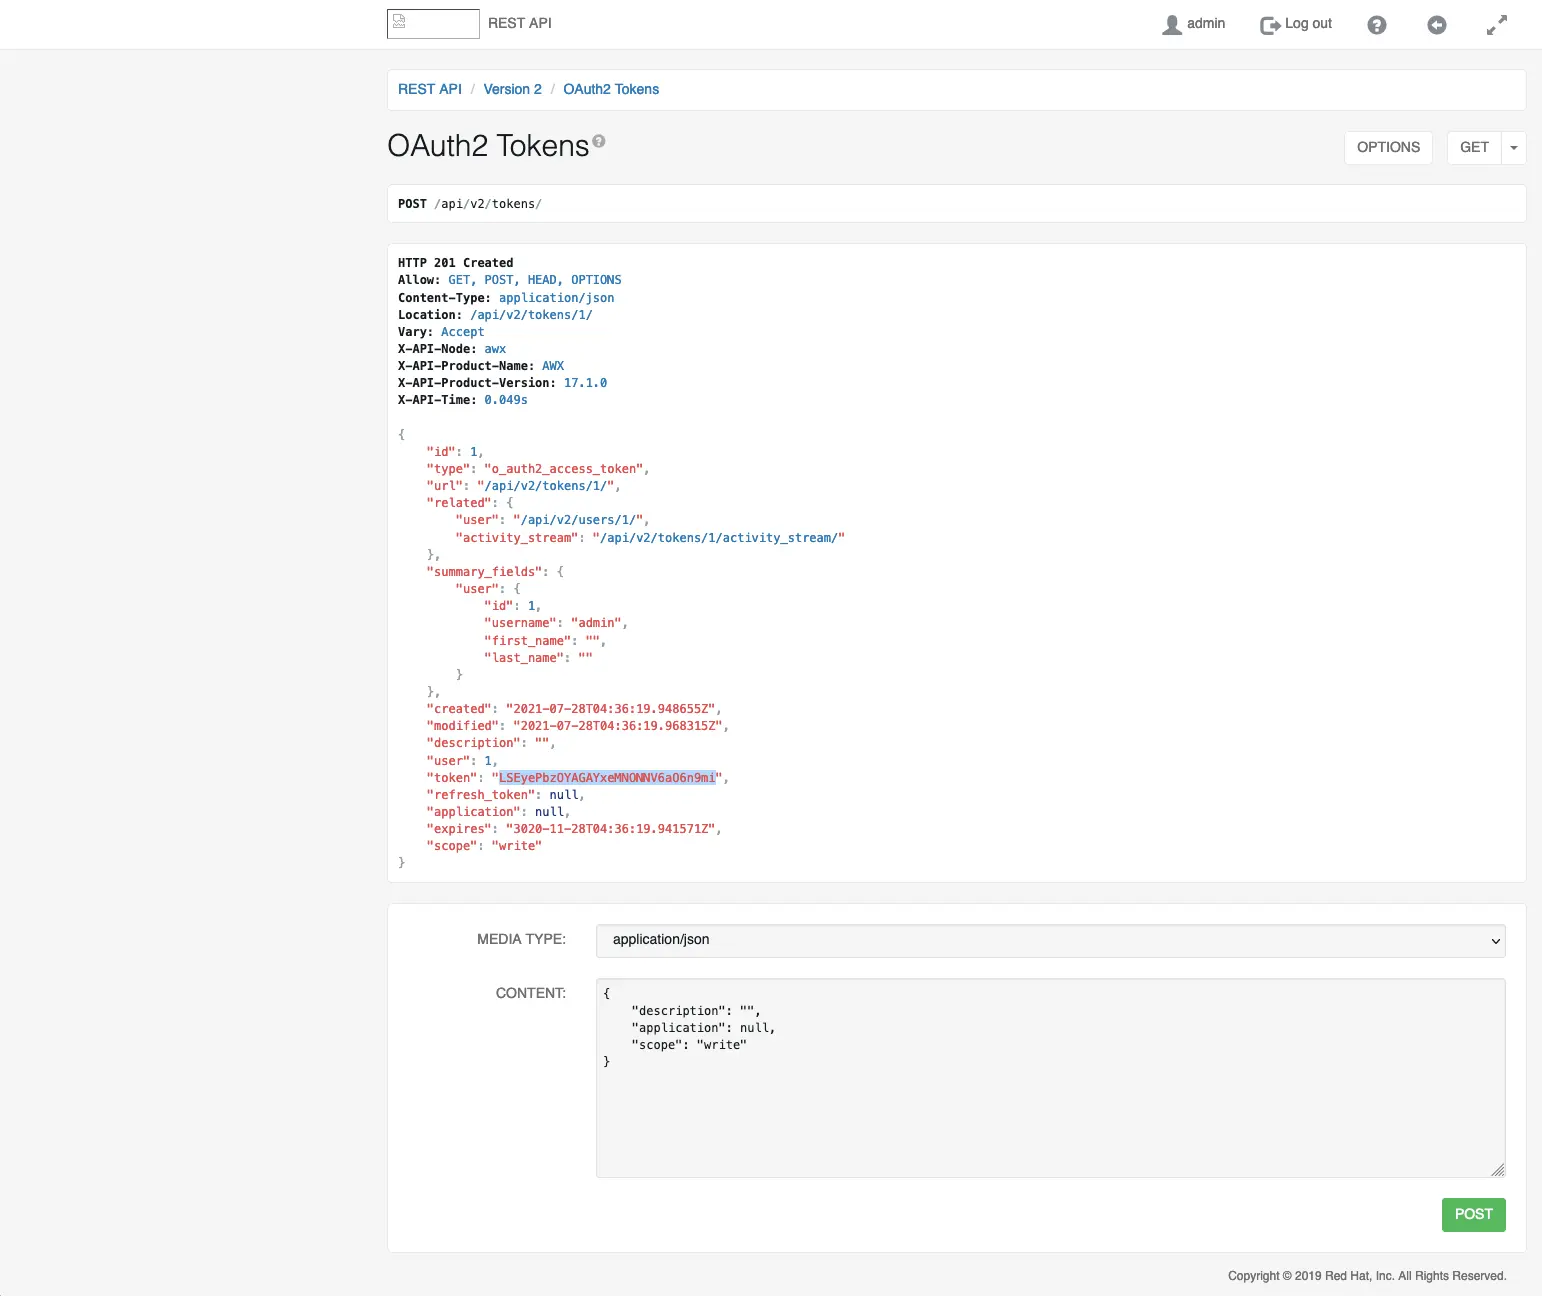
Next, we need to get an inventory and a Project setup. Inside of AWX/Tower, the terms change as compared to Ansible. The Ansible working folder in AWX/Tower is called a Project, the Ansible playbooks in AWX/Tower are called Templates, and a running play is referred to in AWX/Tower as a Job.
Like Ansible, we need to have several things built before creating a Job that makes changes to our devices. So open up AWX on your browser, and you should be presented with the Dashboard after login. On the left side, you have a navbar. The resources section will be adding things like Inventories, Credentials, Projects, and Templates. 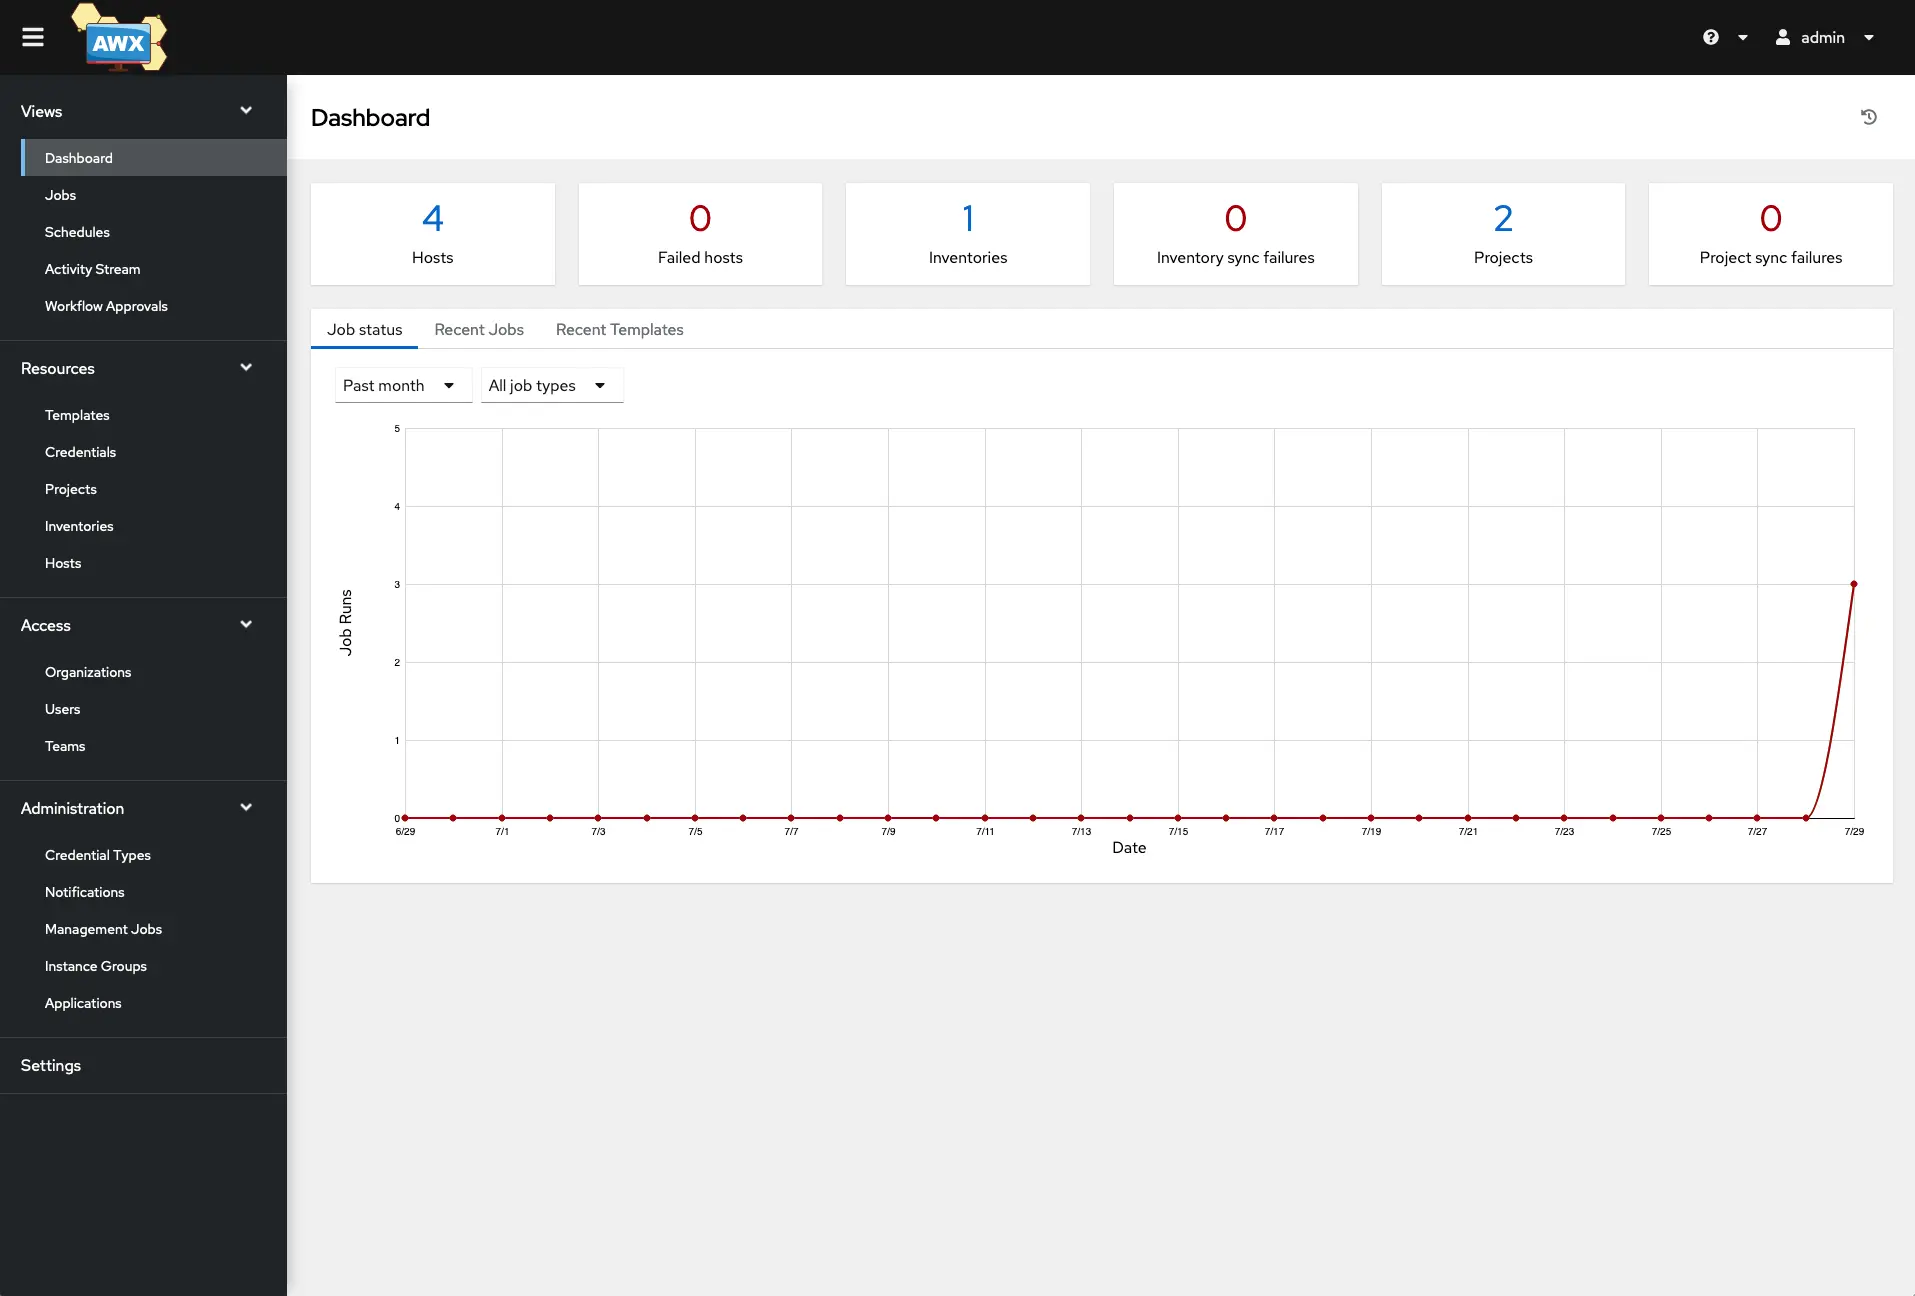
AWX/Tower Credentials
Lets add credentials into AWX/Tower: 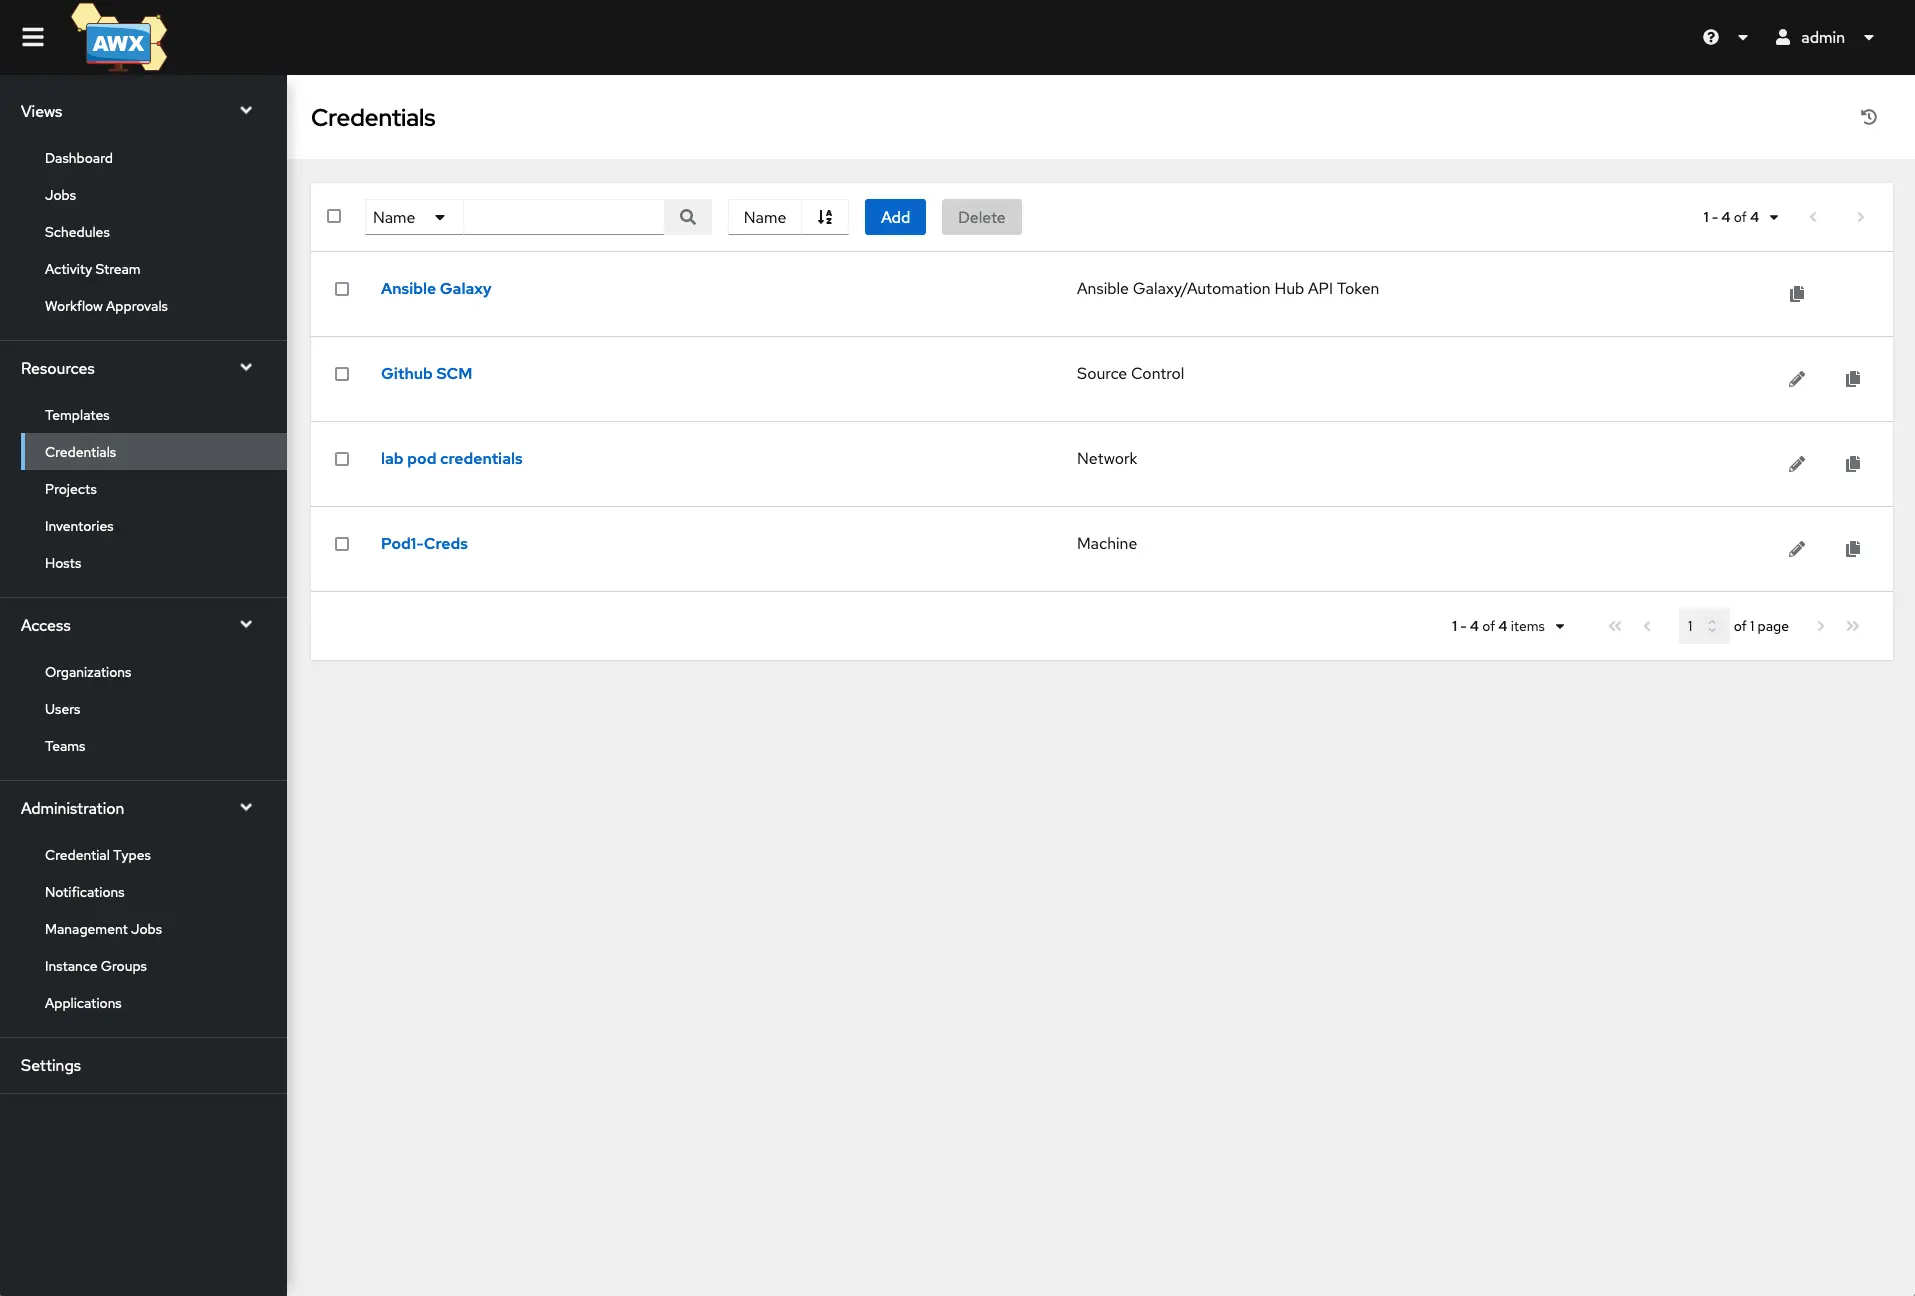
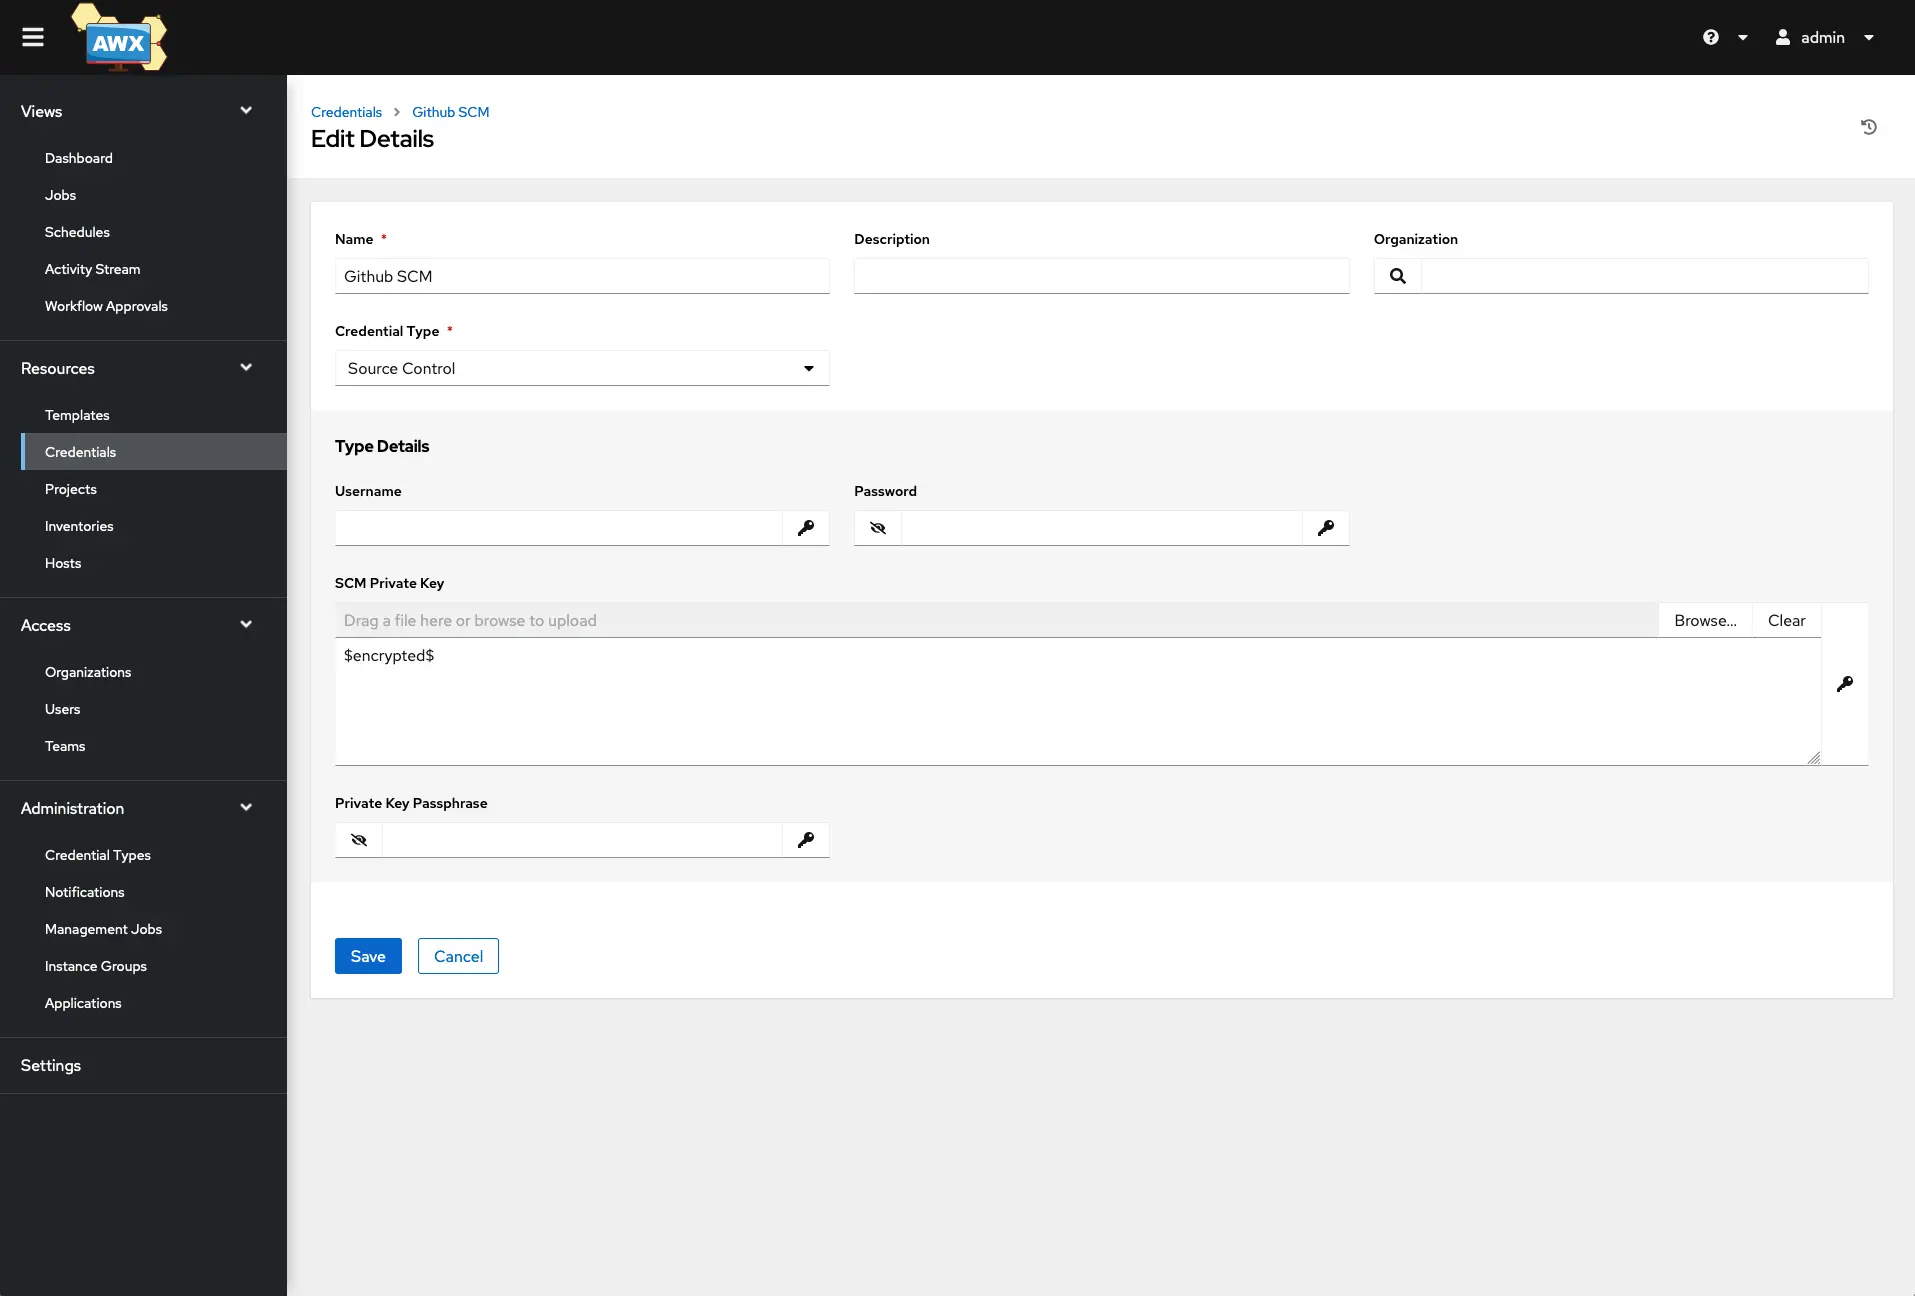
Github We will build the playbooks inside of VS CODE to test that the task works correctly. We will sync with the GitHub repo from AWX/Tower before running the Job that changes our physical devices. Create a new folder and a new repo for this project. You will want to generate an SSH key pair to use between AWX/Tower and Github. The Public key gets added to Github, and the Private key will be added into AWX/Tower. I’ve selected the credential type as Source Control and pasted it in the private key in the SCM Private Key section in the below screenshot. Save it.
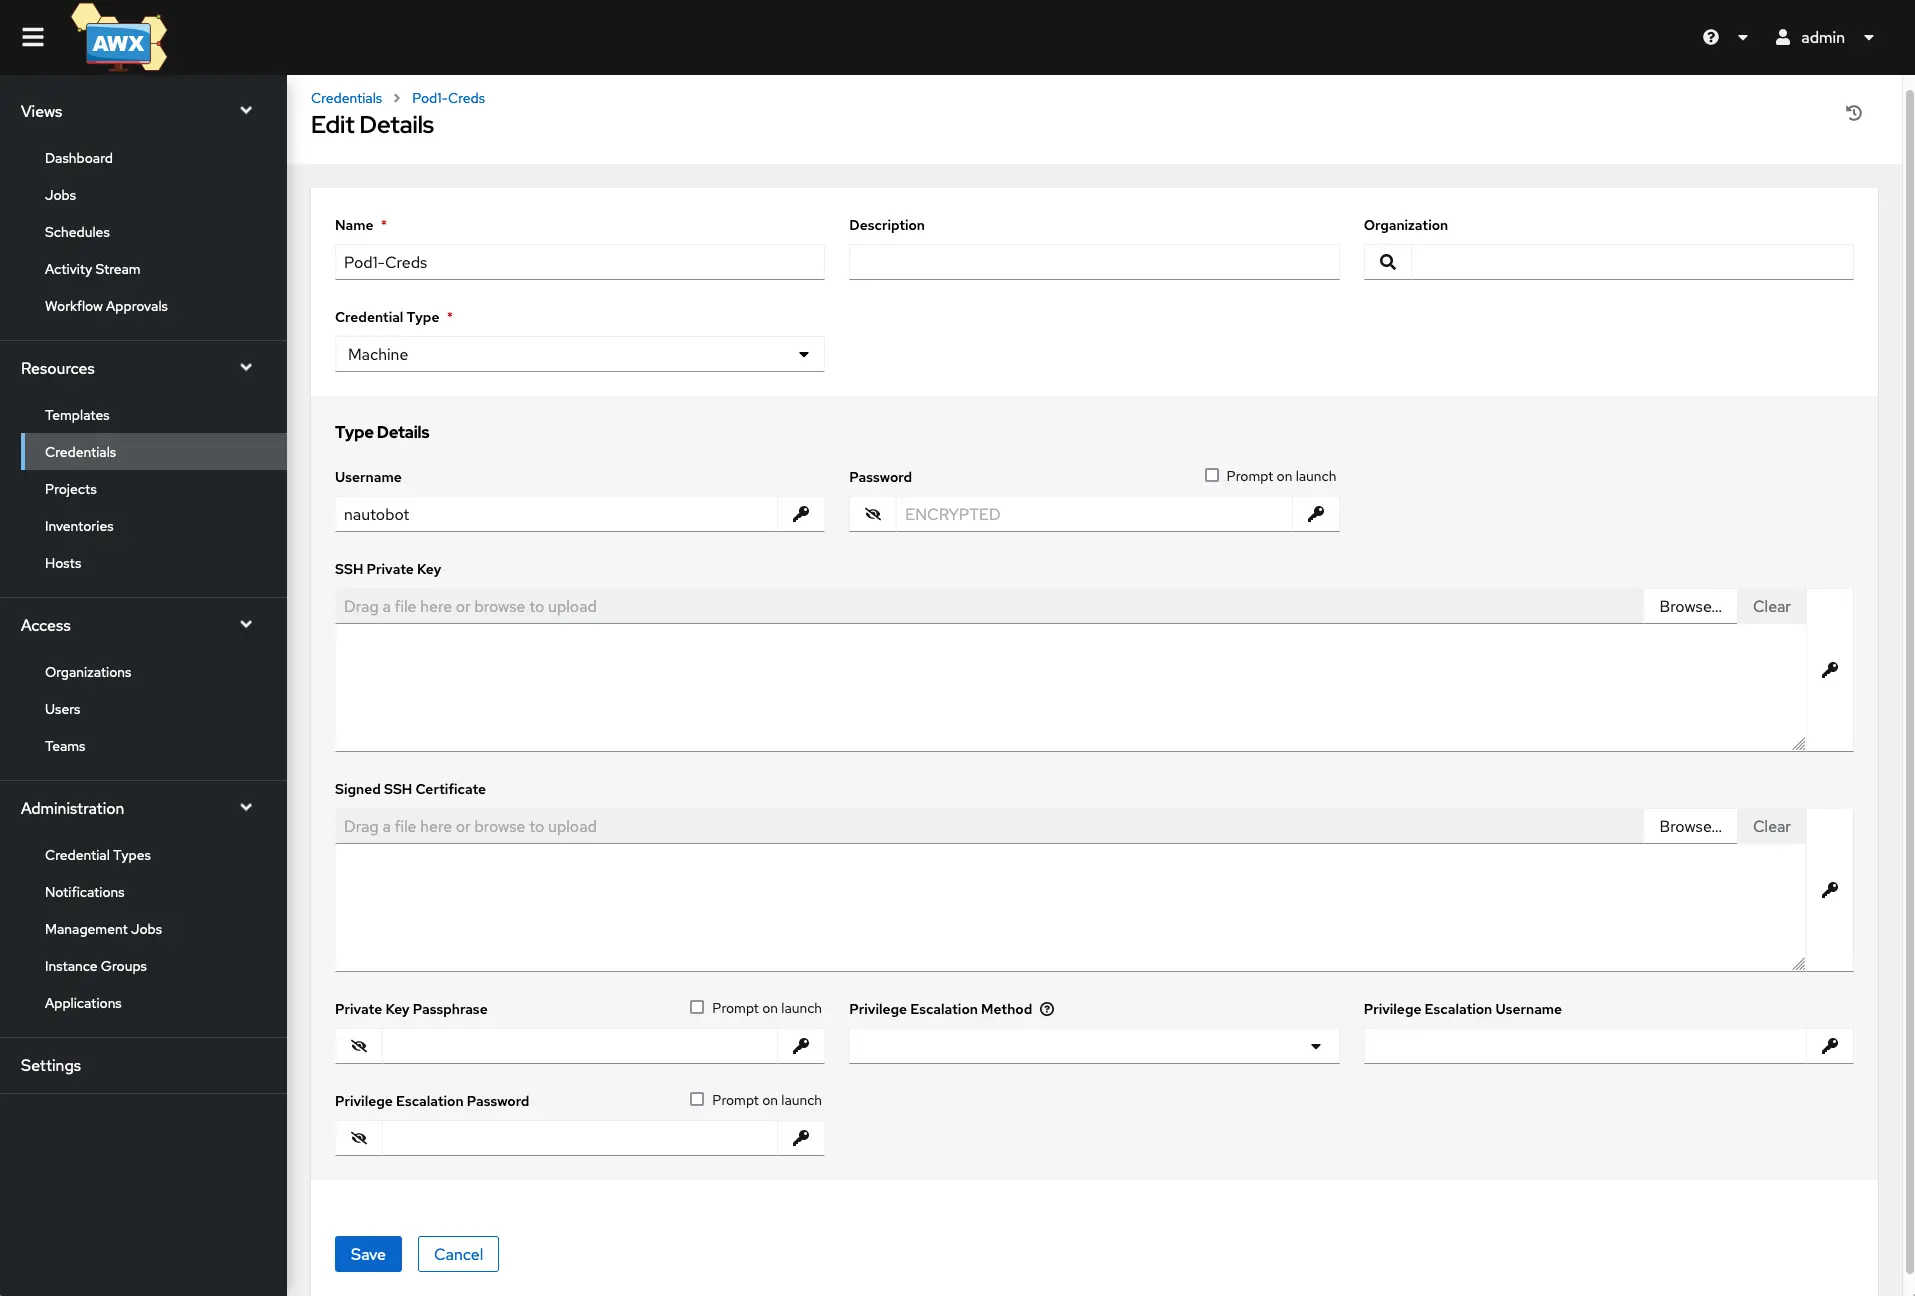
Physical Device Login This will be used by AWX/Tower to log in to your physical device to make the required changes. Add a new Credential and select ‘Machine’ from the Credential Type, and put your device’s username and password below that or you can also use an SSH key. Depending on how you set up your usernames on the device, you can also include Privilege escalations passwords. Mine is blank because, on Cisco, the username I am using has Priv 15 at login.
AWX/Tower Inventory
Now that we have Credentials let’s build out our inventory. Click ‘Add’ and select ‘Add Inventory’, give it a name and, save it. Once created, we can then add hosts. 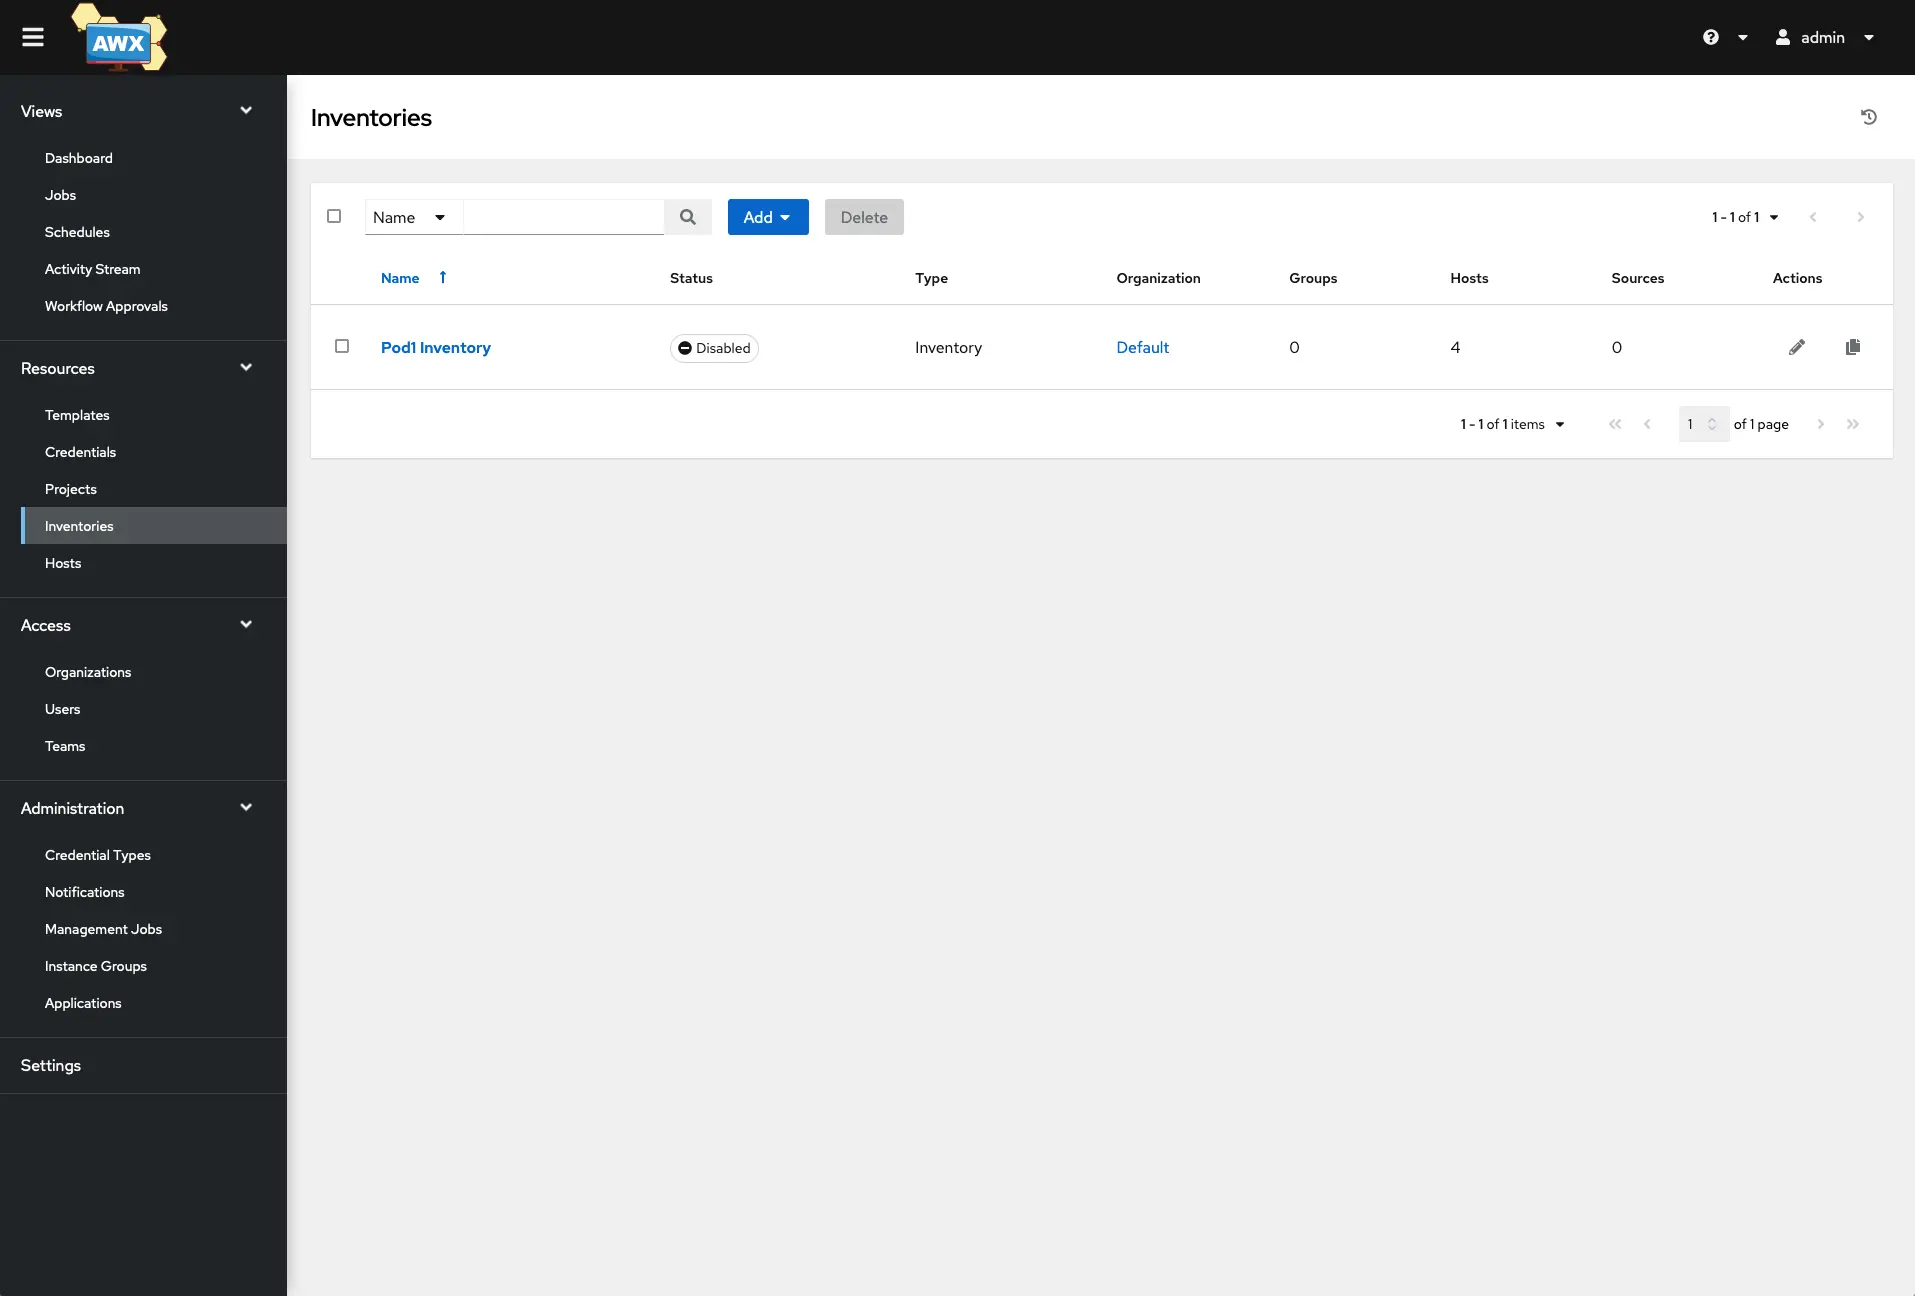
Click on your new inventory and click the ‘Hosts’ menu on the top. Here is where you can add each of the hosts and its specific variables if you have any. 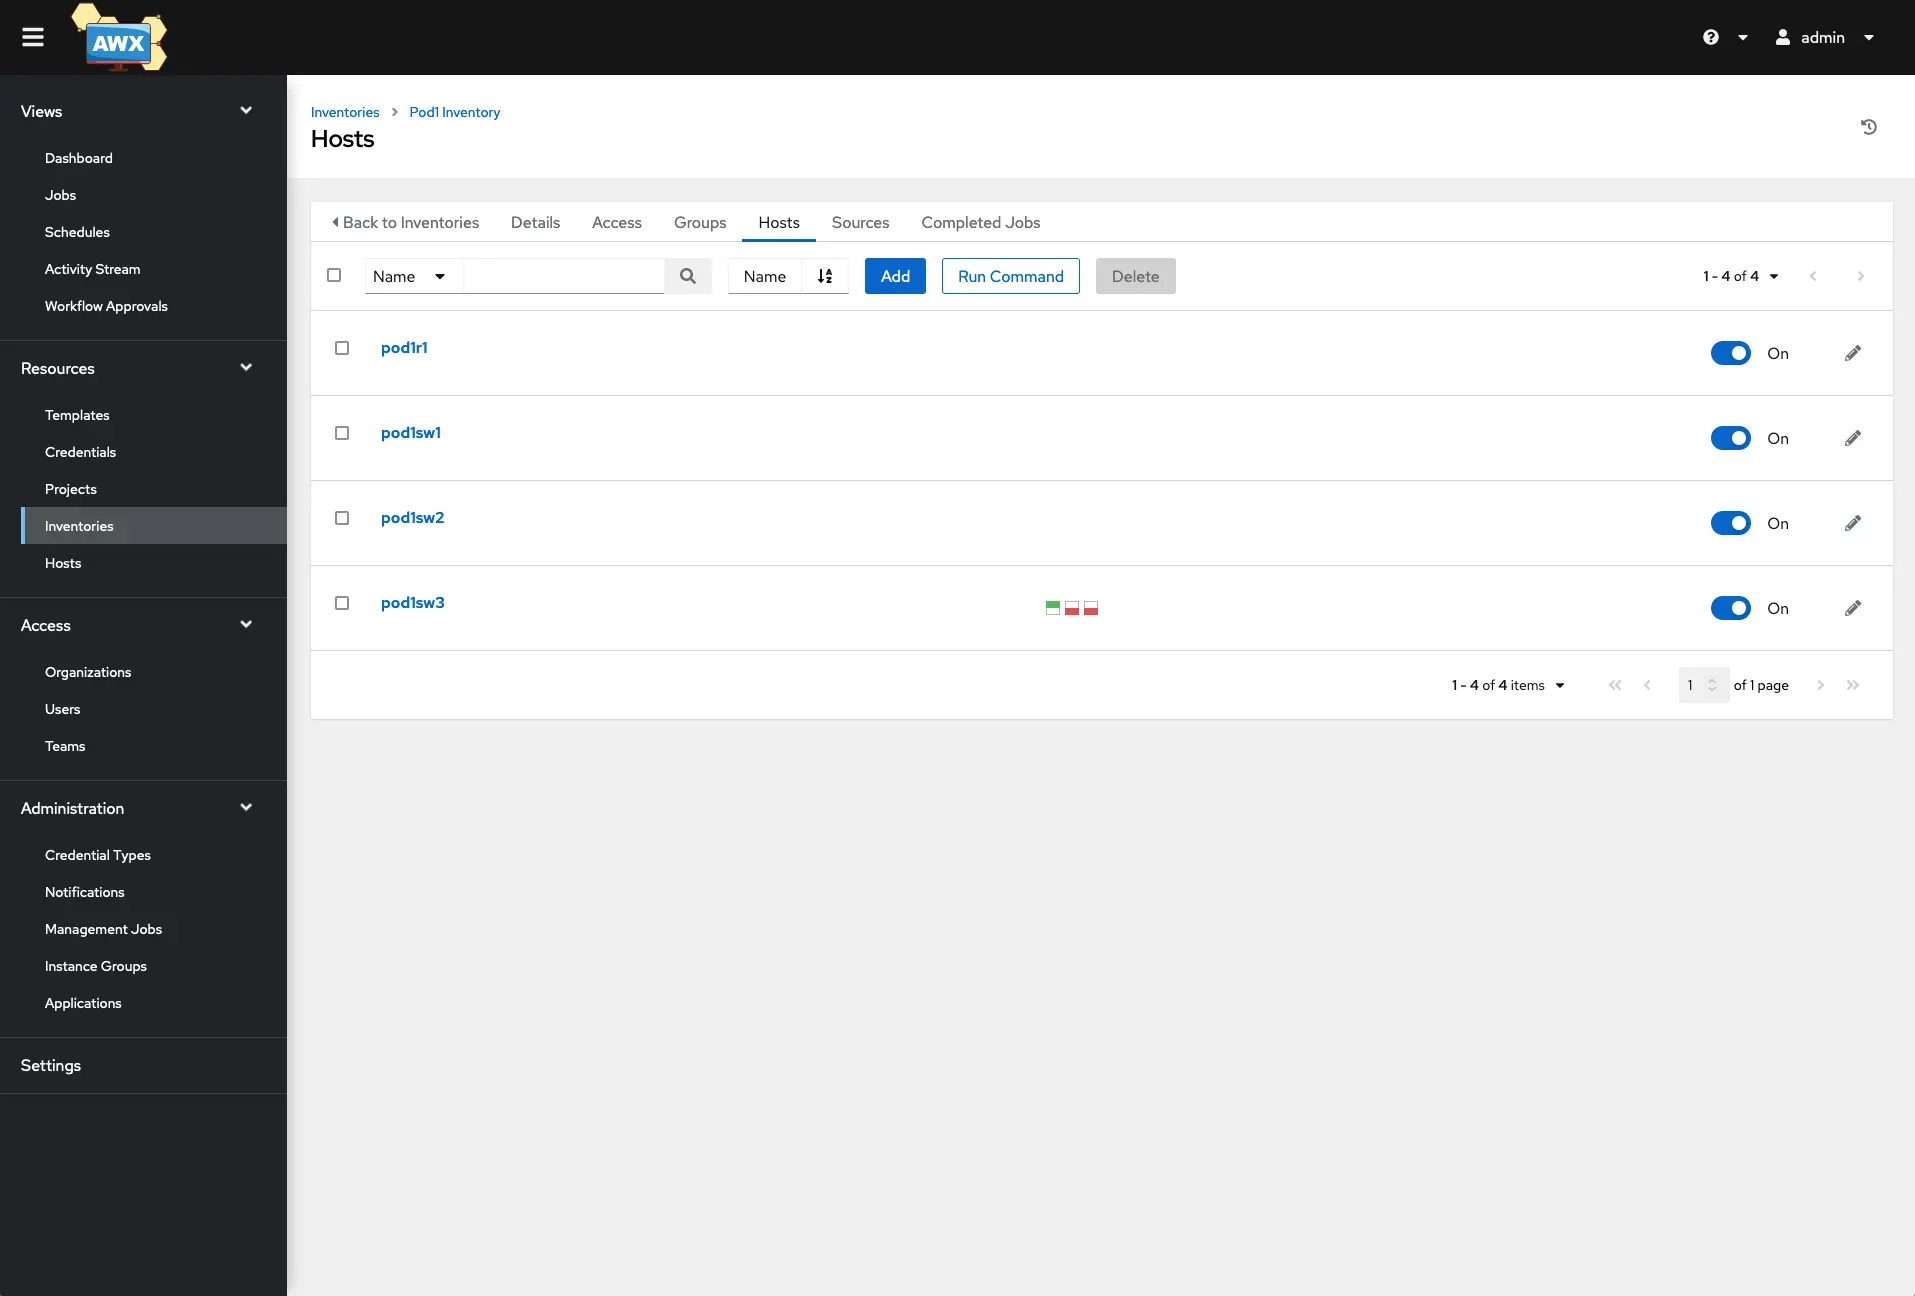
The Host details are pretty simple as it just requires a name, now if you are not using DNS resolution, you will need to add some variables in the same fashion we used in our Ansible inventory YAML file. I have 3 Variables, Hosts IP, Hosts Network, and the Hosts SSH args in this example. The SSH args will allow AWX/Tower to connect to our lab Cisco VM which uses an outdated SSH algorithm, so this is required for AWX/Tower to connect via SSH to those Cisco VMs. Repeat that process for each host you would like to have in your inventory. 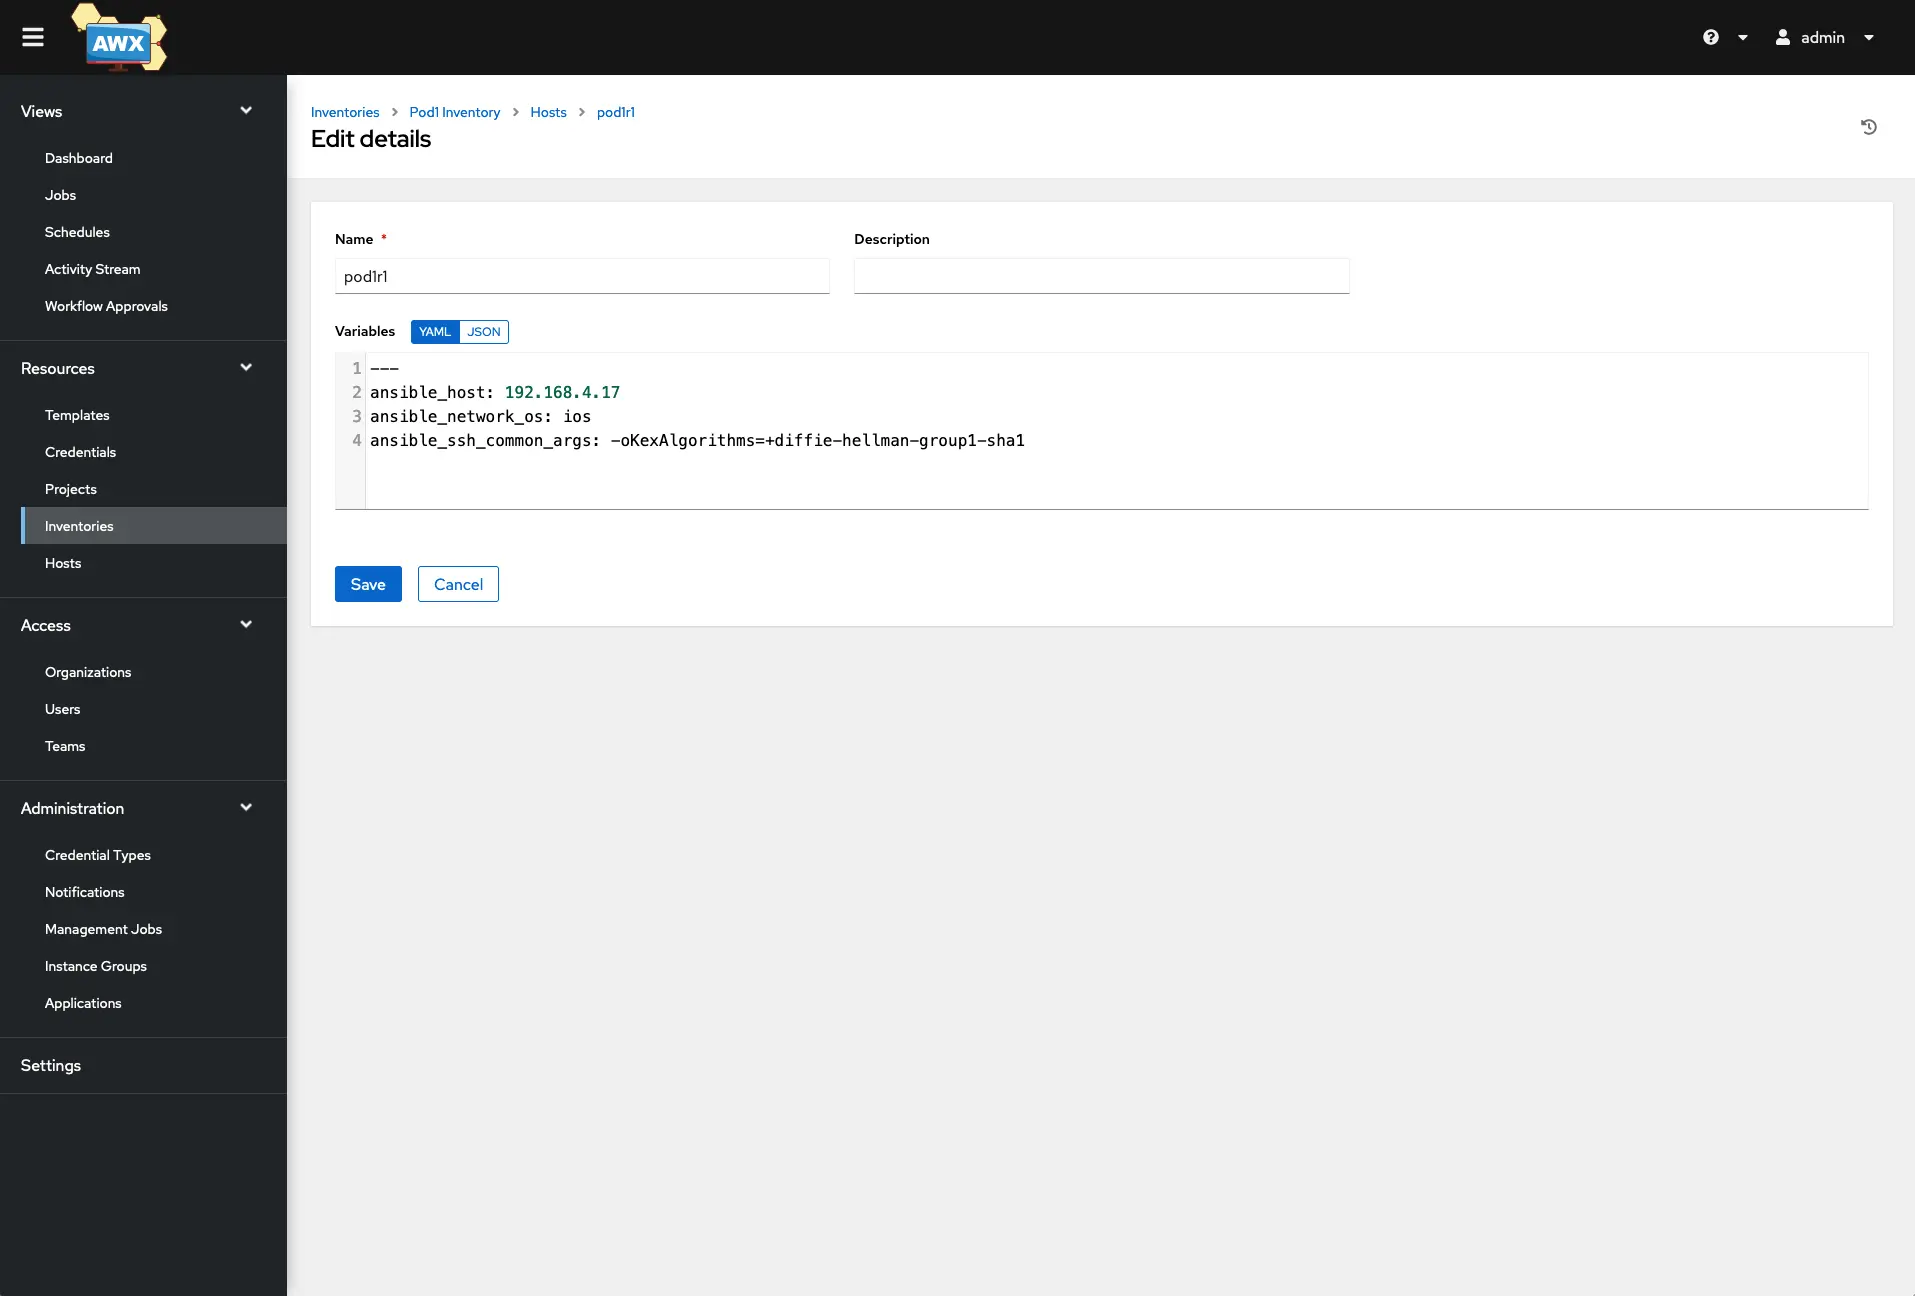
AWX/Tower Projects
We need a Project to pull our playbooks that we will write in VScode and sync to GitHub. 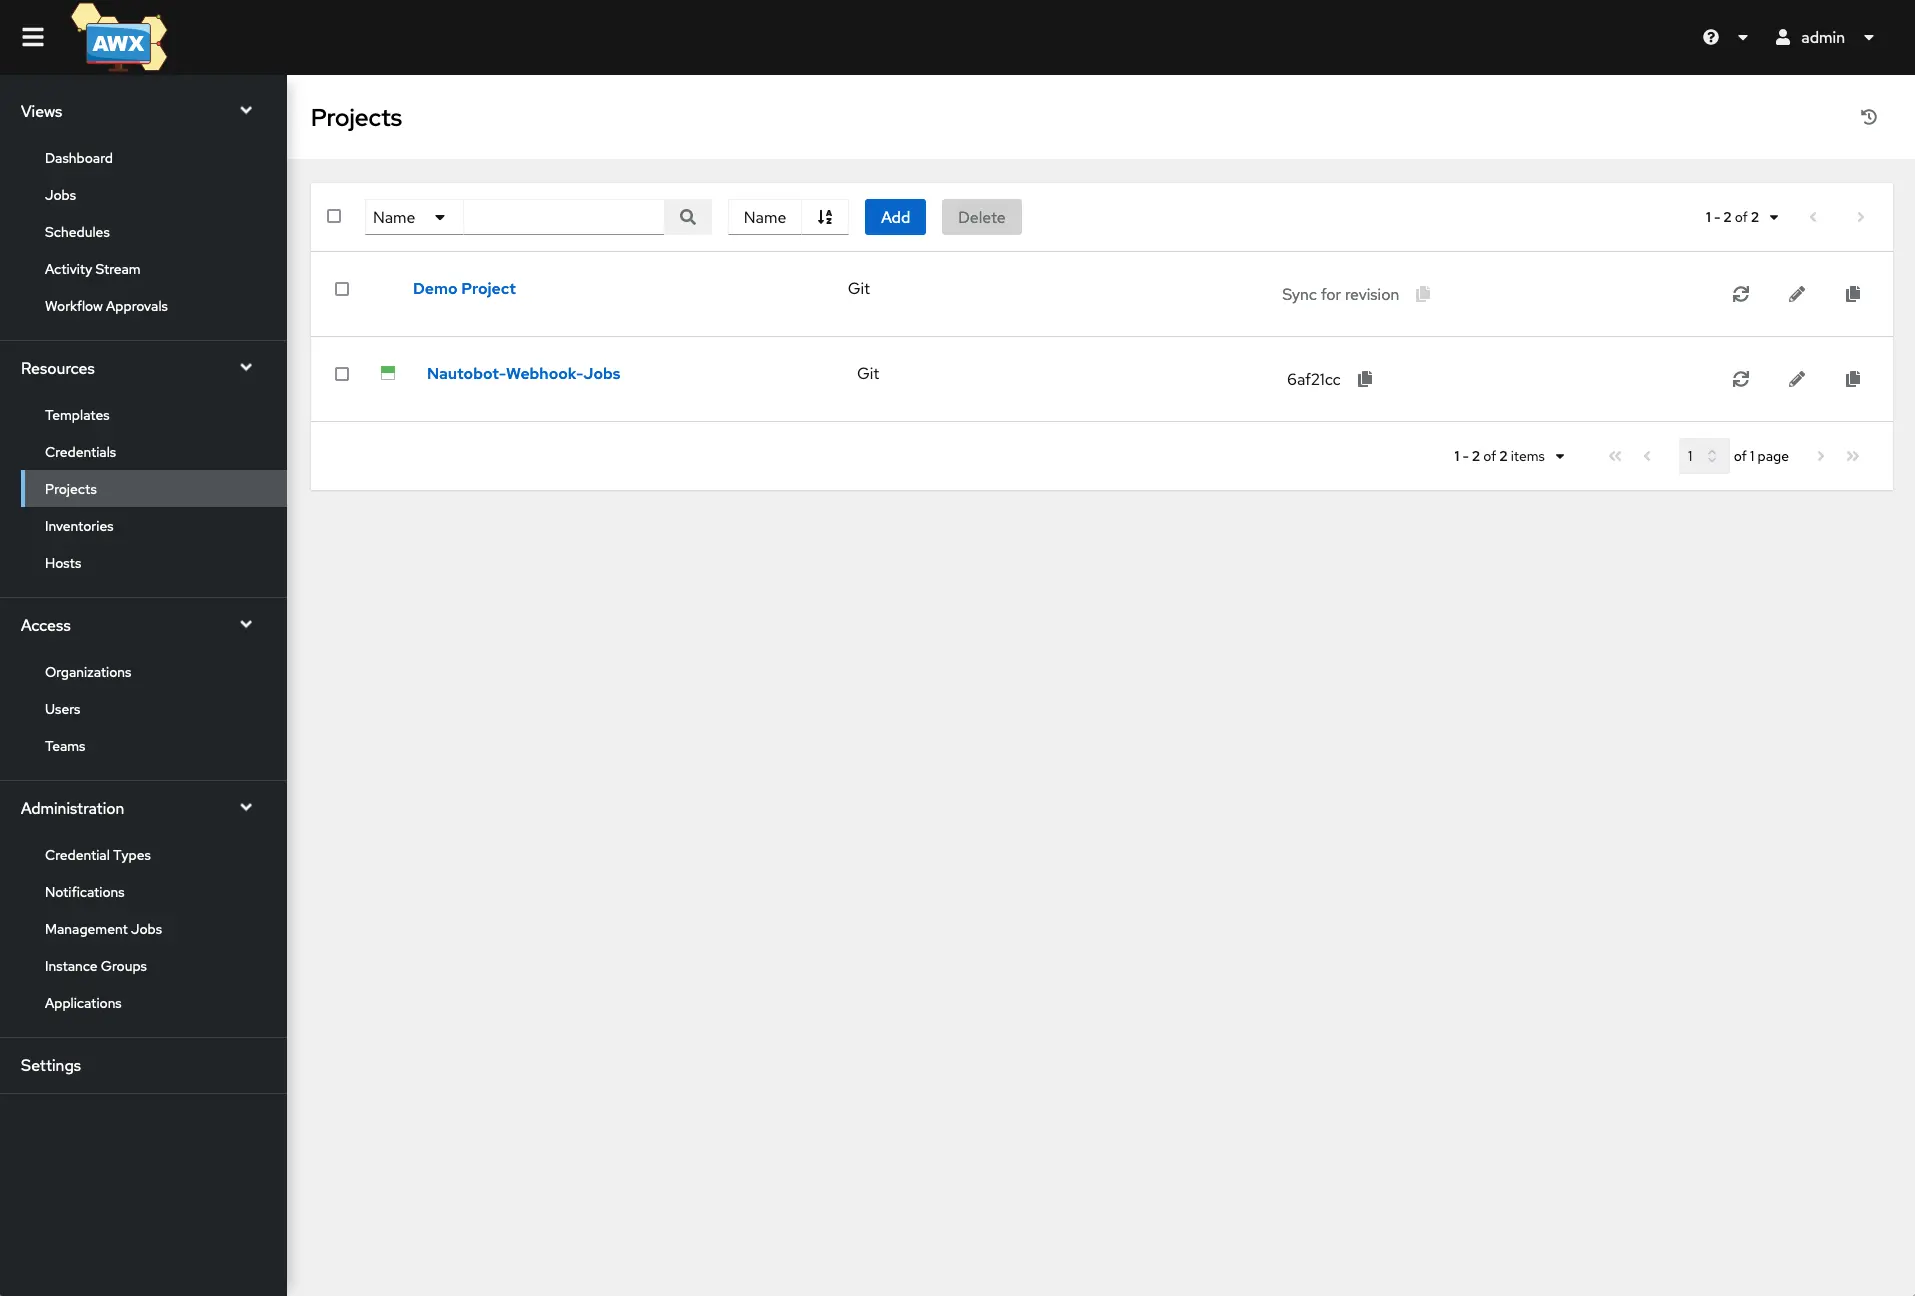
Add a new project by clicking the add button, giving your project a name, selecting under Source Control Credential Type, and choosing Git from the drop-down list. In the ‘Type Details’ paste in your GitHub ssh URL of the repo for this project. In the Source Control Credential, select the GitHub credentials you created in the previous step and then click Save. This will kick off a job to sync the repo, and you can watch that under the Jobs menu at the top left. 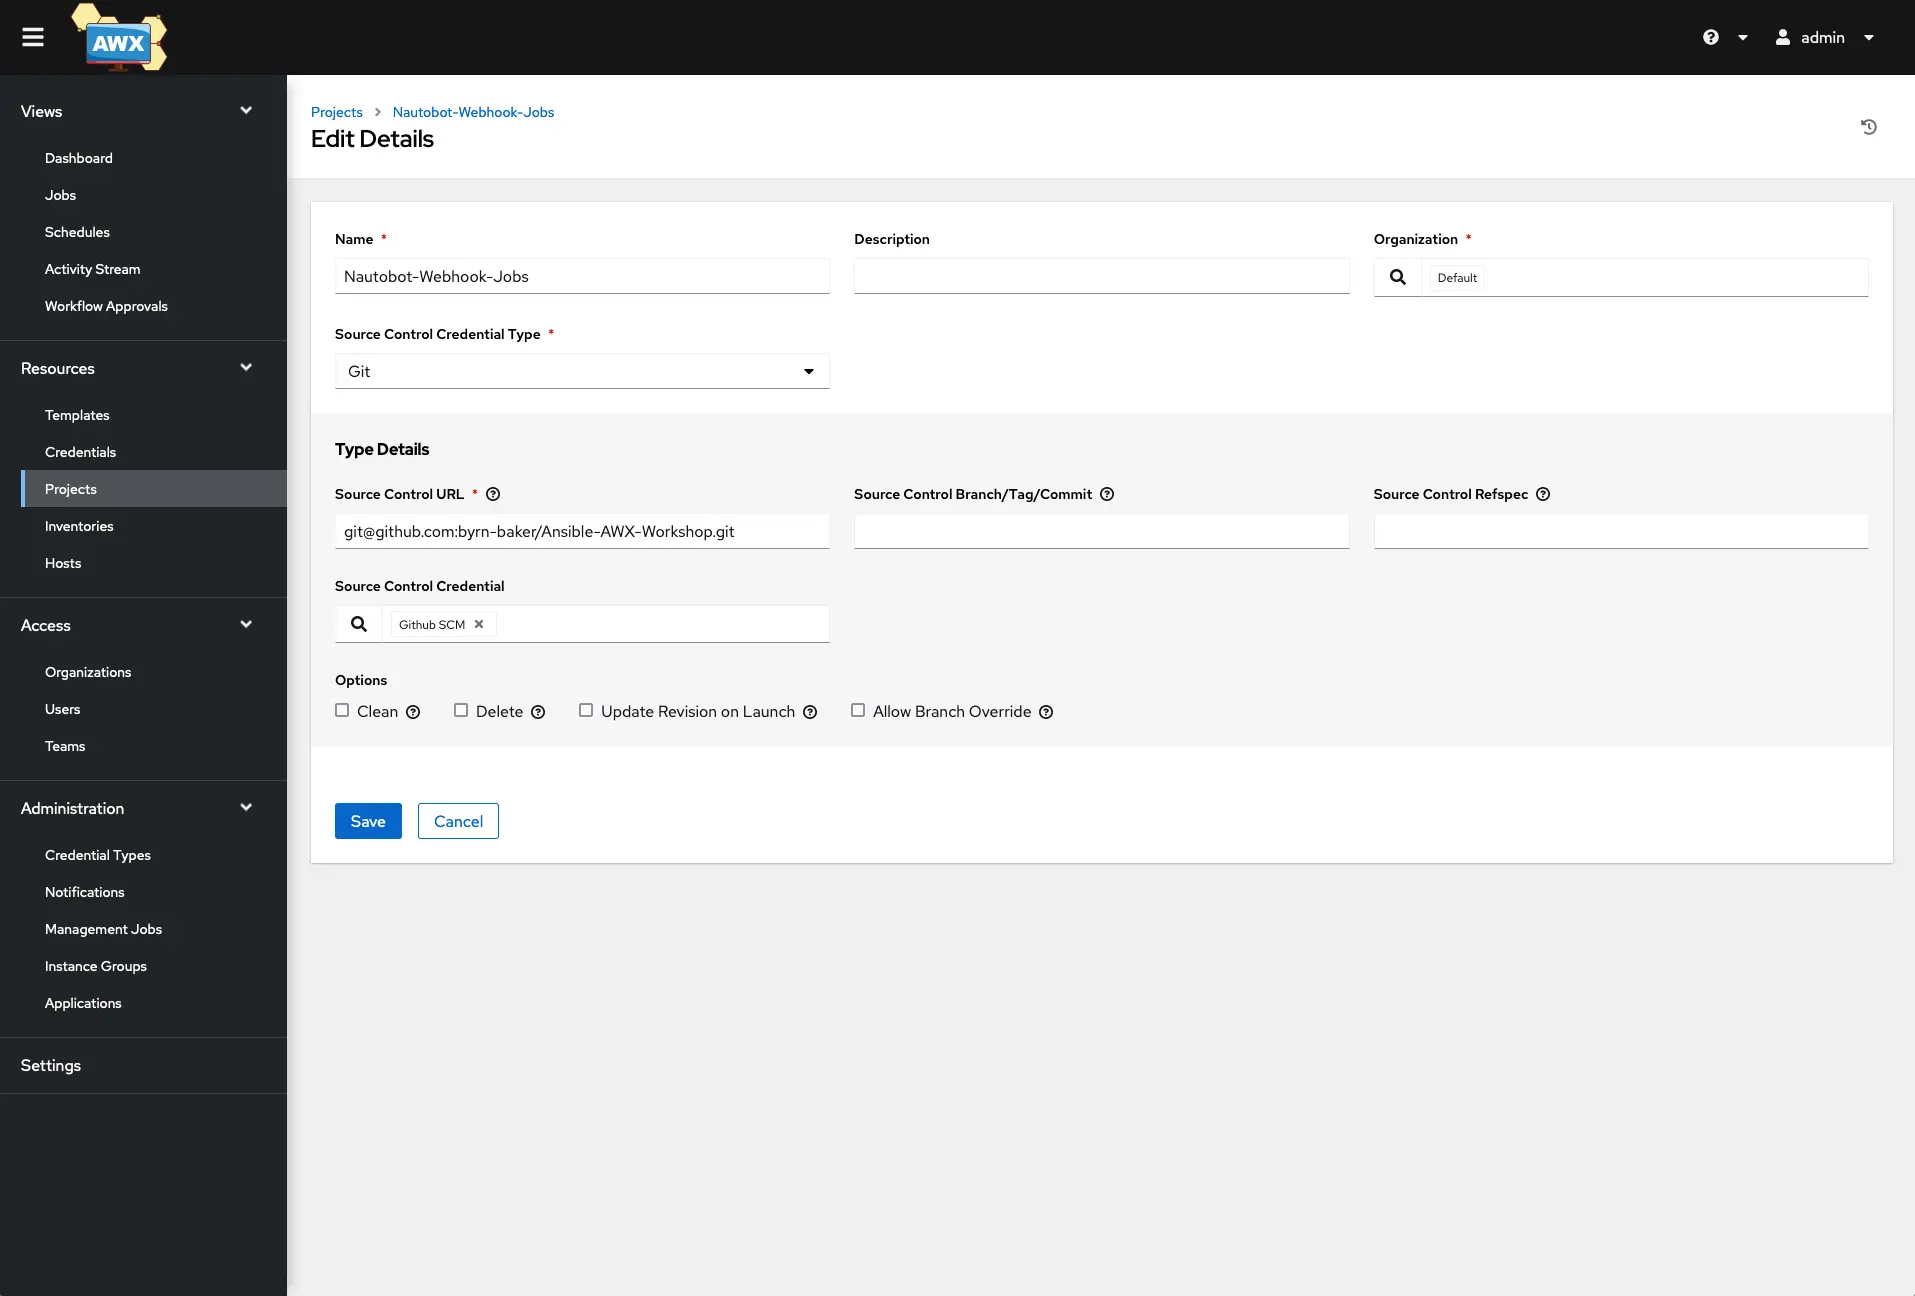
This will kick off a job to sync the repo and you can watch that under the Jobs menu at the top left. 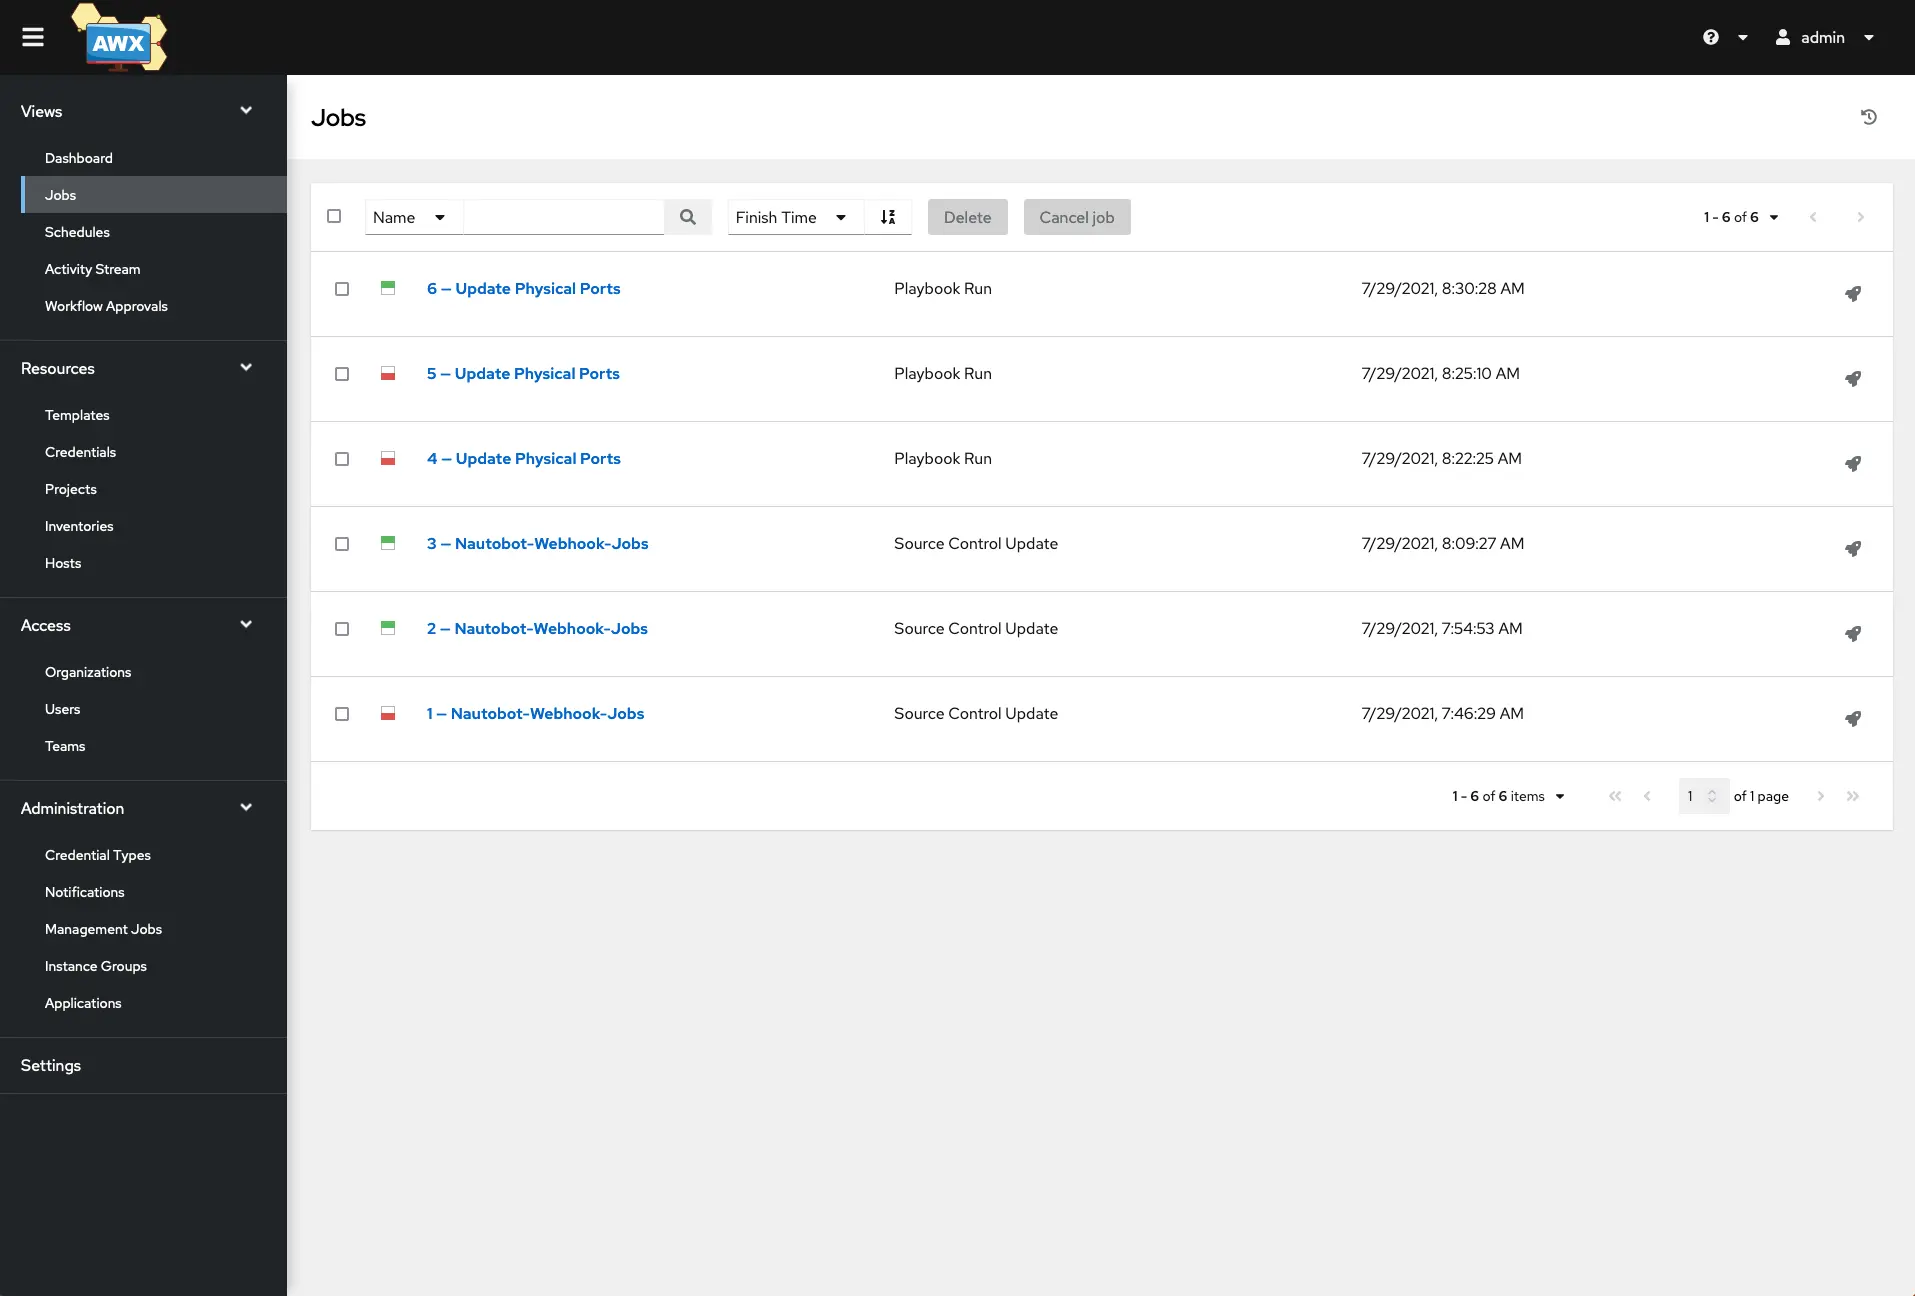
Build a Nautobot Webhook
In your Nautobot, there is a top menu called Extensibility that has a webhooks selection. 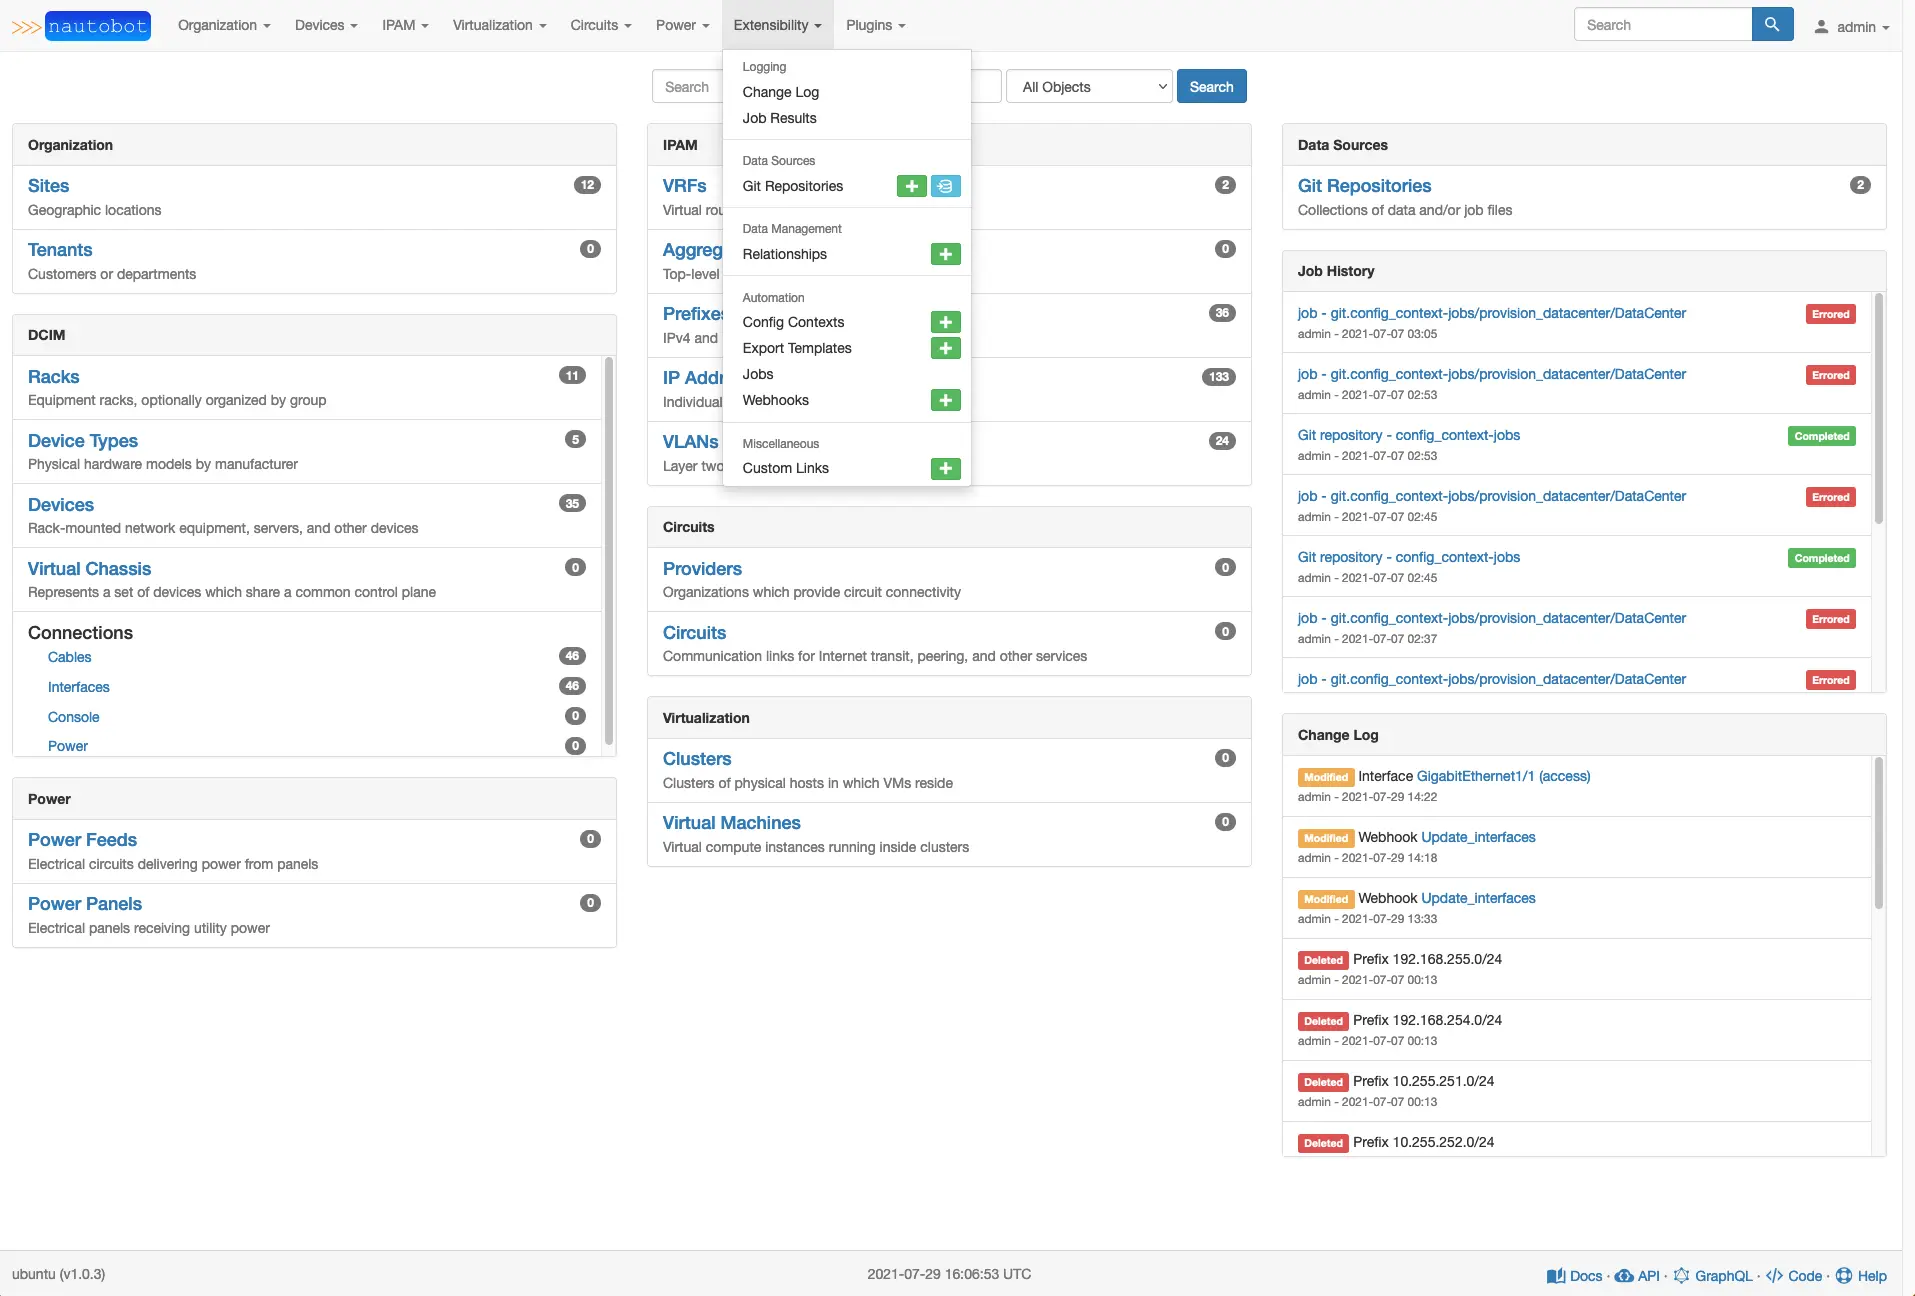
This is where you create webhooks, lets add our ‘Update_interfaces’ hook. 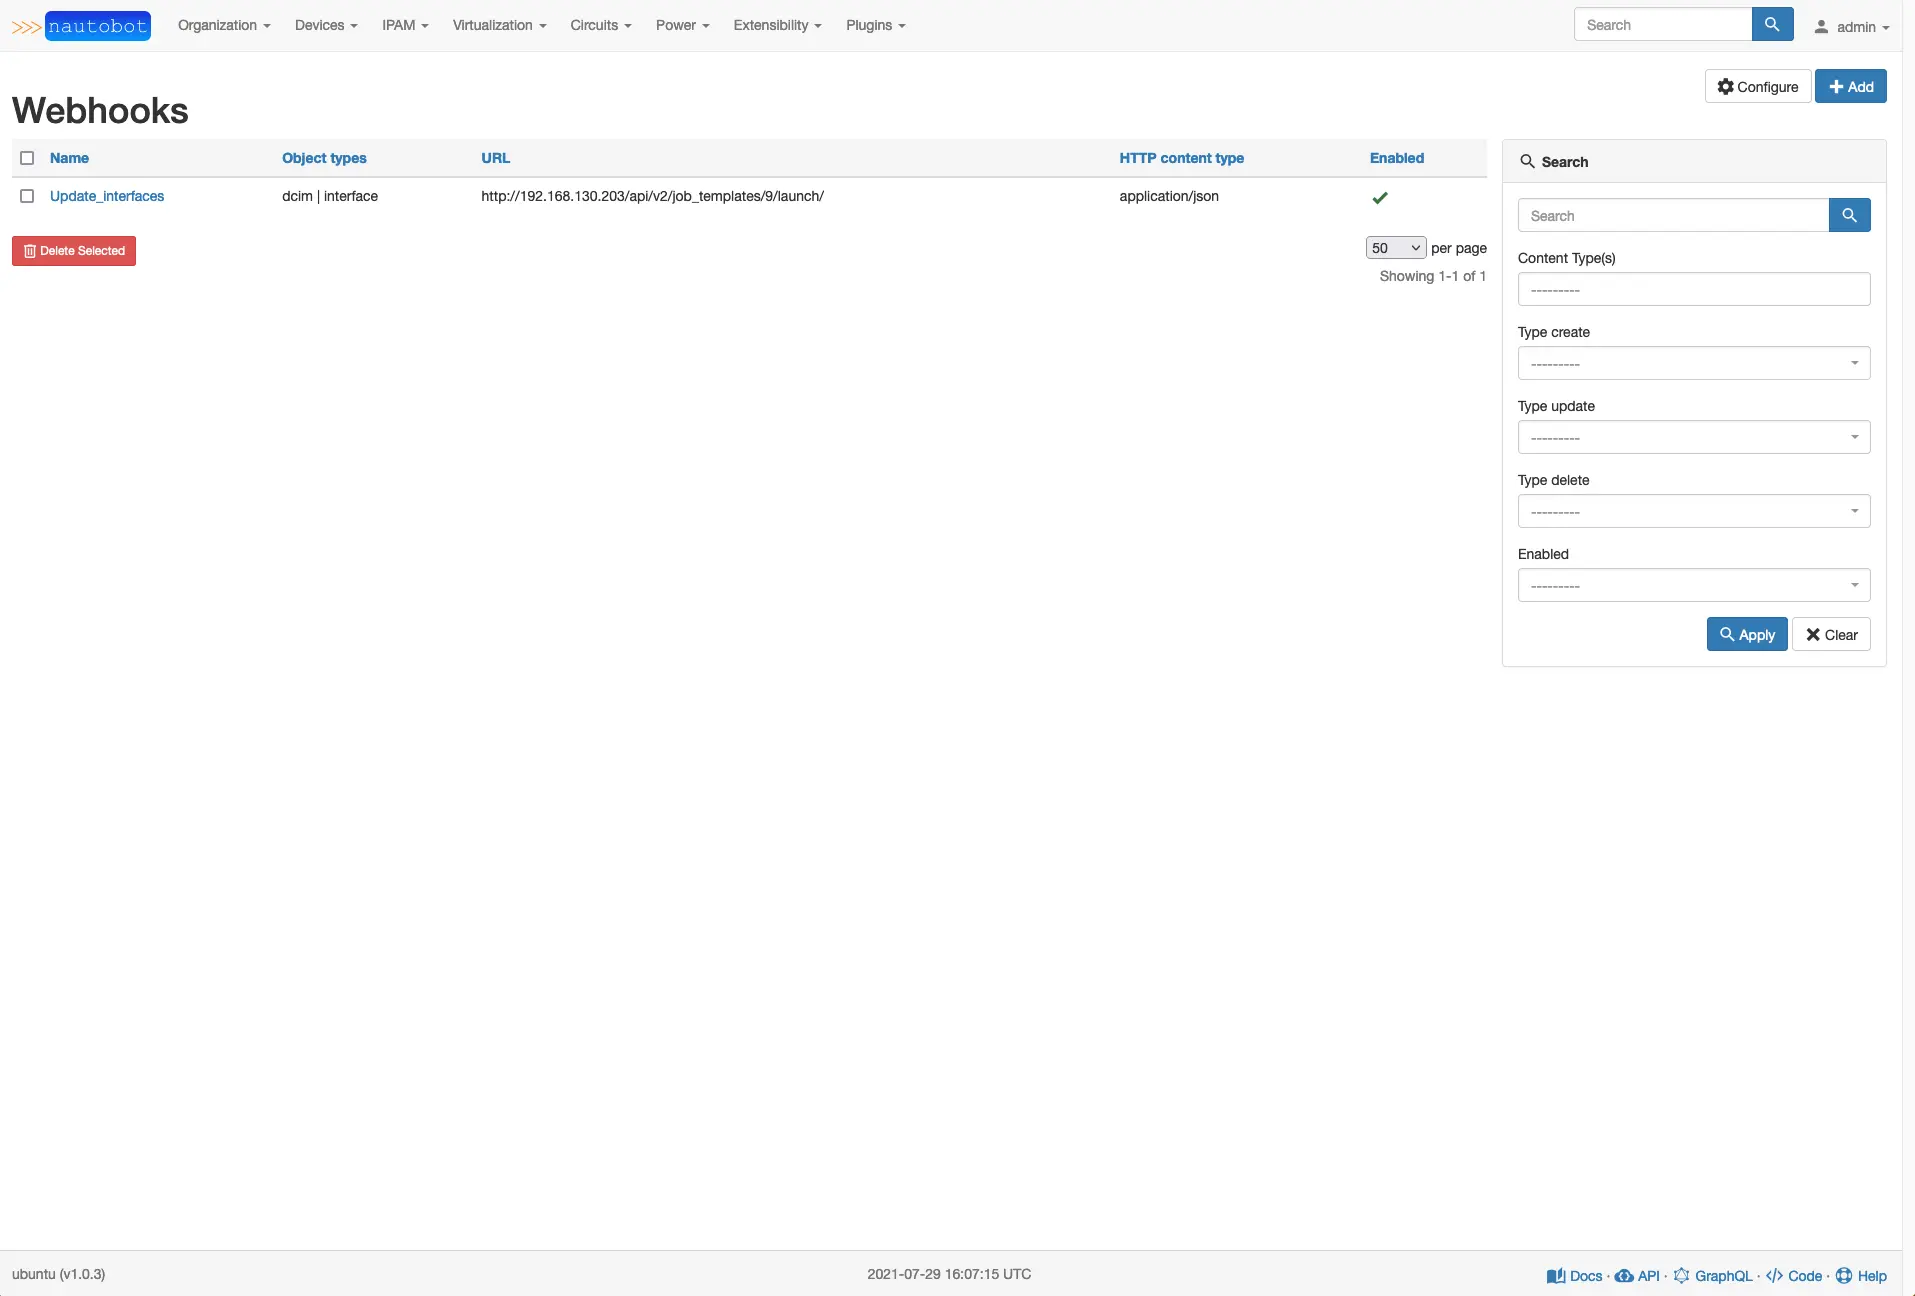
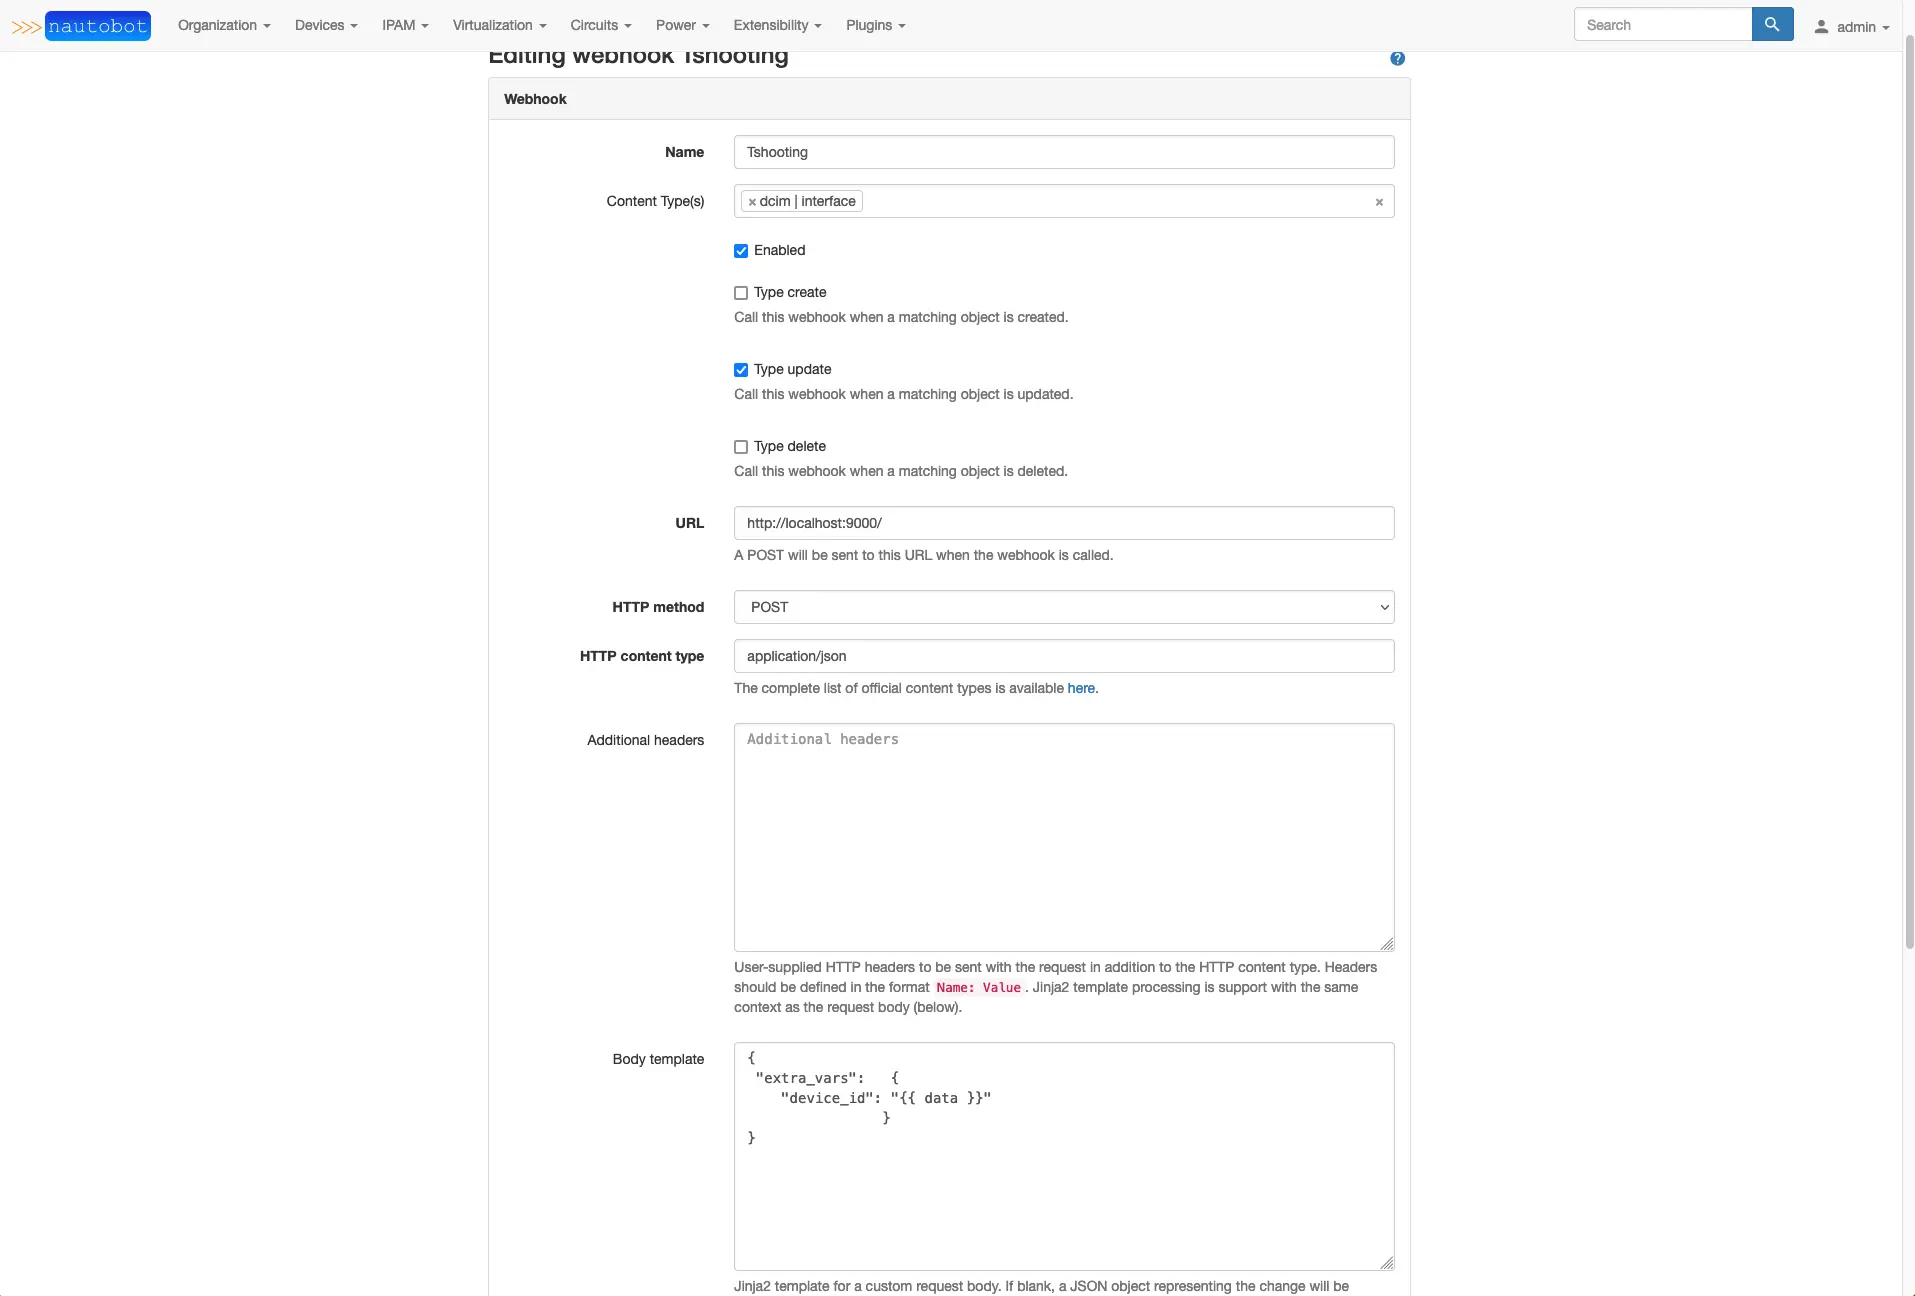
Inside the webhook creation interface, we have several options that will be filled out. In content type selection, you can select more than one and alert the webhook to run. We will use dcim|interface, check enable, and check Type Update. This will watch for database update changes on the dcim|interface table. Notice that there is an update button at the bottom when you edit objects in the web interface.
The URL will be the API endpoint of the job template we will create in AWX/Tower. We need to build a playbook before we can make the job template.
The HTTP Method will be POST. This is the method that AWX/Tower uses to kick off a job template because we need to send information to AWX/Tower, so it knows what device and what port to update.
HTTP Content-Type will be application/json and the Additional headers will need to include your authorization token from AWX/Tower prepended with authorization: Bearer.
The Body Template will build the JSON data inside the API POST from Nautobot to AWX/Tower. Nautobot allows you to use a Jinja2 format, which is nice because we have been using Jinja templates throughout this entire workshop. With Ansible, you can provide “extra_vars” when running a playbook (ansible-playbook myplaybook.yaml --extra-vars "nodes=webgroup” read more here) we have that same ability to do this from inside an AWX/Tower job template. We are going to utilize this function in our webhook. We will build our JSON structure and indent everything pulled from Nautobot below "extra_vars":. The key/value pairs will need to be matched in our playbooks, so use something easy to identify as you work out how to pull the data you need from Nautobot. There are helpful docs here that will assist in building and testing your webhook. The troubleshooting section will help you understand how the WebHook formats the API Post and allow you to see how the JSON is being structured and populate the data you want.
I will pause here and show how you can use the troubleshooting section to understand what the body looks like in the API Post.
Make a Troubleshooting webhook and point the URL at http://localhost:9000/ and in the body, put this
1
2
3
4
5
{
 "extra_vars":   {
    "device_id": "{{ data }}"
                }
}
Open up an ssh session to your nautobot host and run nautobot-server webhook_receiver
Now update an interface on one of your devices, change the description. Once you click update, you should see in your ssh session to Nautobot data returned like this.
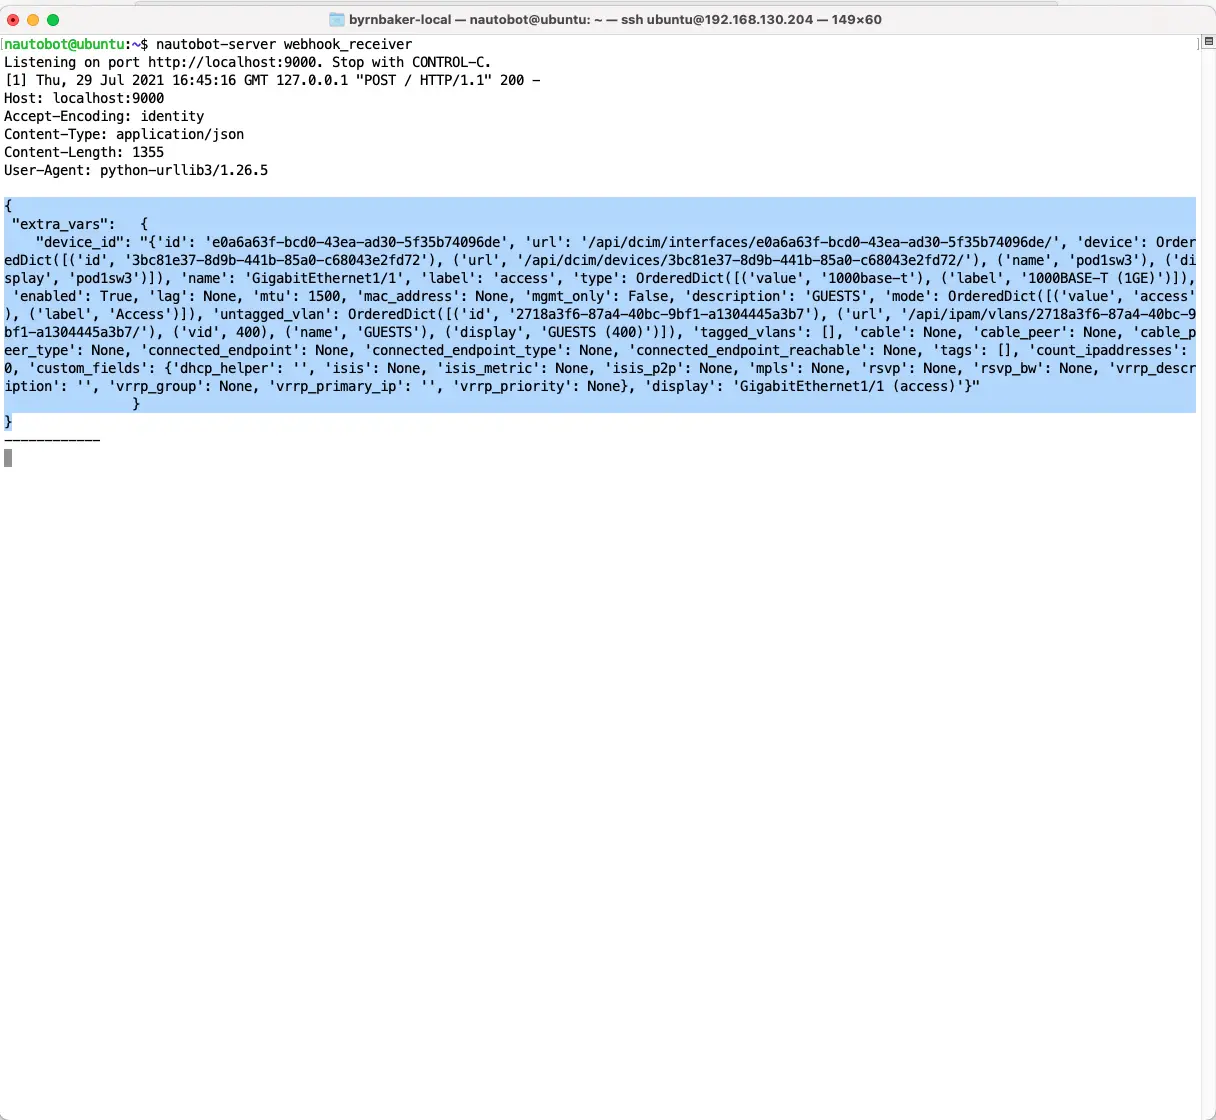
We get back all of the information that Nautobot has on the specific interface that was just updated. So we can use this JSON data to sort through and pick out the items needed to update the interface on a device.
So using this output as a guide, let’s build the Body Template to express the values we will need in our playbook.
1
2
3
4
5
6
7
8
9
10
11
12
13
14
15
16
17
18
19
20
21
22
23
24
25
26
27
28
29
30
31
32
33
34
35
36
37
38
39
40
41
42
{
    "extra_vars": {
        "device_id": "{
            'id': 'e0a6a63f-bcd0-43ea-ad30-5f35b74096de',
            'url': '/api/dcim/interfaces/e0a6a63f-bcd0-43ea-ad30-5f35b74096de/',
            'device': OrderedDict([
                ('id', '3bc81e37-8d9b-441b-85a0-c68043e2fd72'),
                ('url', '/api/dcim/devices/3bc81e37-8d9b-441b-85a0-c68043e2fd72/'),
                ('name', 'pod1sw3'),
                ('display', 'pod1sw3')]),
        'name': 'GigabitEthernet1/1',
        'label': 'access',
        'type': OrderedDict([('value', '1000base-t'), ('label', '1000BASE-T (1GE)')]), 'enabled': True,
        'lag': None, 'mtu': 1500,
        'mac_address': None,
        'mgmt_only': False,
        'description': 'GUESTS',
        'mode': OrderedDict([('value', 'access'), ('label', 'Access')]),
        'untagged_vlan': OrderedDict([('id', '2718a3f6-87a4-40bc-9bf1-a1304445a3b7'), ('url', '/api/ipam/vlans/2718a3f6-87a4-40bc-9bf1-a1304445a3b7/'), ('vid', 400), ('name', 'GUESTS'), ('display', 'GUESTS (400)')]),
        'tagged_vlans': [],
        'cable': None,
        'cable_peer': None,
        'cable_peer_type': None,
        'connected_endpoint': None,
        'connected_endpoint_type': None,
        'connected_endpoint_reachable': None,
        'tags': [], 'count_ipaddresses': 0,
        'custom_fields': {
            'dhcp_helper': '',
            'isis': None,
            'isis_metric': None,
            'isis_p2p': None,
            'mpls': None,
            'rsvp': None,
            'rsvp_bw': None,
            'vrrp_description': '',
            'vrrp_group': None,
            'vrrp_primary_ip': '',
            'vrrp_priority': None},
            'display': 'GigabitEthernet1/1 (access)'}"
    }
}
We can see that the device name is located in data['device']['name'], the interface name is located in data['name']. You can see a pattern emerging. We can just go through this dictionary and pull out the items we need. A few of the other things we can use will be
- mode
- untagged_vlan
- tagged_vlans
- description
- enabled
- mtu
- dhcp_helper
- vrrp_description
- vrrp_group
- vrrp_primary_ip
- vrrp_priority
We don’t have to use all of these in a single task. You can break tasks down into smaller changes, like just the description, or just the MTU, and so on. The finished Body Template will look like this in our interface_update webhook; you don’t need anything in the secret box and uncheck SSL verification, this is a development environment, and I do not have an authorized certificate on the AWX server.
1
2
3
4
5
6
7
8
9
10
11
12
13
14
15
16
17
18
{
 "extra_vars":   {
    "device_id": "{{ data['device']['name'] }}",
    "interface_id": "{{ data['name'] }}",
    "label": "{{ data['label'] }}",
    "mode": "{{ data['mode']['value'] }}",
    "untagged_vlan": "{{ data['untagged_vlan']['vid'] }}",
    "tagged_vlans": "{{ data["tagged_vlans"] | join(',', attribute='vid') }}",
    "description": "{{ data['description'] }}",
    "enabled": "{{ data['enabled'] }}",
    "mtu": "{{ data['mtu'] }}",
    "dhcp_helper": "{{ data['custom_fields']['dhcp_helper'] }}",
    "vrrp_description": "{{ data['custom_fields']['vrrp_description'] }}",
    "vrrp_group": "{{ data['custom_fields']['vrrp_group'] }}",
    "vrrp_primary_ip": "{{ data['custom_fields']['vrrp_primary_ip'] }}",
    "vrrp_priority": "{{ data['custom_fields']['vrrp_priority'] }}"
                }
}
Now that we understand the data being provided from Nautobot, let’s start working on a playbook and tasks that will use the data.
Ansible Playbooks
So now that we have some of the items needed in AWX set up and we have messed around with webhooks, let’s focus on the playbooks. We will need to change a device’s ports physical attributes. In this example, we will focus on making changes to the following:
- Update physical attributes like description, MTU, and shut or no shut.
- Update the type of interface, access, trunk, and what VLAN is assigned
- adding or updating layer3 information like and IP address, DHCP helper, vrrp information.
Playbook and Tasks
Playbooks for AWX/Tower look the same for the most part. However, because we will kick these off from a Webhook in Nautobot, we need to build into our Playbooks and tasks variables.
1
2
3
4
5
6
7
8
---
- name: Nautobot Webhook interface update
  hosts: ""
  gather_facts: no
  connection: network_cli

  roles:
  - { role: updates_from_nautobot/physical_port_update }
In the play above, we use because that is the name we chose for our device name variable. This should also match precisely with our inventory. I will continue to use Roles, so our tasks will be under roles/updates_from_nautobot/physical_port_update/tasks/main.yaml.
Our first task lets us do something simple and update the interface description and the administrative status (enabled or not). Because I am working with Cisco devices, I will also be using the cisco ios ansible module. These vendor-specific modules are convenient when we are making minor changes to specific items on the device. Look at the docs for cisco.ios.interfaces This describes what we can change on the interface with this module and provides several different examples.
1
2
3
4
5
6
7
8
---
- name: update interface description and admin status
  cisco.ios.ios_interfaces:
    config:
    - name: ""
      description: ""
      enabled: ""
    state: replaced
In this first task, if we update anything on the interface is will kick off the Webhook, which will, in turn, kick off the job template. Above we will use to identify which interface to make changes to,, and ``````.
We need to present all of our variables as extra-vars of the play will fail as we are not checking if a variable exists before running the play, so these will be required for this task to be run. Name and Description are self-explanatory, enabled however is neither shut nor no shut. However, it performs that function when called in our ansible task. Enabled uses a yes or no, True or False boolean choice, which is perfect because Nautobot uses the same boolean on its end.
You can also test this playbook directly from the command line by the following ansible-playbook -i inventory/pod1_inventory.yml pb.update_port_description.yaml --extra-vars "device_id=pod1sw3 interface_id=GigabitEthernet0/0 description=ANSIBLE_TEST enabled=yes".
You should have an output similar to this:
1
2
3
4
5
6
7
8
9
(.venv) root@c1557e2bca38:/home/Ansible-AWX-Workshop# ansible-playbook -i inventory/pod1_inventory.yml pb.update_port_description.yaml --extra-vars "device_id=pod1sw3 interface_id=GigabitEthernet0/0 description=ANSIBLE_TEST enabled=no"

PLAY [Nautobot Webhook interface update] ***********************************************************************************************************************************************************************************************

TASK [updates_from_nautobot/physical_port_update : update interface description and admin status] **************************************************************************************************************************************
ok: [pod1sw3]

PLAY RECAP *****************************************************************************************************************************************************************************************************************************
pod1sw3                    : ok=1    changed=0    unreachable=0    failed=0    skipped=0    rescued=0    ignored=0
Notice that nothing has been changed. The cisco module is looking at the current state of the interface and because it is already enabled. The description is already set to “ANSIBLE_TEST” on my device. There is no change in which ansible registers.
1
2
3
4
5
6
7
8
9
10
pod1sw3#sh int description
Interface                      Status         Protocol Description
Gi0/0                          admin down     down     ANSIBLE_TEST
Gi0/1                          up             up       TRUNK TO POD1SW1
Gi0/2                          up             up       TRUNK TO POD1SW2
Gi0/3                          up             up       USERS
Gi1/0                          down           down     SERVERS
Gi1/1                          down           down     GUESTS - Webhooks
Gi1/2                          down           down     NOT IN USE
Gi1/3                          up             up       MGMT-INTERFACE
Run the play again except this time lets change the description
1
2
3
4
5
6
7
8
9
(.venv) root@c1557e2bca38:/home/Ansible-AWX-Workshop# ansible-playbook -i inventory/pod1_inventory.yml pb.update_port_description.yaml --extra-vars "device_id=pod1sw3 interface_id=GigabitEthernet0/0 description=TEST enabled=no"

PLAY [Nautobot Webhook interface update] ***********************************************************************************************************************************************************************************************

TASK [updates_from_nautobot/physical_port_update : update interface description and admin status] **************************************************************************************************************************************
changed: [pod1sw3]

PLAY RECAP *****************************************************************************************************************************************************************************************************************************
pod1sw3                    : ok=1    changed=1    unreachable=0    failed=0    skipped=0    rescued=0    ignored=0
Here we register a change and below is the output from the switch show command
1
2
3
4
5
6
7
8
9
10
11
12
13
pod1sw3#
*Jul 29 18:15:42.346: %SYS-5-CONFIG_I: Configured from console by pod1 on vty0 (192.168.130.141)
pod1sw3#sh int description
Interface                      Status         Protocol Description
Gi0/0                          admin down     down     TEST
Gi0/1                          up             up       TRUNK TO POD1SW1
Gi0/2                          up             up       TRUNK TO POD1SW2
Gi0/3                          up             up       USERS
Gi1/0                          down           down     SERVERS
Gi1/1                          down           down     GUESTS - Webhooks
Gi1/2                          down           down     NOT IN USE
Gi1/3                          up             up       MGMT-INTERFACE
pod1sw3#
Now that we can see that this works from Ansible in the terminal we need to make one addition to our folder structure to ensure that when this project is synced over to AWX/Tower that it installs the Cisco Ansible module. inside of roles/updates_from_nautobot/physical_port_update add a file called requirements.yaml and place the following
1
2
3
4
---
collections:
  - name: cisco.ios
    version: 2.2.0
AWX/Tower Job Template
So we have built out the playbook with a single task that can change the interface description and if the interface is enabled or disabled. We used some output from Nautobots webhook inspector to understand how to build our Body Template. We used that information to fill in the variables for our playbooks device, interface and enabled status.
Make sure that your playbook has been pushed to your repo, and inside of AWX/Tower, sync our new project with the repo so that it has the most recent version with our new playbook. Now that we have a functioning playbook, it is time to build a Job Template in AWX/Tower, so click Templates.
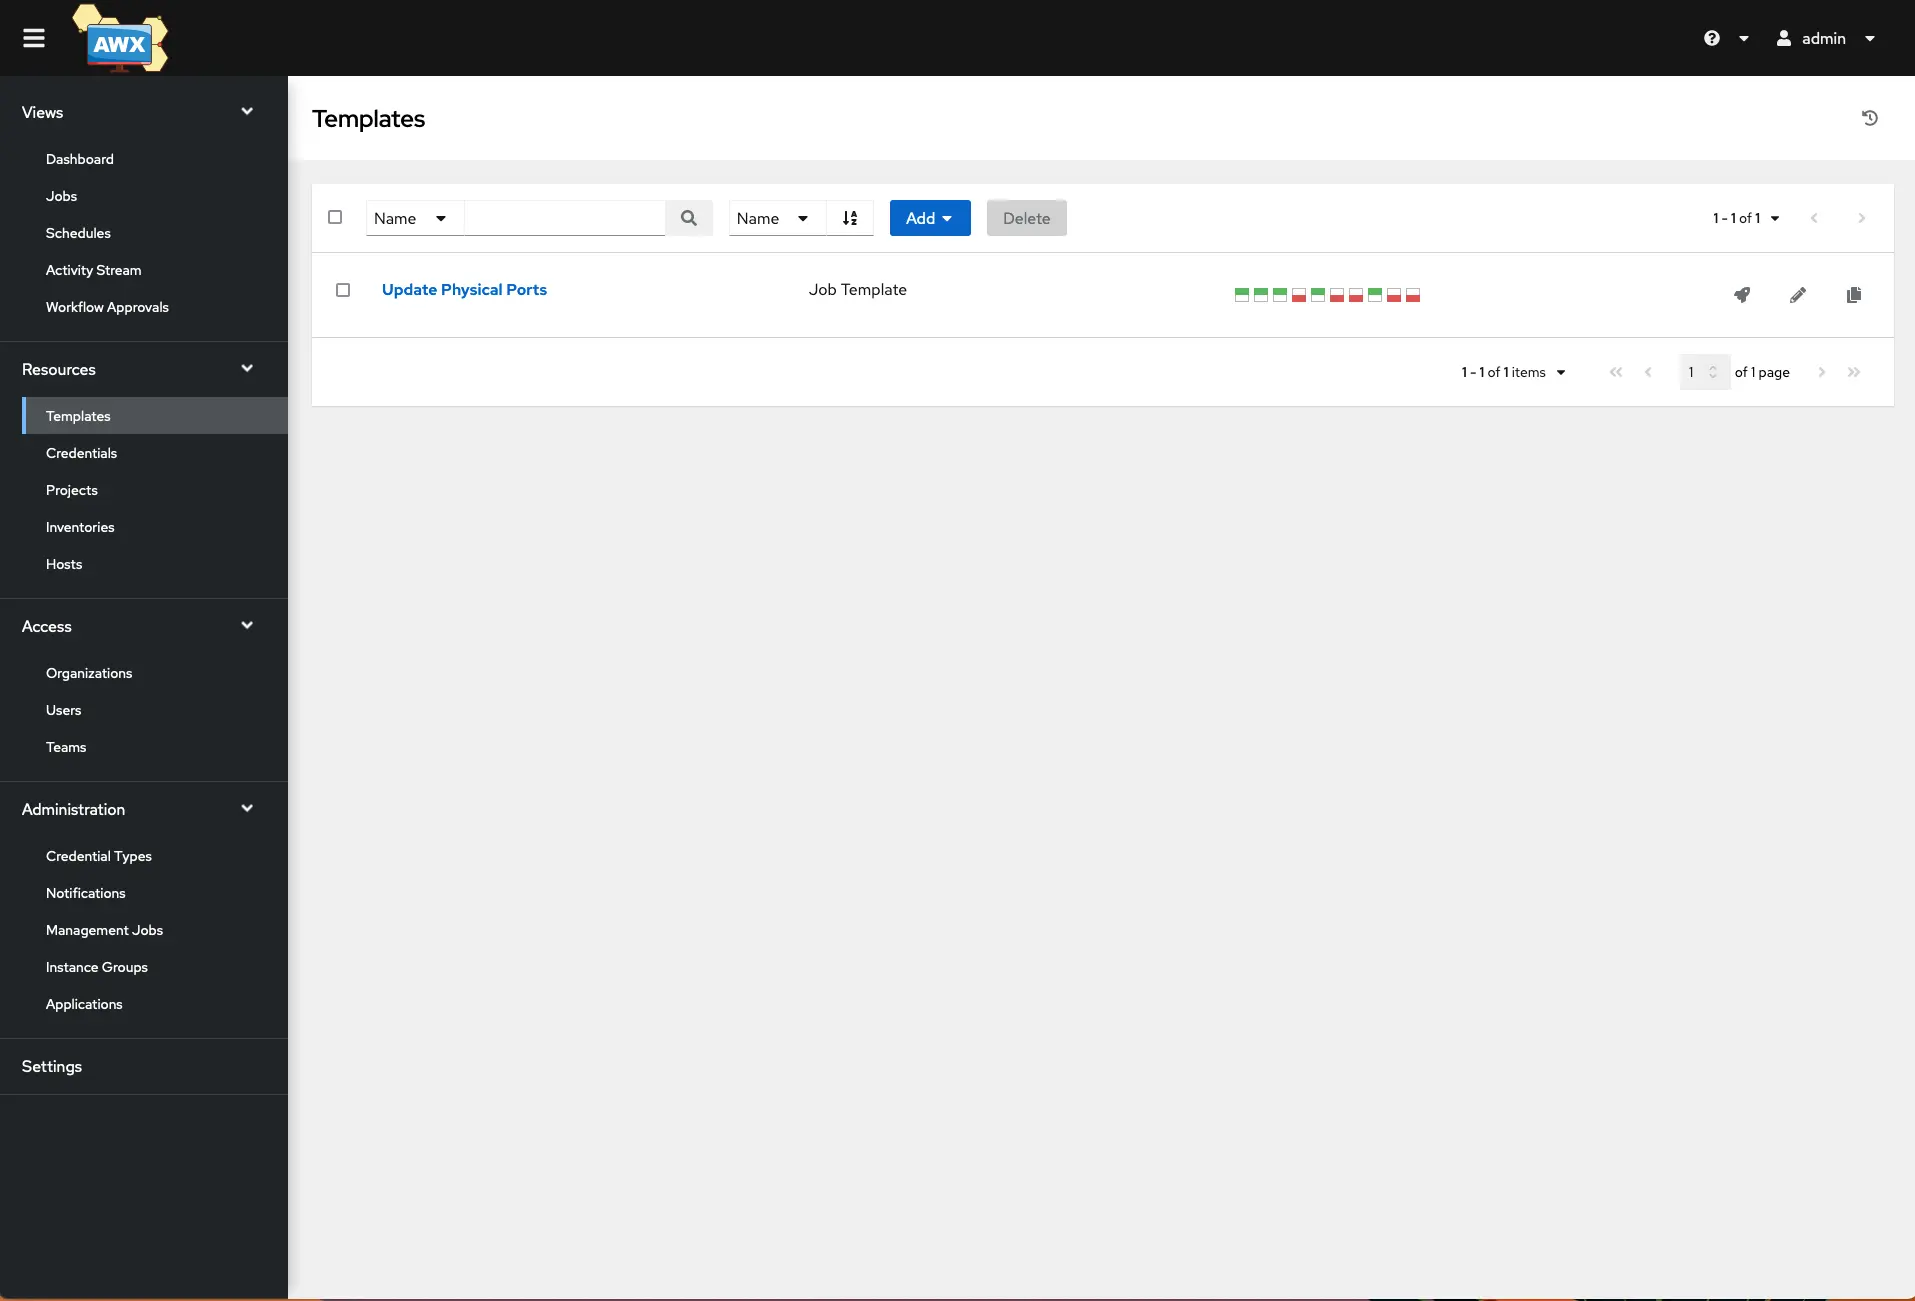
Add a new job and give it a name, the Job type should be “run”, inventory should be the inventory created earlier, the project will be the project that is syncing with the GitHub repo created earlier. The playbook should appear in the drop-down menu. The credentials should also appear in the search bar, select from the Machine category and click the radio button on your credentials. Click the check box next to Prompt on launch, and then click Save.

Now that our job template is created we need to update our Nautobot Webhook so that is pointing at the correct API endpoint. So open up a new tab on the browser and navigate to your AWX API http://awxhost/api/v2
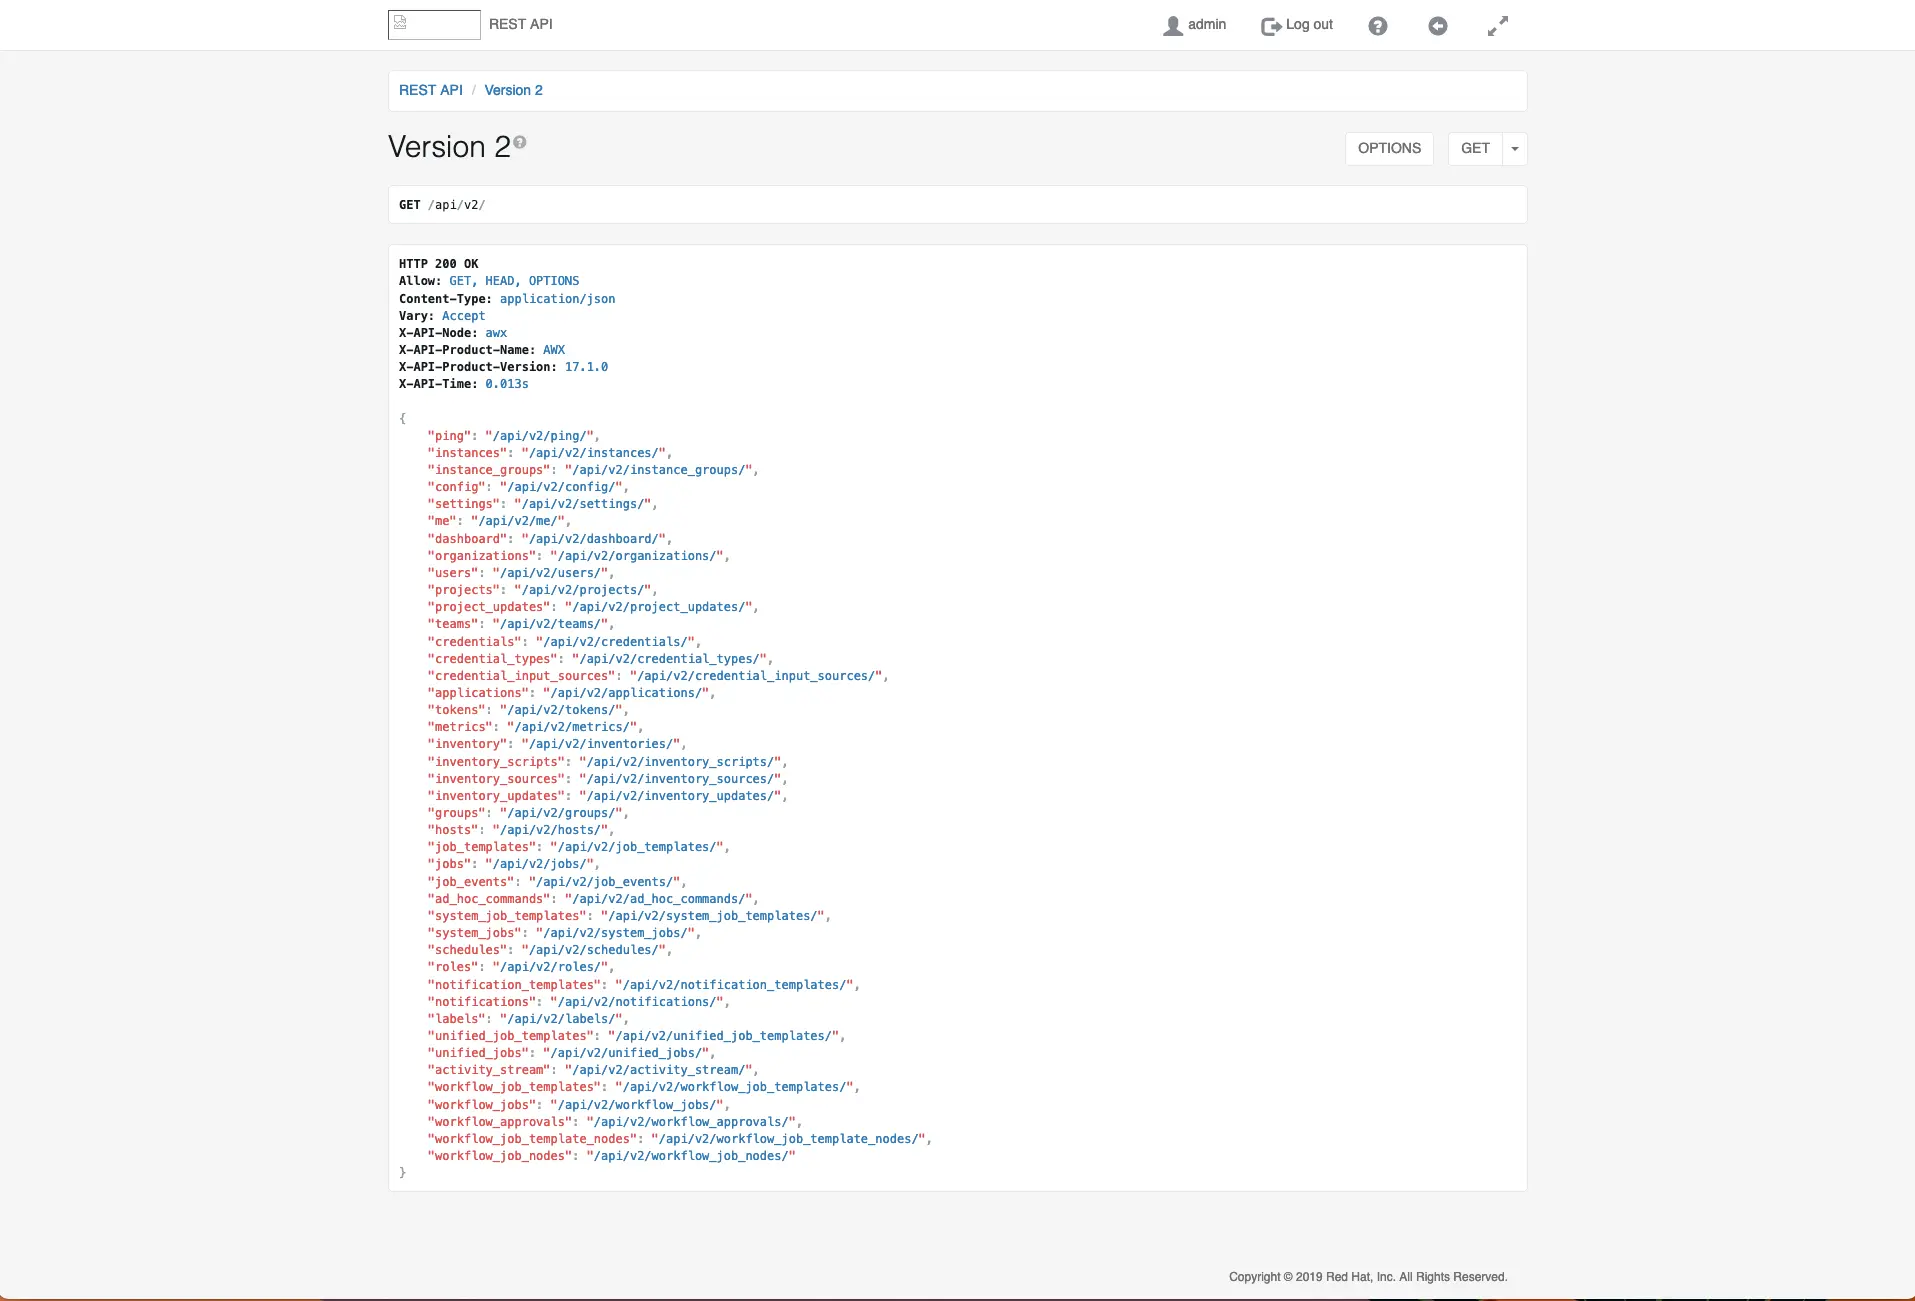
You will be presented with a list of endpoints. Select the job_templates about mid way down http://awxhost/api/v2/job_templates
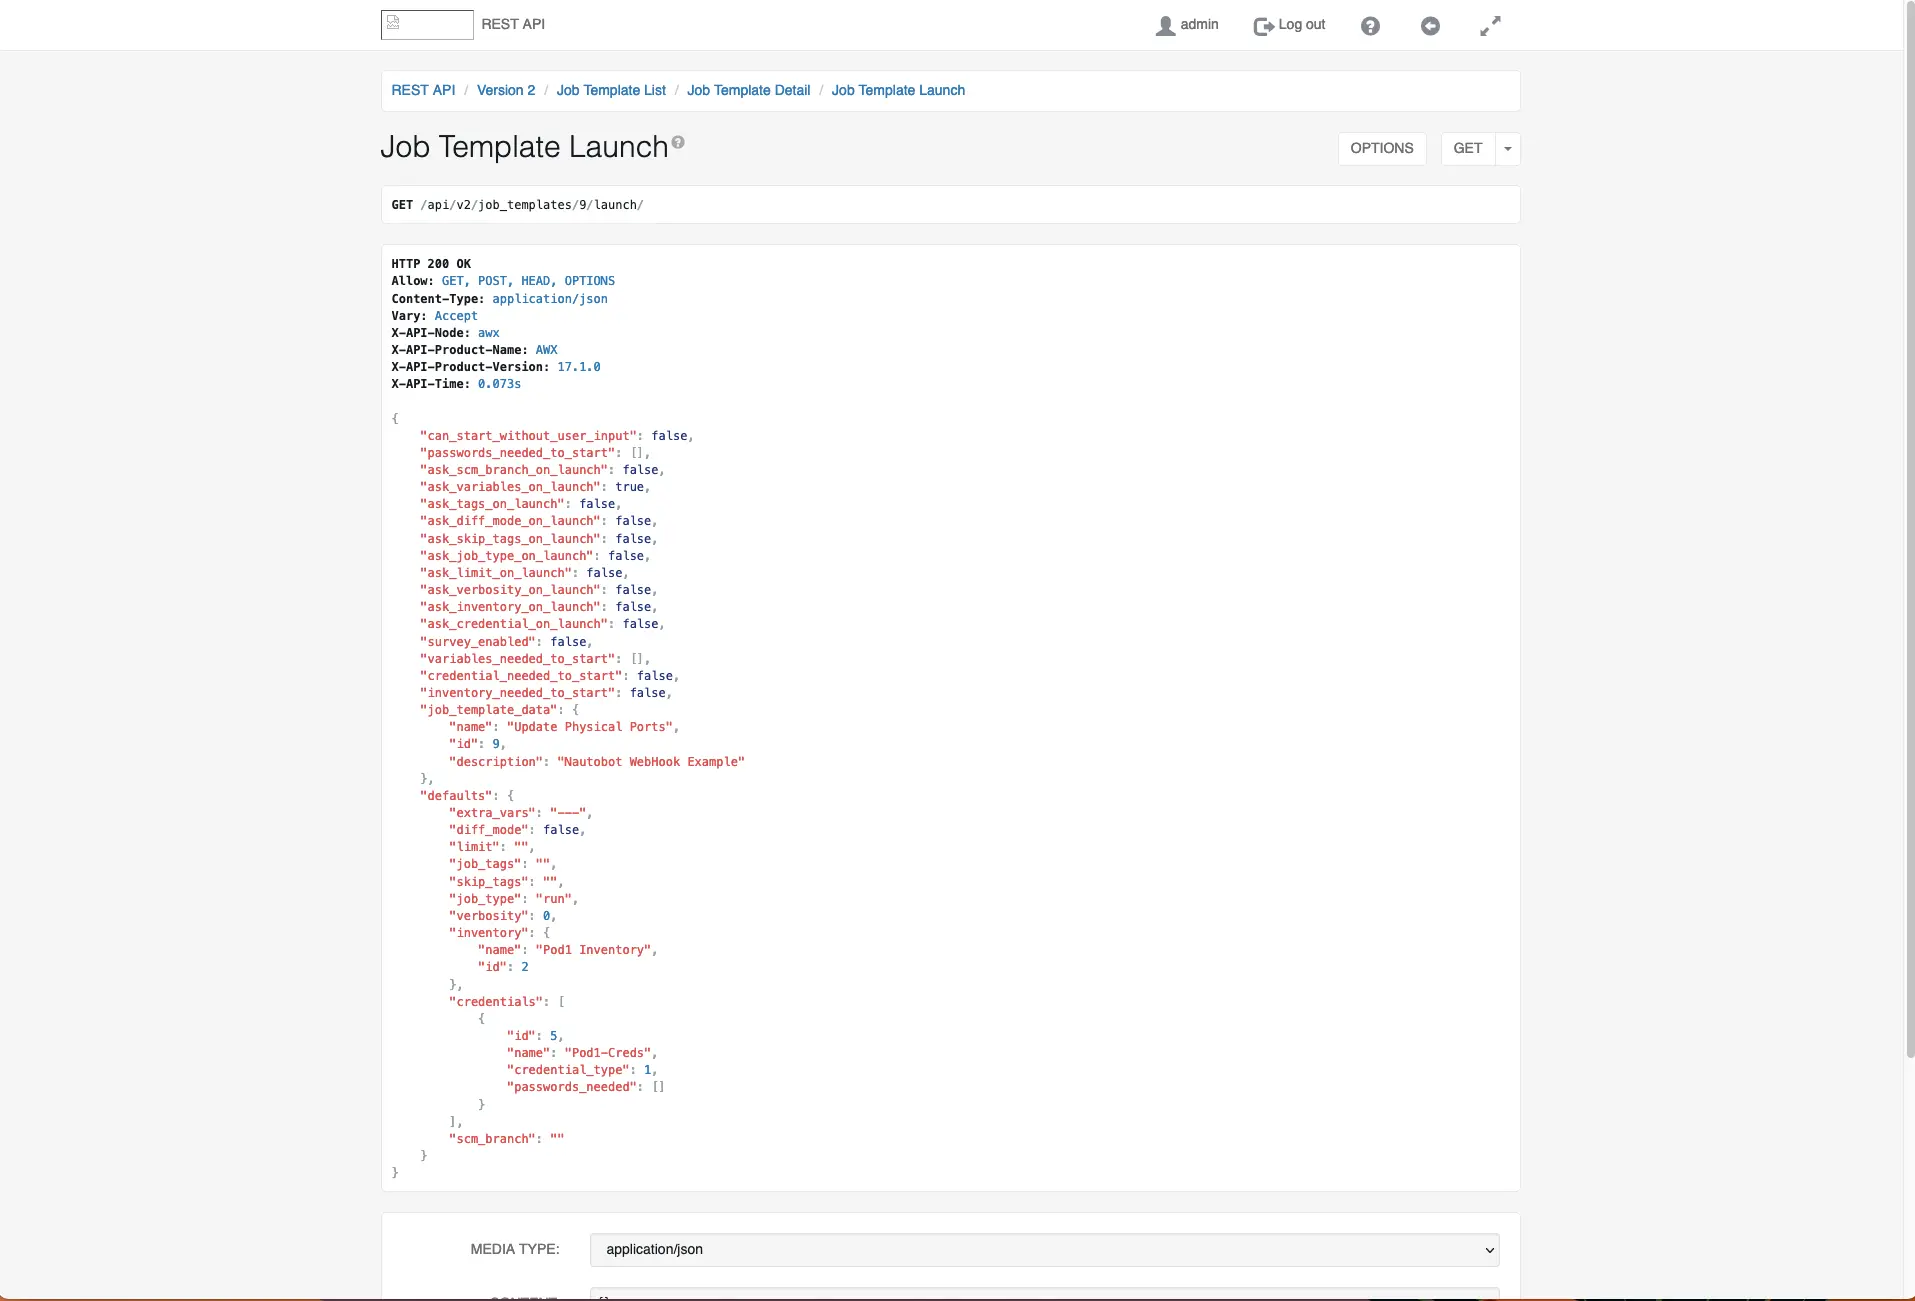
In this list you should have one job, however if there are more you want to look for the Project it is assigned to or even a description that you used for the Job Template, another way is to open the job template up in the AWX/Tower gui and look at the URL which will provde its number at the end http://awxhost/#/templates/job_template/9/details in my case it is job nine. Look for a link that says “Launch” http://awxhost/api/v2/job_templates/9/launch/. This is the URL that you need to place in your Nautobot webhook URL.
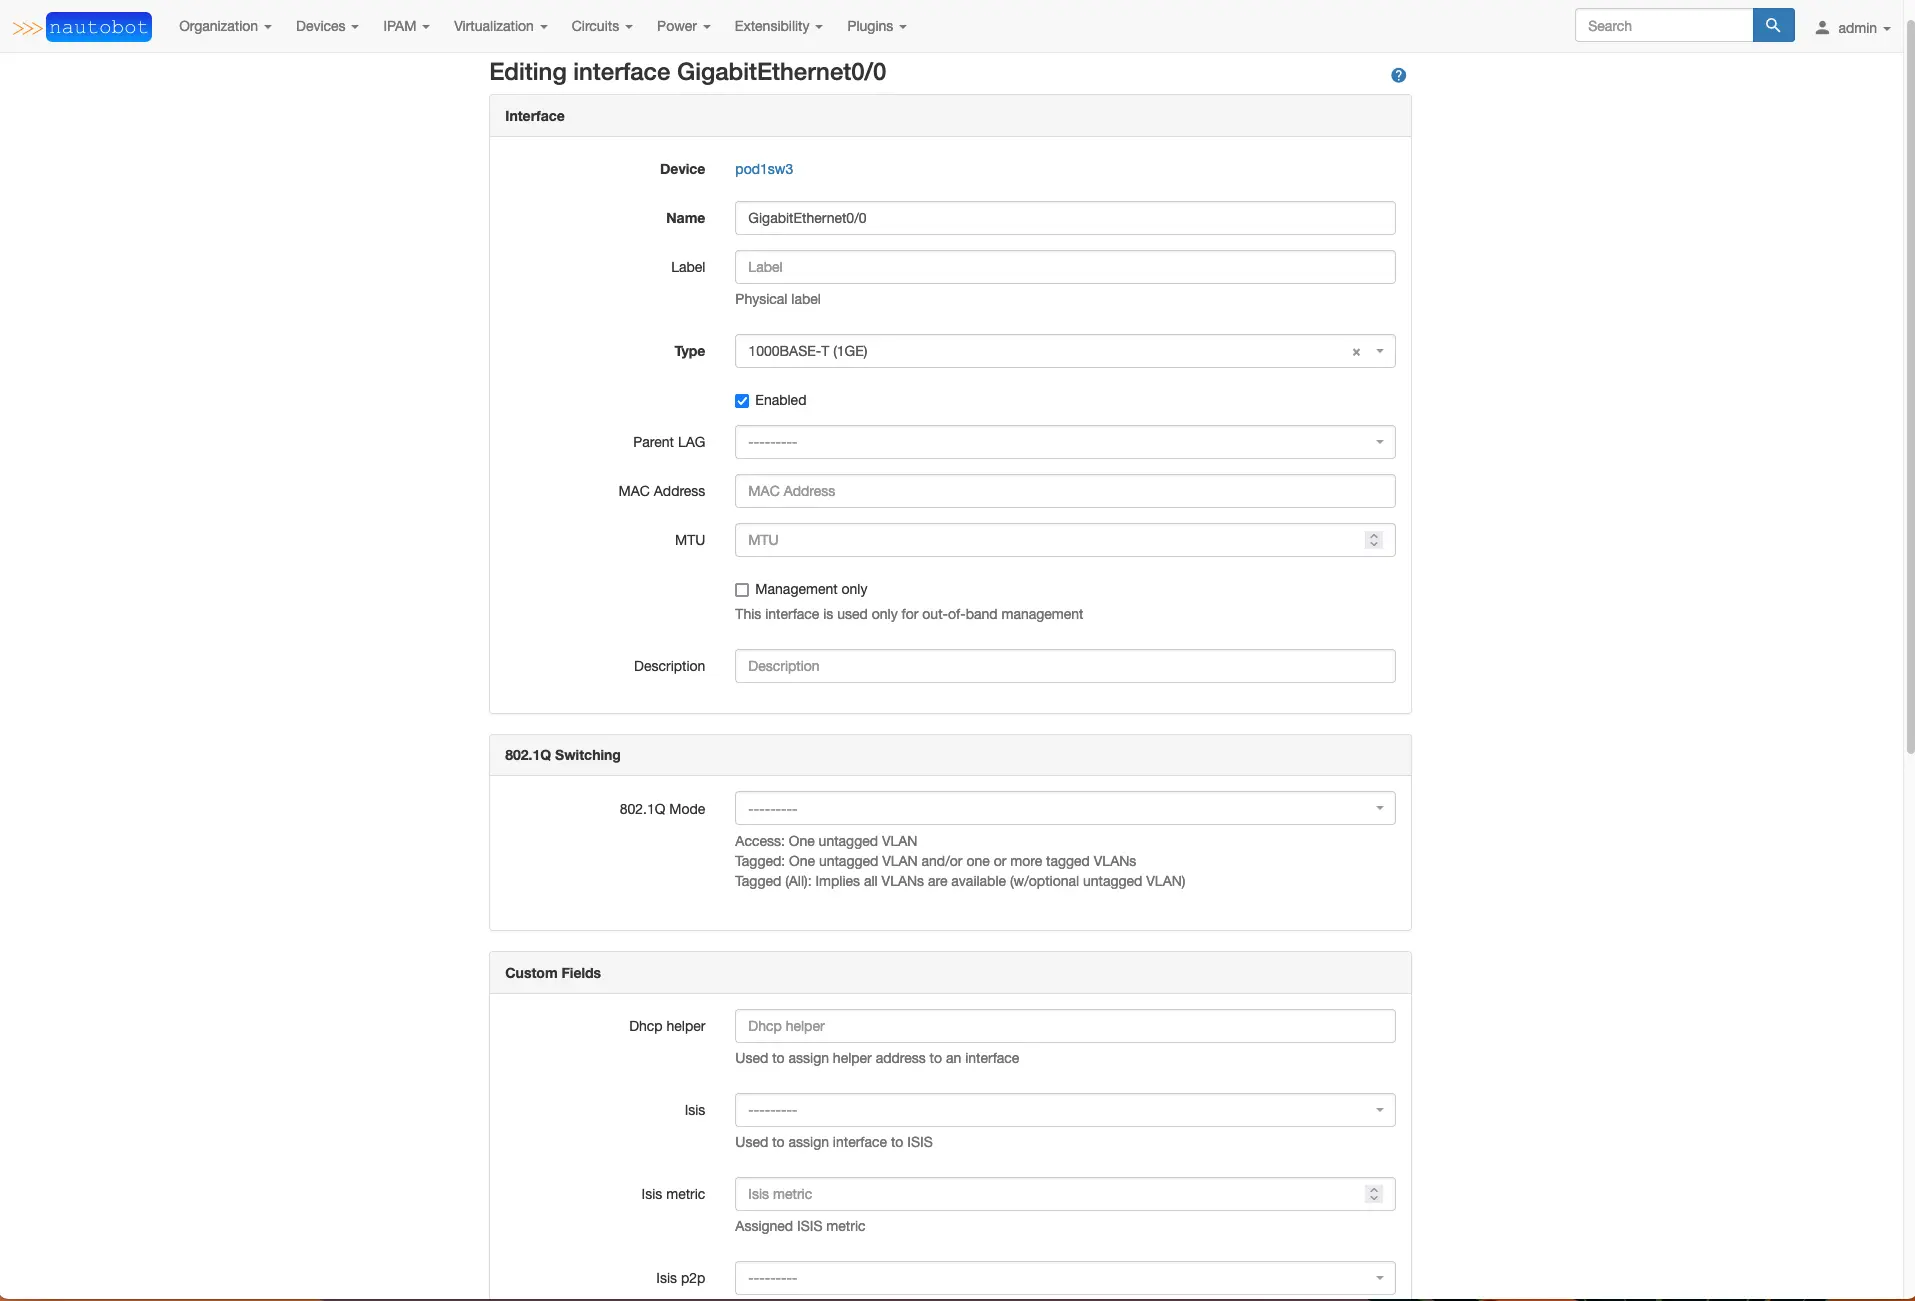
Ok, so we have several parts now put together, and it is time to test out if this works. Pick a device from Nautobot that is in your ansible inventory. Select the interface tab, and click the edit yellow edit button on interface GigabitEthernet0/0.
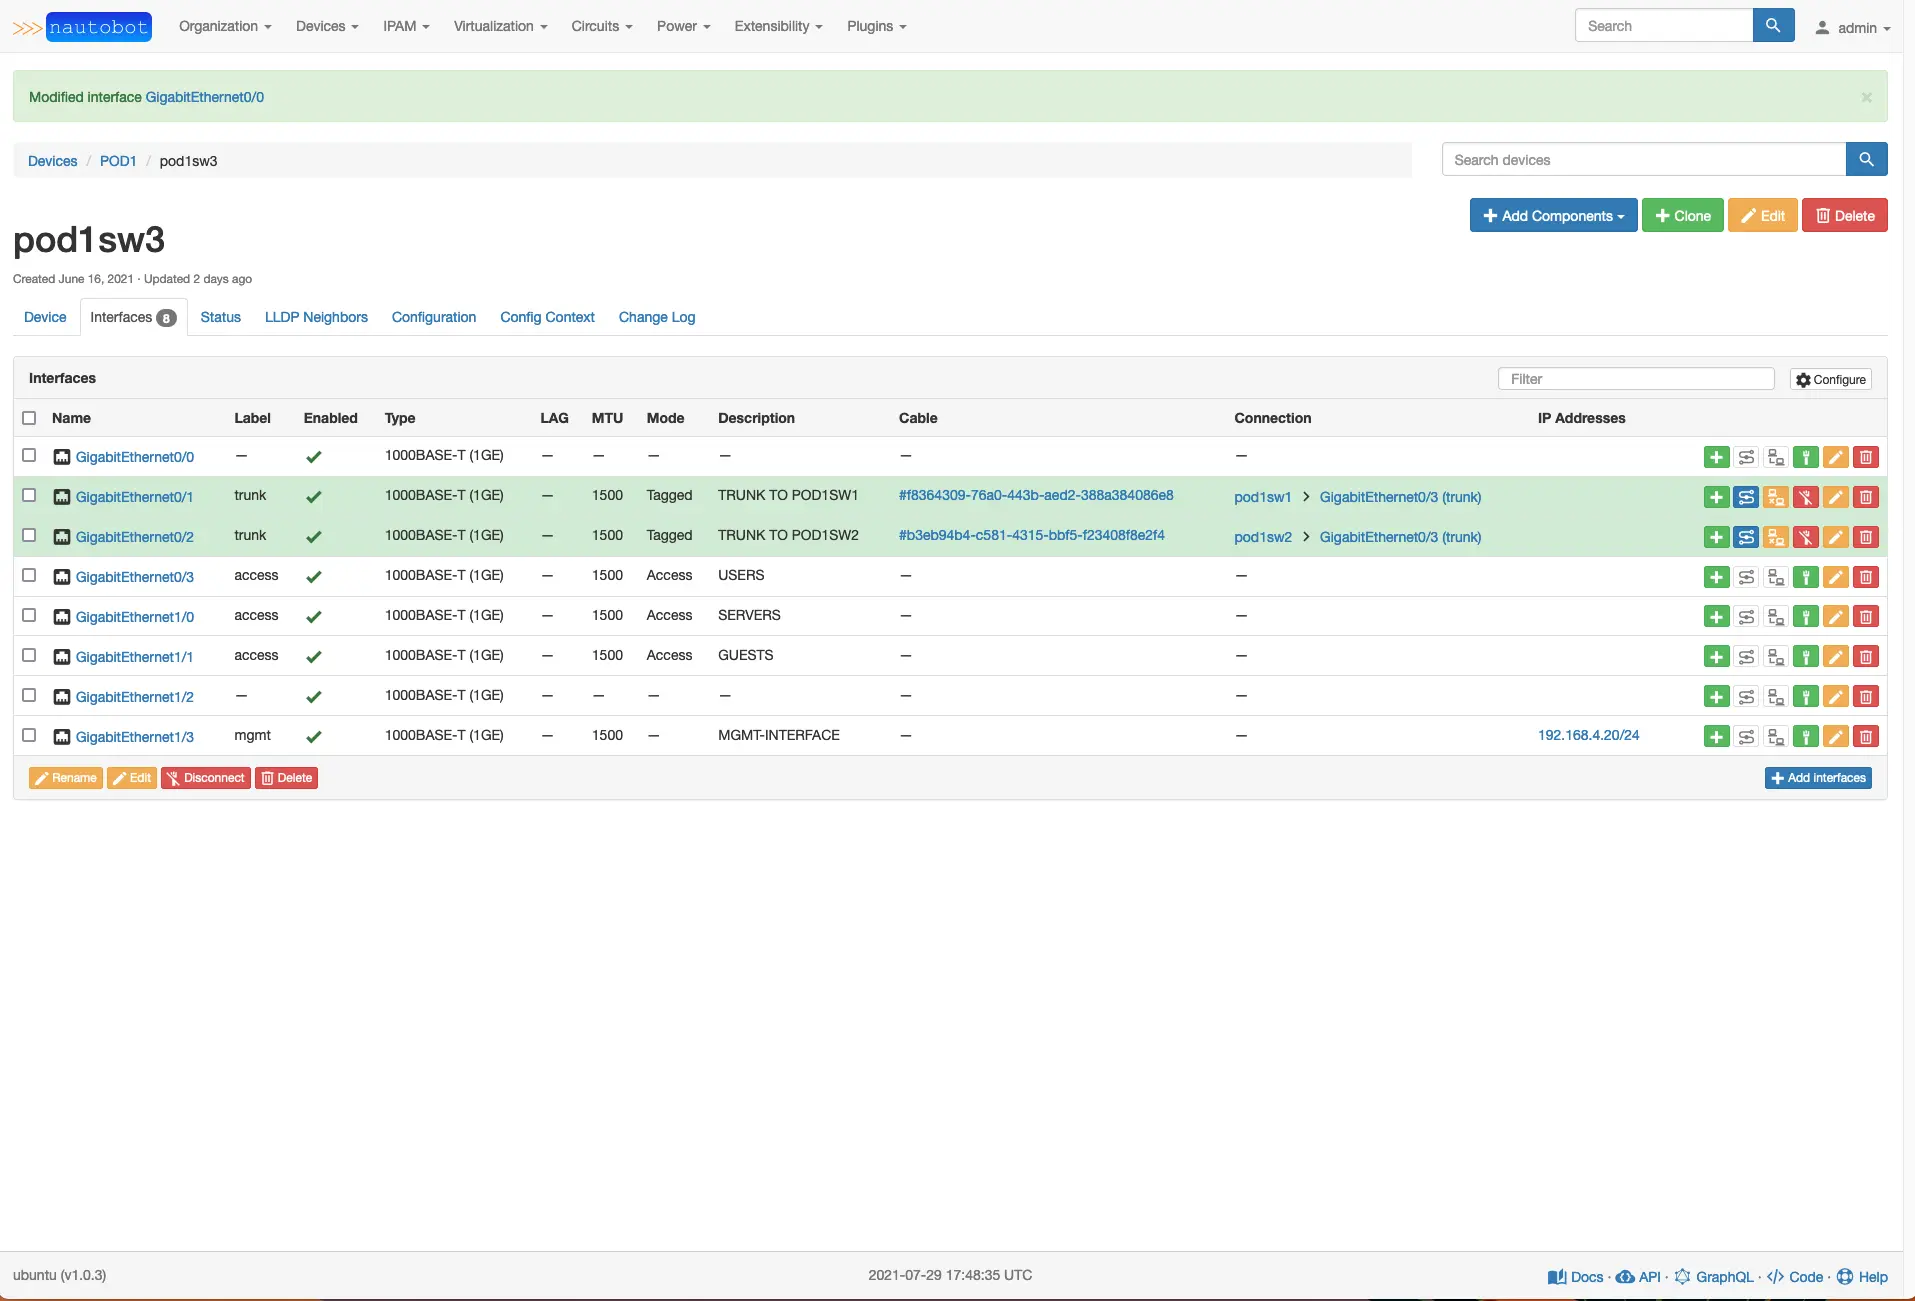
Let’s add an interface description and uncheck enabled because this is a user interface and should be shut down. When done, click update.
Head over to AWX/Tower and look at the Jobs tab on the top side menu.

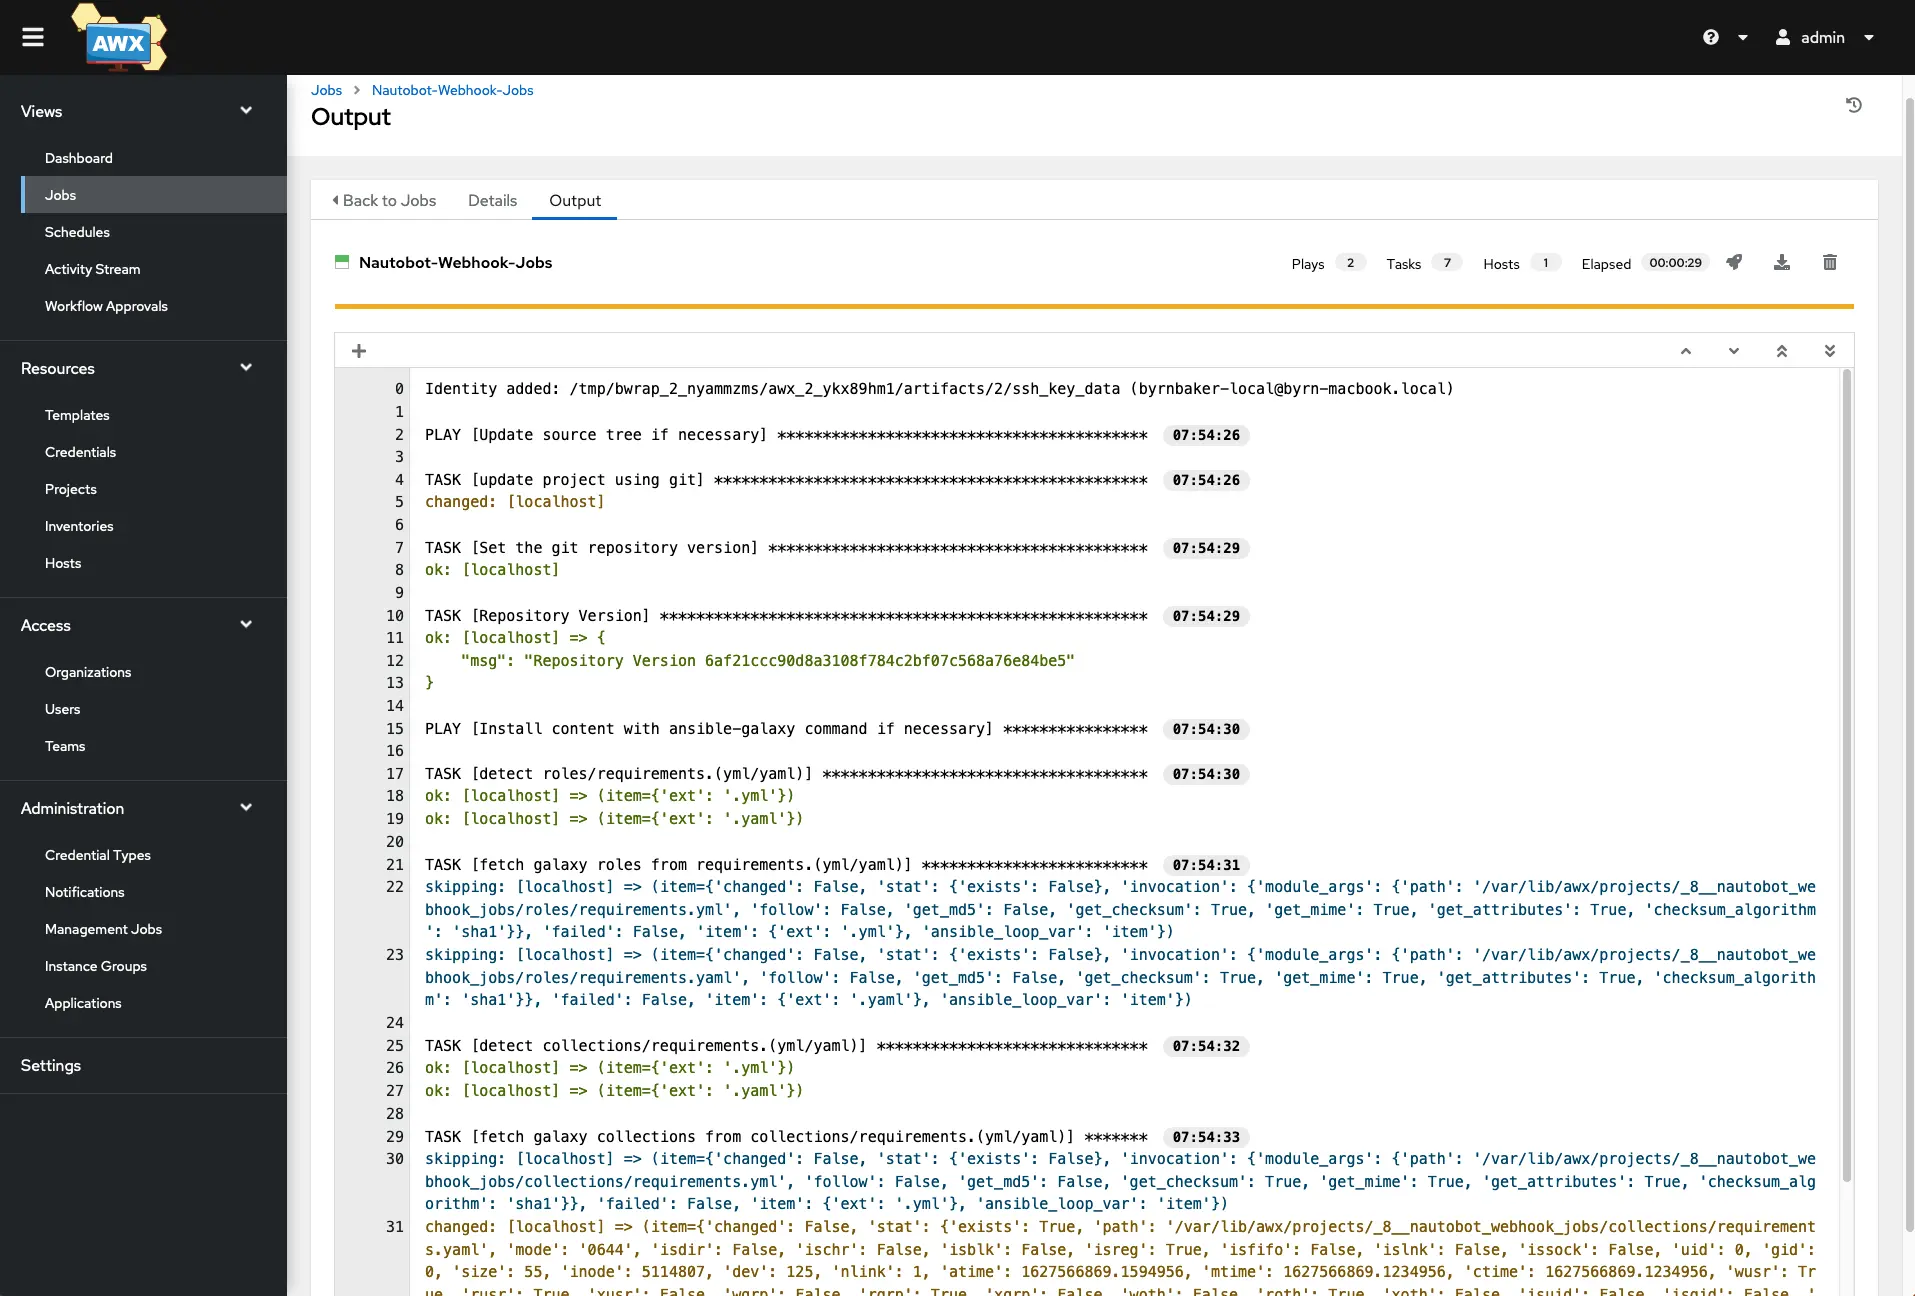
Click on the job that should be running to get its detailed output.
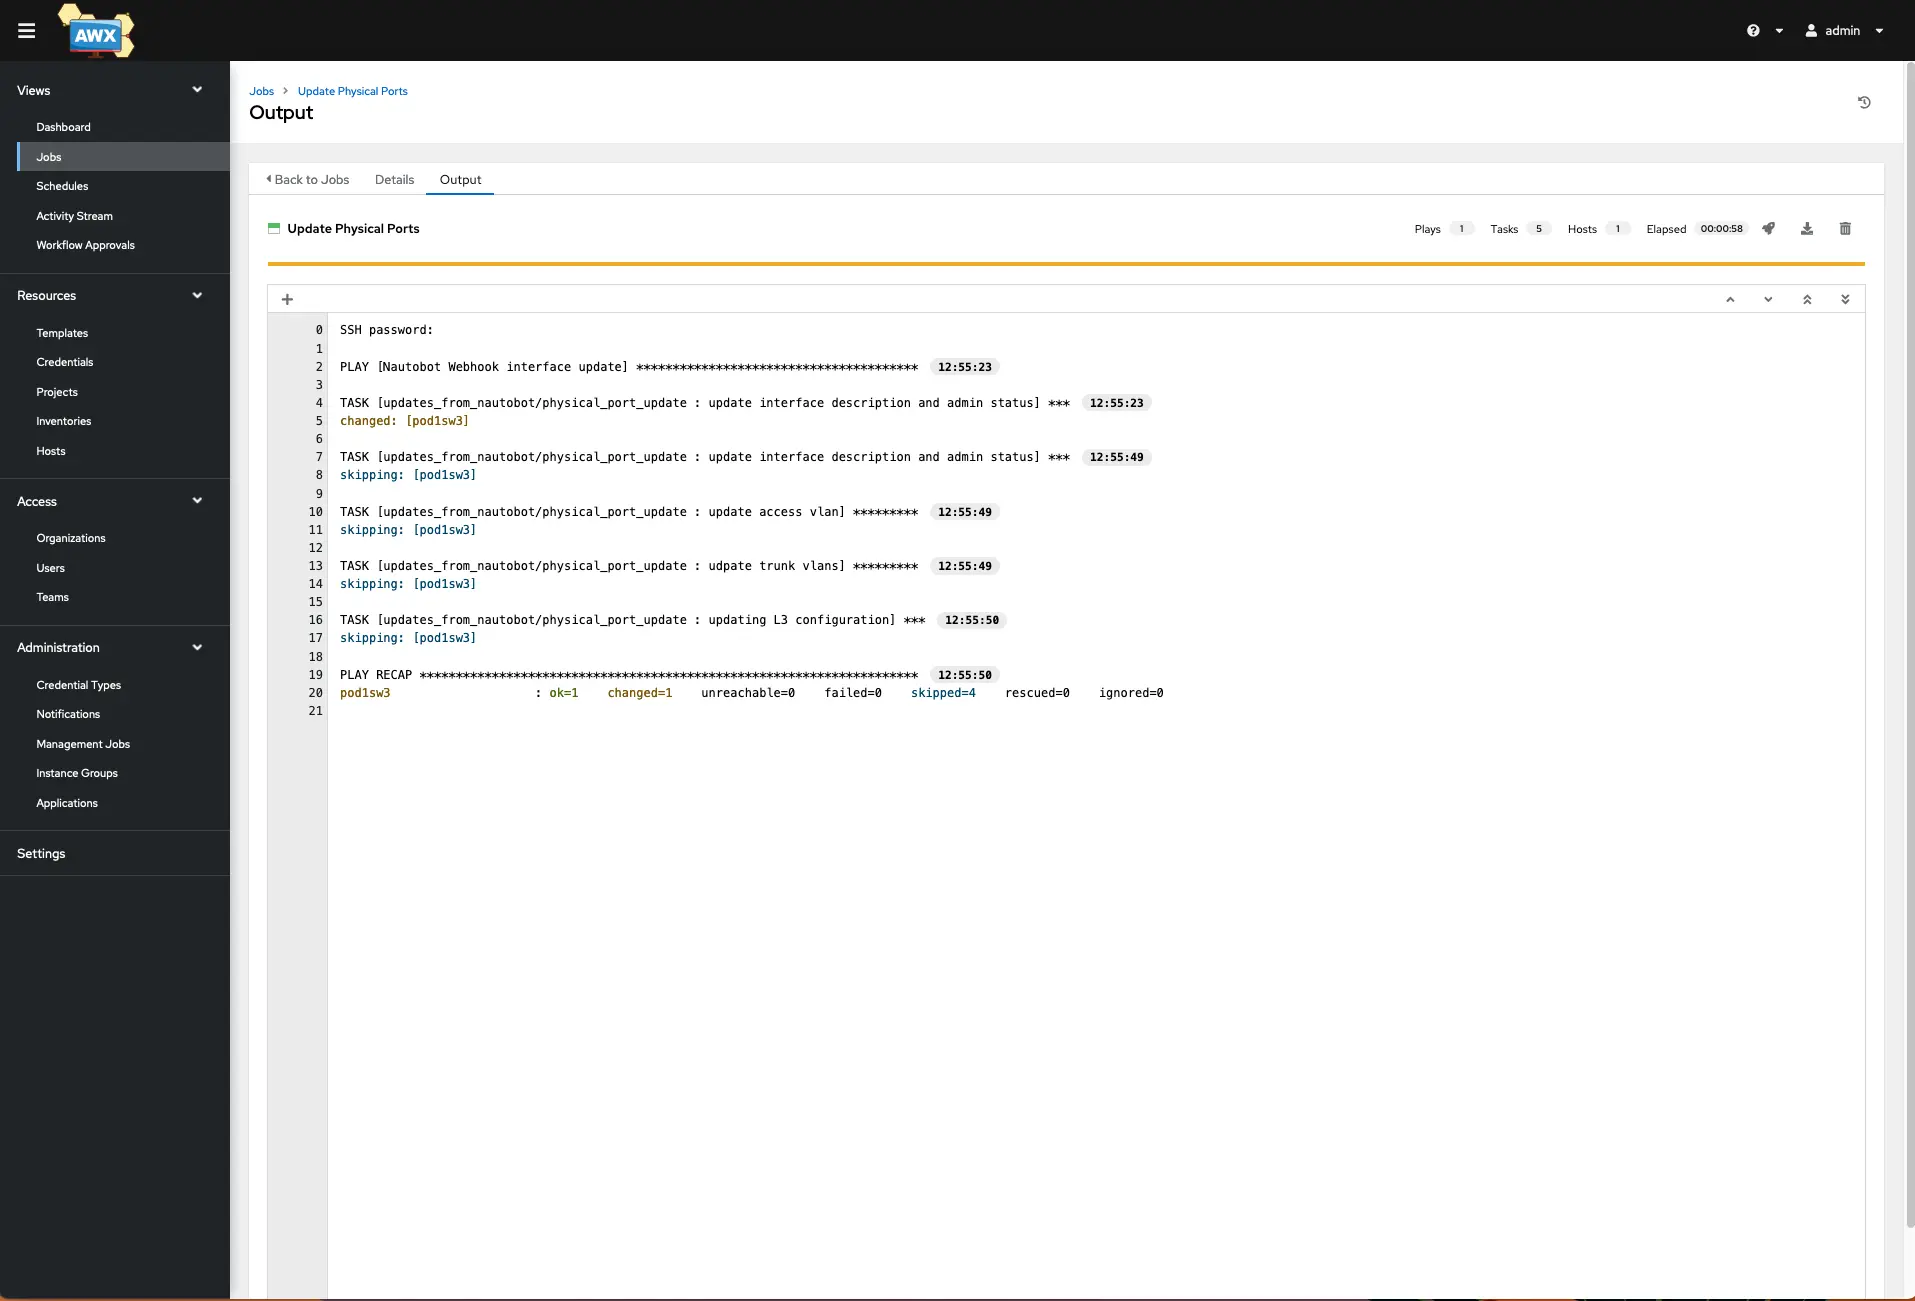
As it completes, you should see a similar output that you are used to seeing from Ansible in the terminal. It shows that a change was successful, so let’s take a look at the switch output.
1
2
3
4
5
6
7
8
9
10
11
pod1sw3#show int description
Interface                      Status         Protocol Description
Gi0/0                          admin down     down     NOT IN USE **SHUTDOWN**
Gi0/1                          up             up       TRUNK TO POD1SW1
Gi0/2                          up             up       TRUNK TO POD1SW2
Gi0/3                          up             up       USERS
Gi1/0                          down           down     SERVERS
Gi1/1                          down           down     GUESTS - Webhooks
Gi1/2                          down           down     NOT IN USE
Gi1/3                          up             up       MGMT-INTERFACE
pod1sw3#
Fantastic, we can see that the interface is now shut down with a new description. We have a method now to ensure that data inside of our Network Source of Truth can be reflected on the actual device, which can go a long way in ensuring that the drift between the source of truth and your device can be minimized.
So to finish up we should add a few more tasks to roles/updates_from_nautobot/physical_port_update/tasks/main.yaml which will handle things like chaning the MTU, VLAN assignments, the type of switchport (Access or Trunk), configure an IP address, DHCP Helper, or VRRP specific things.
We will use when: to evaluate if these tasks will need to be run each time we update an interface in Nautobot. For example
1
2
3
4
5
6
7
- name: update interface mtu
  cisco.ios.ios_interfaces:
    config:
    - name: ""
      mtu: ""
    state: replaced
  when: mtu != "None"
If you inspect the JSON data from our webhook receiver, you will notice that if MTU is empty is passed the word “None”. So we only want this task if the word “None” is not present. If it is present, then skip the task. This is an easy way to evaluate the required task and only run it if the requirement has been met.
Next will be Access ports
1
2
3
4
5
6
7
8
9
- name: update access vlan
  cisco.ios.ios_l2_interfaces:
    config:
    - name: ""
      mode: ""
      access:
        vlan: ""
    state: replaced
  when: mode == "access"
We want these tasks in the same playbook so that we can build a single Webhook for interface specific changes. This provides some sanity to the operations and makes troubleshooting much easier if something breaks.
Trunk Ports
1
2
3
4
5
6
7
8
9
10
- name: udpate trunk vlans
  cisco.ios.ios_l2_interfaces:
    config:
    - name: "{{ interface_id }}"
      mode: "{{ mode | replace('tagged', 'trunk') }}"
      trunk:
        allowed_vlans: "{{ tagged_vlans }}"
        native_vlan: "{{ untagged_vlan }}"
    state: replaced
  when: mode == "tagged"
To update Layer3 port configurations I will employ a Jinja Template to accomplish this task. There is no module to handle VRRP changes so I felt this was a good approach to demonstrate how to put this together.
When setting up Nautobot we assigned a label to each interface to help identify it for our Jinja templates, so we will use that label to trigger this task.
1
2
3
4
5
- name: updating L3 configuration
  cisco.ios.ios_config:
    src: l3_interface.j2
    save_when: always
  when: label == "layer3"
Inside of our Role folder we need to add a template folder and our templateroles/updates_from_nautobot/physical_port_update/templates/l3_interface.j2.
1
2
3
4
5
6
7
8
9
10
11
12
13
14
#jinja2: lstrip_blocks: "True (or False)", trim_blocks: "True (or False)"
interface {{ interface_id }}
 {% if dhcp_helper %}
 no ip helper-address
 ip helper-address {{ dhcp_helper }}
 {% else %}
 no ip helper-address
 {% endif %}
 {% if vrrp_group != "None"%}
 vrrp {{ vrrp_group }} description {{ vrrp_description }}
 vrrp {{ vrrp_group }} ip {{ vrrp_primary_ip }}
 vrrp {{ vrrp_group }} timers learn
 vrrp {{ vrrp_group }} priority {{ vrrp_priority }}
 {% endif %}
This is just one small way you can use Webhooks with Ansible AWX/Tower and hopefully this opens up some ideas for you to try and move your automation journey forward. Go forth and Automate those simple things.