Nautobot Workshop Blog Series - Part 7 - Nautobot Golden Configuration - Configuration Backups

Nautobot Workshop Blog Series
Nautobot Workshop is a hands-on blog series for building a fully automated network lab using Nautobot, Containerlab, and Docker. Starting with a basic Ubuntu setup, each post walks through:
- Deploying Nautobot via
nautobot-docker-compose - Modeling topologies with Containerlab and vrnetlab routers
- Populating Nautobot with real device data using Ansible
- Generating configurations with Jinja2 templates
- Enforcing compliance with the Golden Config plugin
- Leveraging Nautobot’s GraphQL API for dynamic inventory
This series is perfect for network engineers aiming to combine source of truth, automation, and simulation in a streamlined workflow.
🚀 All project files are available in this GitHub repo
Part 7 - Nautobot Golden Configuration - Configuration Backups
Now that we have our containerlabs topology fully functions with a base configuration, we can walk through setting up the Nautobot Golden Configuration application and perform a configuration backup of each node.
You can read more about the Nautobot Golden Configuration App here.
Before configuring any of the Golden Configuration setting we need to create a Git token secret and github repo inside our Nautobot sandbox. Navigate over to the Secrets menu and select the blue plus sign creating a new secret. Provide a name and in the provider section use Environment Variable, and in the parameters sections under “Form” type in the variable being used for you github token. 
When creating a token in github make sure the token can read and write to your repositories. The Nautobot Golden Configuration App will place files into this repository when performing backups of your router configs. The environment variables will need to be placed in your
nautobot-docker-compose/environments/creds.envfile. You will need the following:
- GITHUB_TOKEN=!your token here!
- NAPALM_USERNAME=admin
- NAPALM_PASSWORD=admin
- DEVICE_SECRET=admin The Napalm user and password will be used by the Golden Configuration application to log in to your routers.
Next create a secrets group by using the blue plus sign and from the Access type drop down select HTTP(s), from the secrets type use “token”, and select your github secret from the Secrets dropdown. 
Now click the Extensibility menu and then the Git Repositories blue plus sign under “DATA SOURCES” to add your github repository.
Give a name and in the remote URL use the HTTP option from the github green code button under Local Clone. Use the branch where you would like to keep this data, and then select all of the “provides” you would like to sync between nautobot and this repository.
Create three repositories for the Jinja templates, intended configs, and backup configs, or you can fork mine tempaltes, intended-configs, backup-configs. Select the appropriate provides for each one.
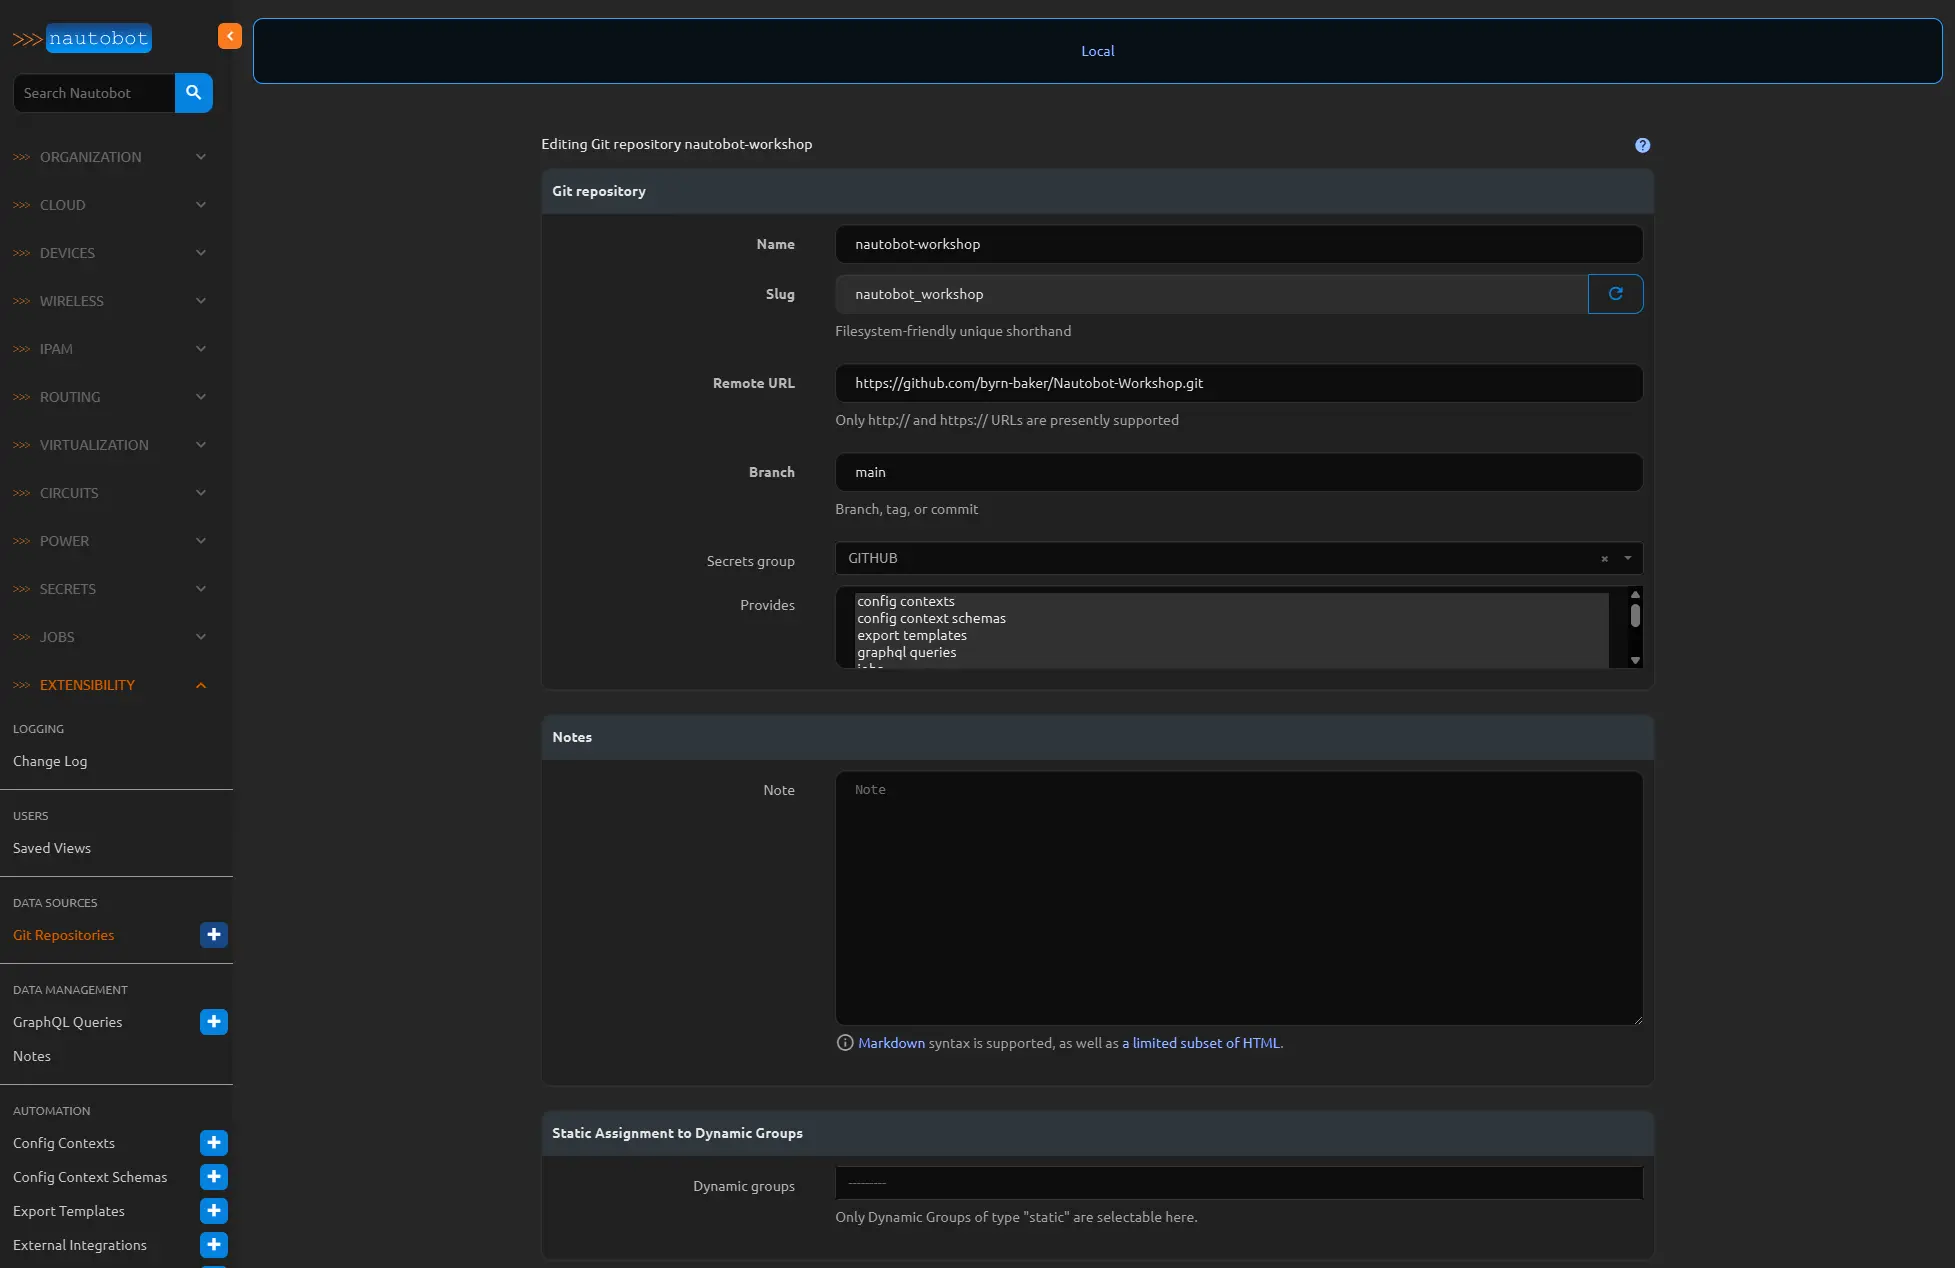
You can use a single repo for this, however seperate repos for each of the Gold Config provides is a little easier to manage in the long run.
At the bottom click the create & sync button. If all goes well you should see a completed status on this job. 
We need to create a graphql that will be used to pull the data, the Golden Configuration documentation provides one, but we have our own from the work we did in Ansible, so we will just use that one because it works perfectly with our templates already. Under Extensibility click the blue plus sign on GraphQL Queries, give it a name and paste the query.

1
2
3
4
5
6
7
8
9
10
11
12
13
14
15
16
17
18
19
20
21
22
23
24
25
26
27
28
29
30
31
32
33
34
35
36
37
38
39
40
41
42
43
44
45
46
47
48
49
50
51
52
53
54
55
56
57
58
59
60
61
62
63
64
65
66
67
68
69
70
71
72
73
74
75
76
77
78
79
80
81
82
83
84
85
86
87
88
89
90
91
92
93
94
95
96
97
98
99
100
101
102
103
104
105
106
107
108
109
110
111
112
113
114
115
116
117
118
119
120
121
122
123
124
125
126
127
128
129
130
131
132
133
134
135
136
137
138
139
140
141
142
143
144
145
146
147
148
149
150
151
152
153
154
155
156
157
158
159
160
161
162
163
164
165
166
167
168
169
170
171
172
173
174
175
176
query ($device_id: ID!) {
    device(id: $device_id) {
      hostname: name
      config_context
      bgp_routing_instances {
      extra_attributes
      autonomous_system {
        asn
      }
      address_families {
        afi_safi
        extra_attributes
      }
      peer_groups {
        name
        source_interface {
          name
        }
        autonomous_system {
          asn
        }
        extra_attributes
        secret {
          name
        }
        address_families{
          import_policy
          export_policy
          extra_attributes
        }
        peergroup_template {
          autonomous_system {
            asn
          }
          extra_attributes
        }
        address_families {
          afi_safi
          import_policy
          export_policy
        }
      }
      endpoints {
        peer_group {
          name
        }
        source_ip {
          address
        }
        source_interface {
            name
          }
        description
        peer {
          description
          source_ip {
            address
          }
          address_families {
            afi_safi
            import_policy
            export_policy
          }
          autonomous_system {
            asn
          }
          routing_instance {
            autonomous_system {
              asn
            }
          }
        }
      }
    }
      position
      serial
      role {
        name
      }
      primary_ip4 {
        id
        primary_ip4_for {
          id
          name
        }
      }
      tenant {
        name
      }
      tags {
        name
      }
      role {
        name
      }
      platform {
        name
        network_driver
        manufacturer {
          name
        }
        network_driver
        napalm_driver
      }
      location {
        name
        vlans {
          name
          vid
          vlan_group {
            name
          }
        }
        parent {
          name
          vlans {
          name
          vid
          vlan_group {
            name
          }
        }
        }
      }
      interfaces {
        name
        description
        mac_address
        enabled
        mgmt_only
        label
        lag {
          name
        }
        cf_ospf_network_type
        cf_ospf_area
        cf_mpls_enabled
        cf_vrrp_group_id
        cf_vrrp_ipv4_enabled
        cf_vrrp_ipv6_enabled
        cf_vrrp_disabled
        cf_vrrp_preempt
        cf_vrrp_priority_level
        cf_vrrp_advertisement_interval
        cf_vrrp_bfd_enabled
        cf_vrrp_mac_advertisement_interval
        cf_vrrp_peer_address
        cf_vrrp_session_name
        cf_vrrp_timer_interval
        cf_vrrp_tracked_object
        ip_addresses {
          address
          tags {
            id
          }
        }
        mode
        tagged_vlans {
          vid
        }
        untagged_vlan {
          vid
        }
        connected_interface {
          name
          device {
            name
          }
        }
        cf_mlag_interface
        tags {
          id
        }
      }
    }
  }
Now select the Golden Config Settings under the Golden Config menu, there should already be a settings called “default”. We will use this for our example. Click on this and edit using the edit button on the top right. Under the Backup Configuration section from the backup repository drop down choose the repository we just created, and for the backup path we will use this in our form - /.cfg. We can leave the Backup Test checked. Under the Templates Configuration section in the SOT AGG Query dropdown choose the graphql we just created above. Once done click update.
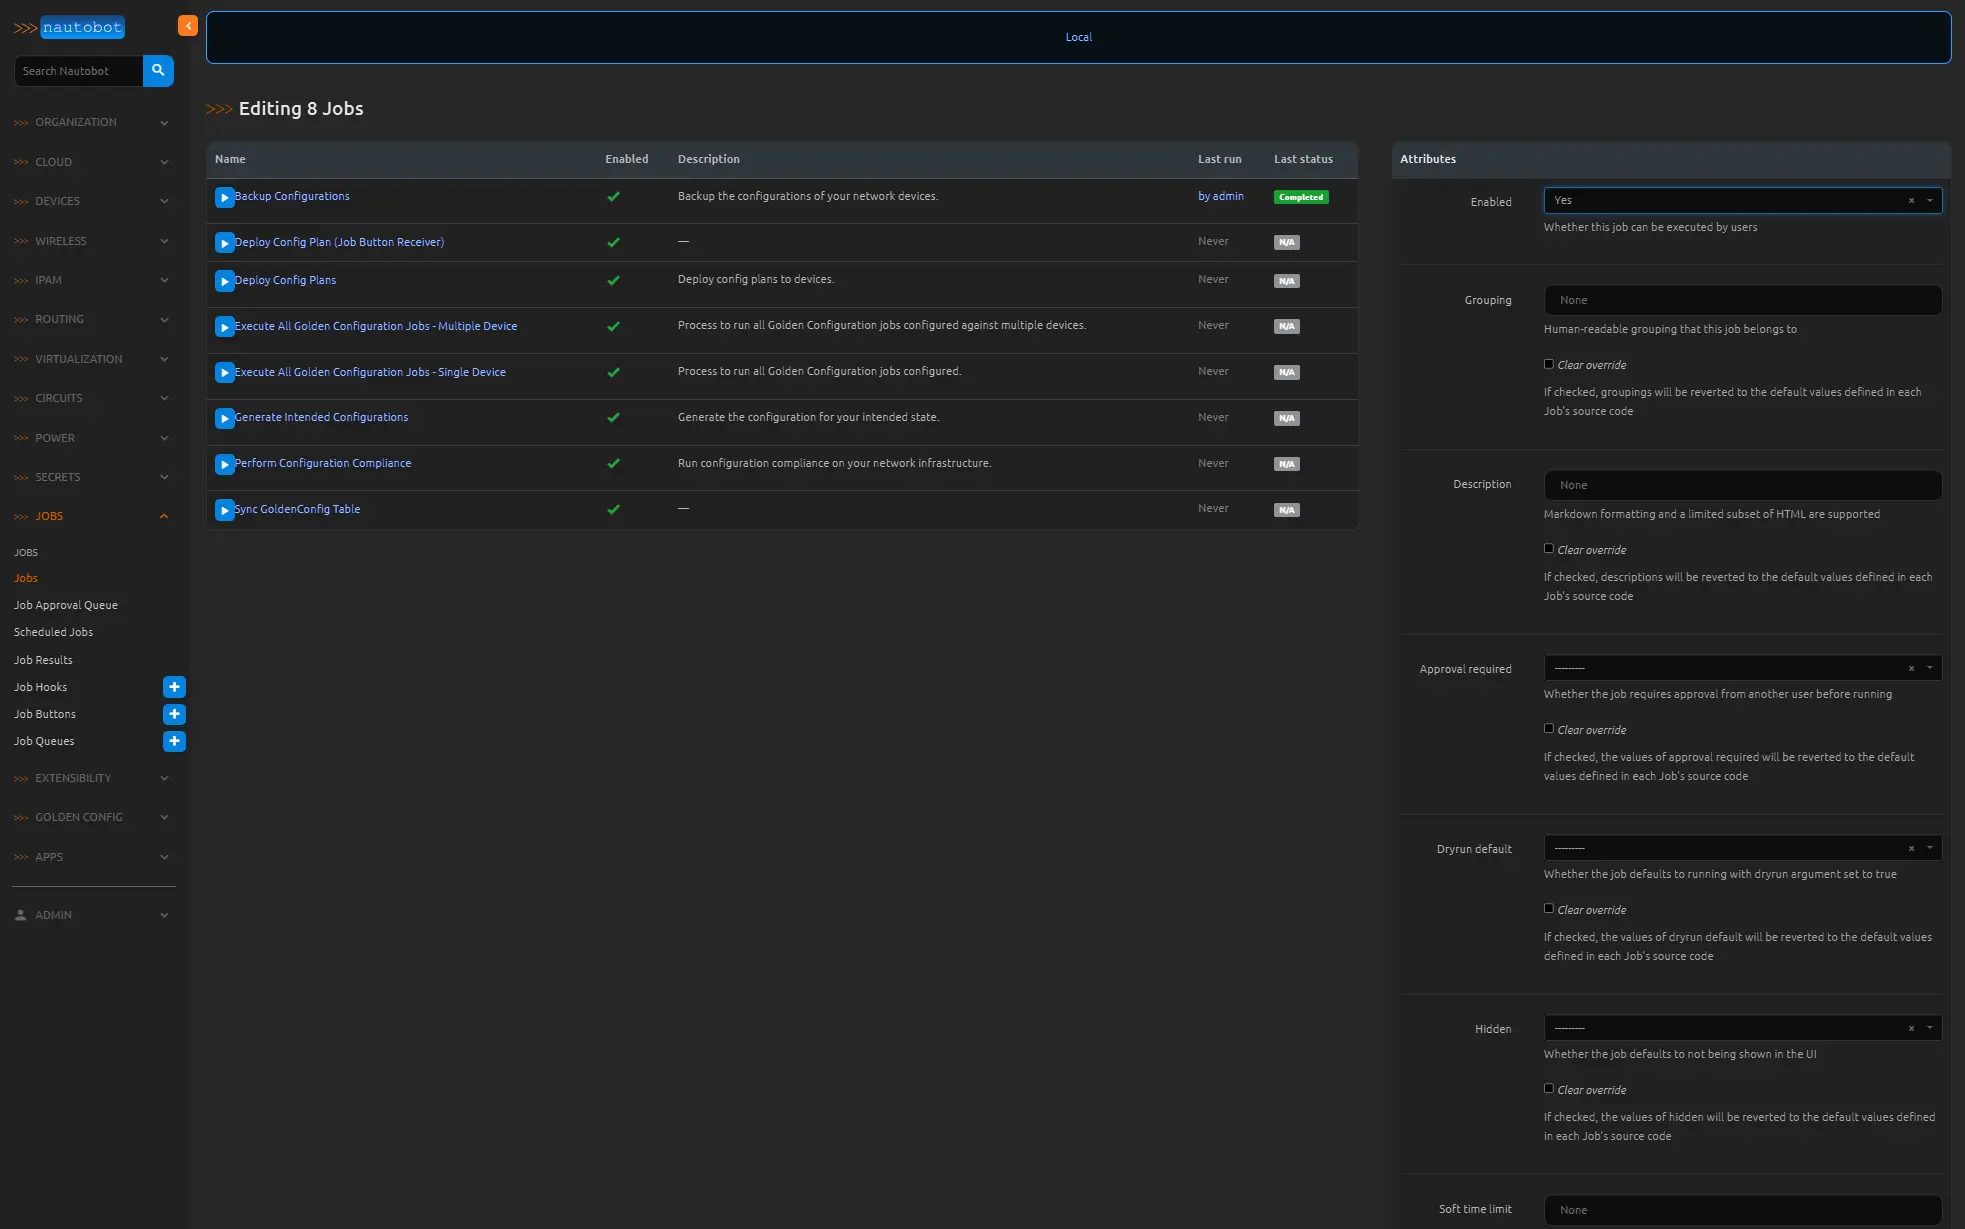
Now navigate over to the JOBS menu and select Jobs. We will need to enable all of the Nautobot Golden Configuration Jobs so that we can use them later and the Backup configs job now. Select each one by checking each check mark, and clicking edit at the bottom left of the page (edit selected). On the top choose YES in the attributes called Enabled and click apply at the bottom right. 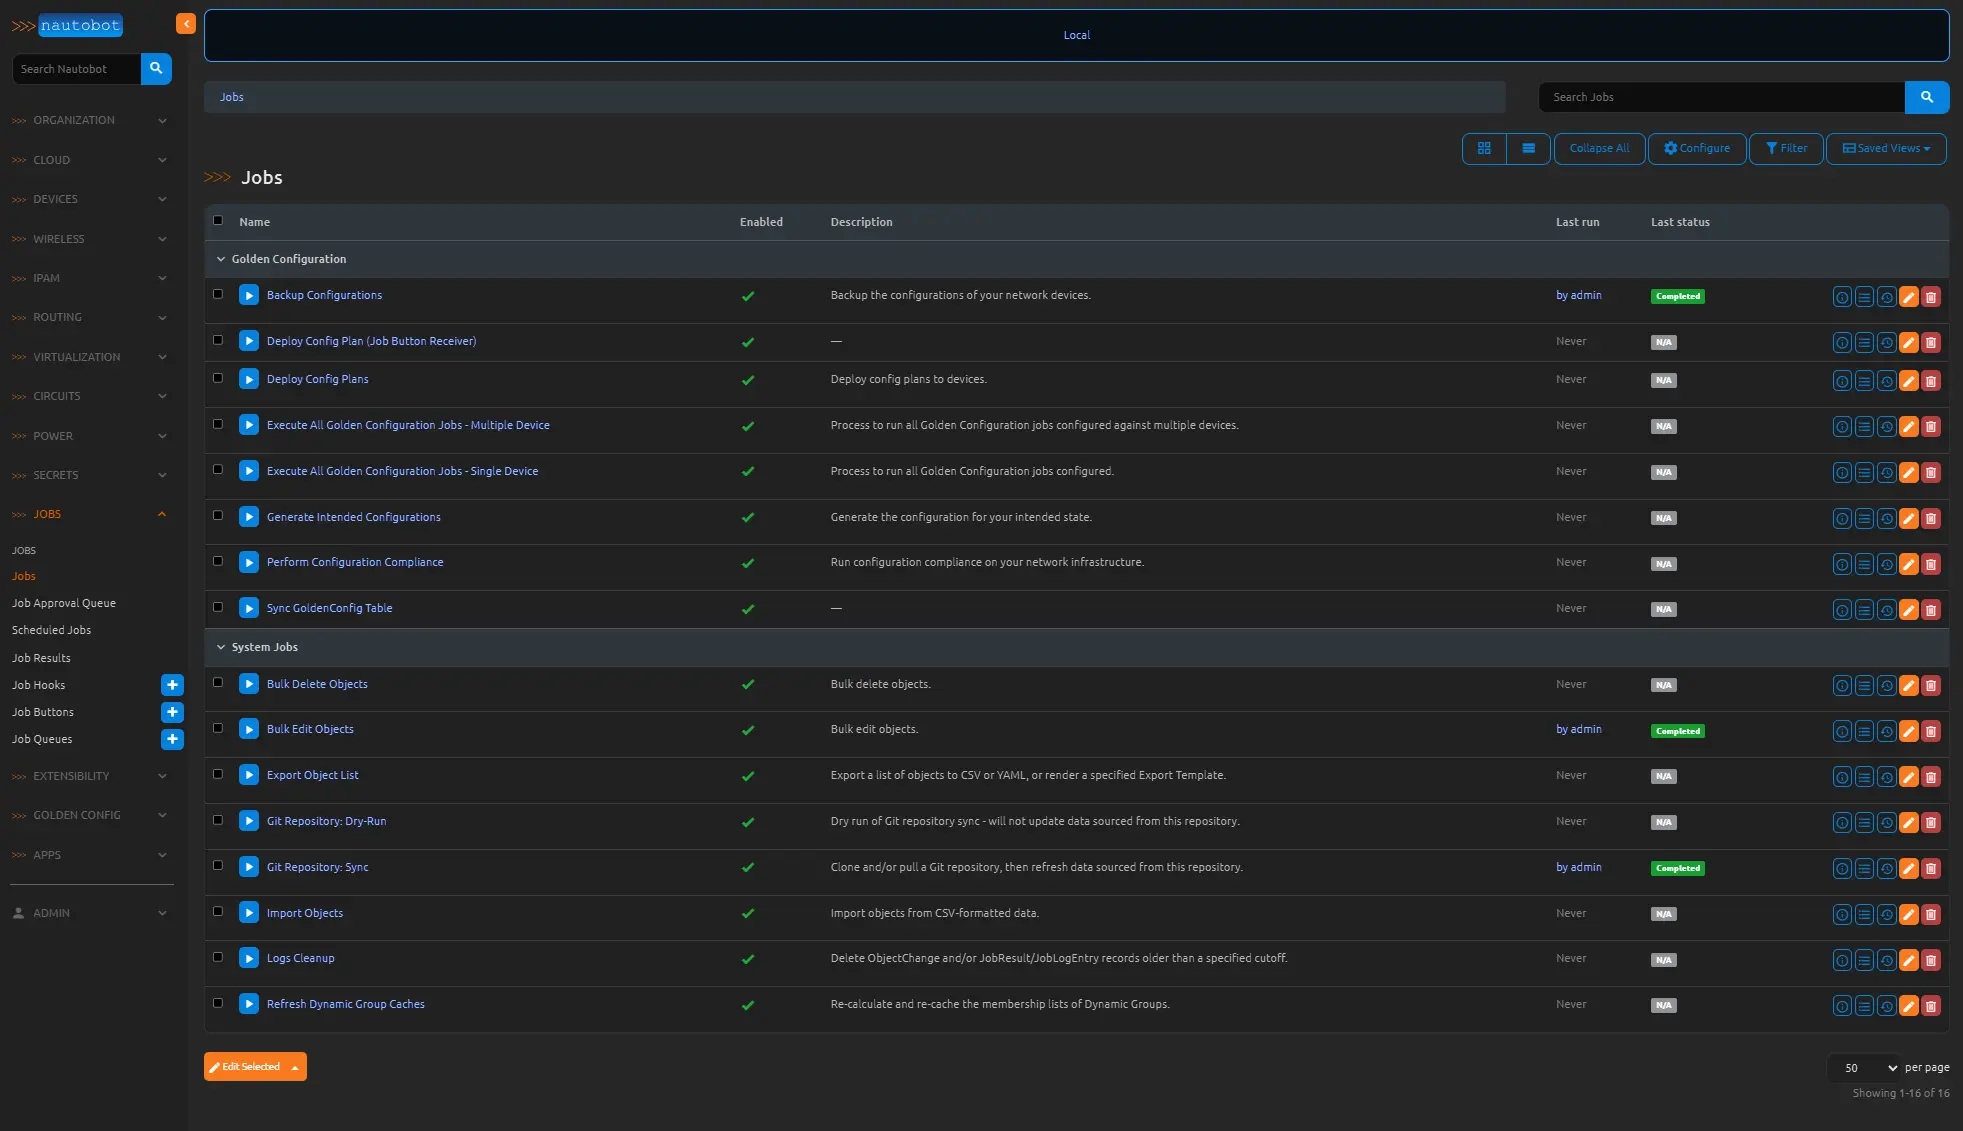
Now click the Backup Configurations job at the top of the list. From the platform section choose both the EOS and IOS platforms and click the Run Job Now button on the bottom right. 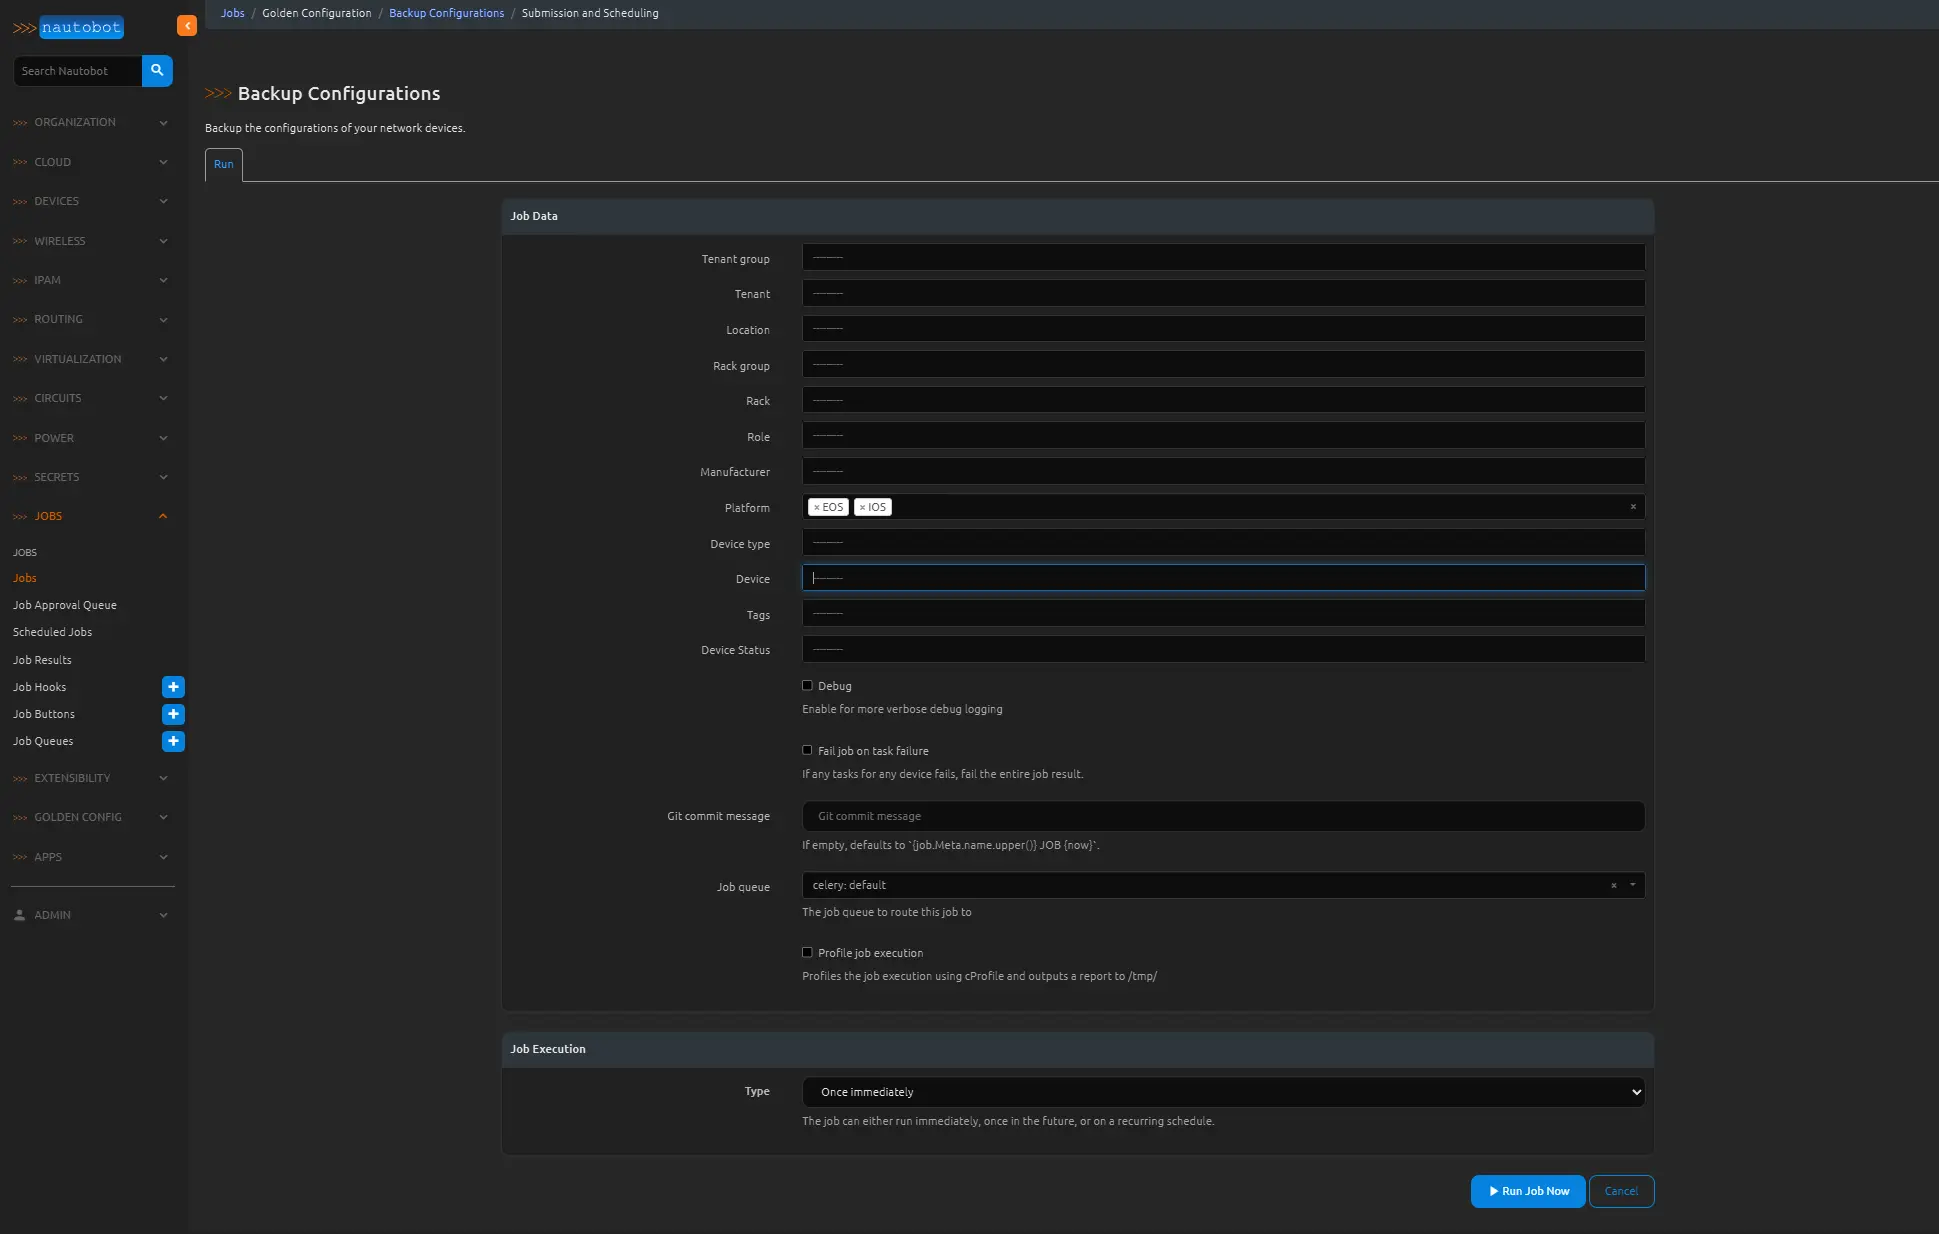
If we have done everything correctly we should see this job end with a status of completed, and in the logs you will see that each router was logged into and configs we retrieved and backed up. These backups will be synced to your repository under the backup-config folder. 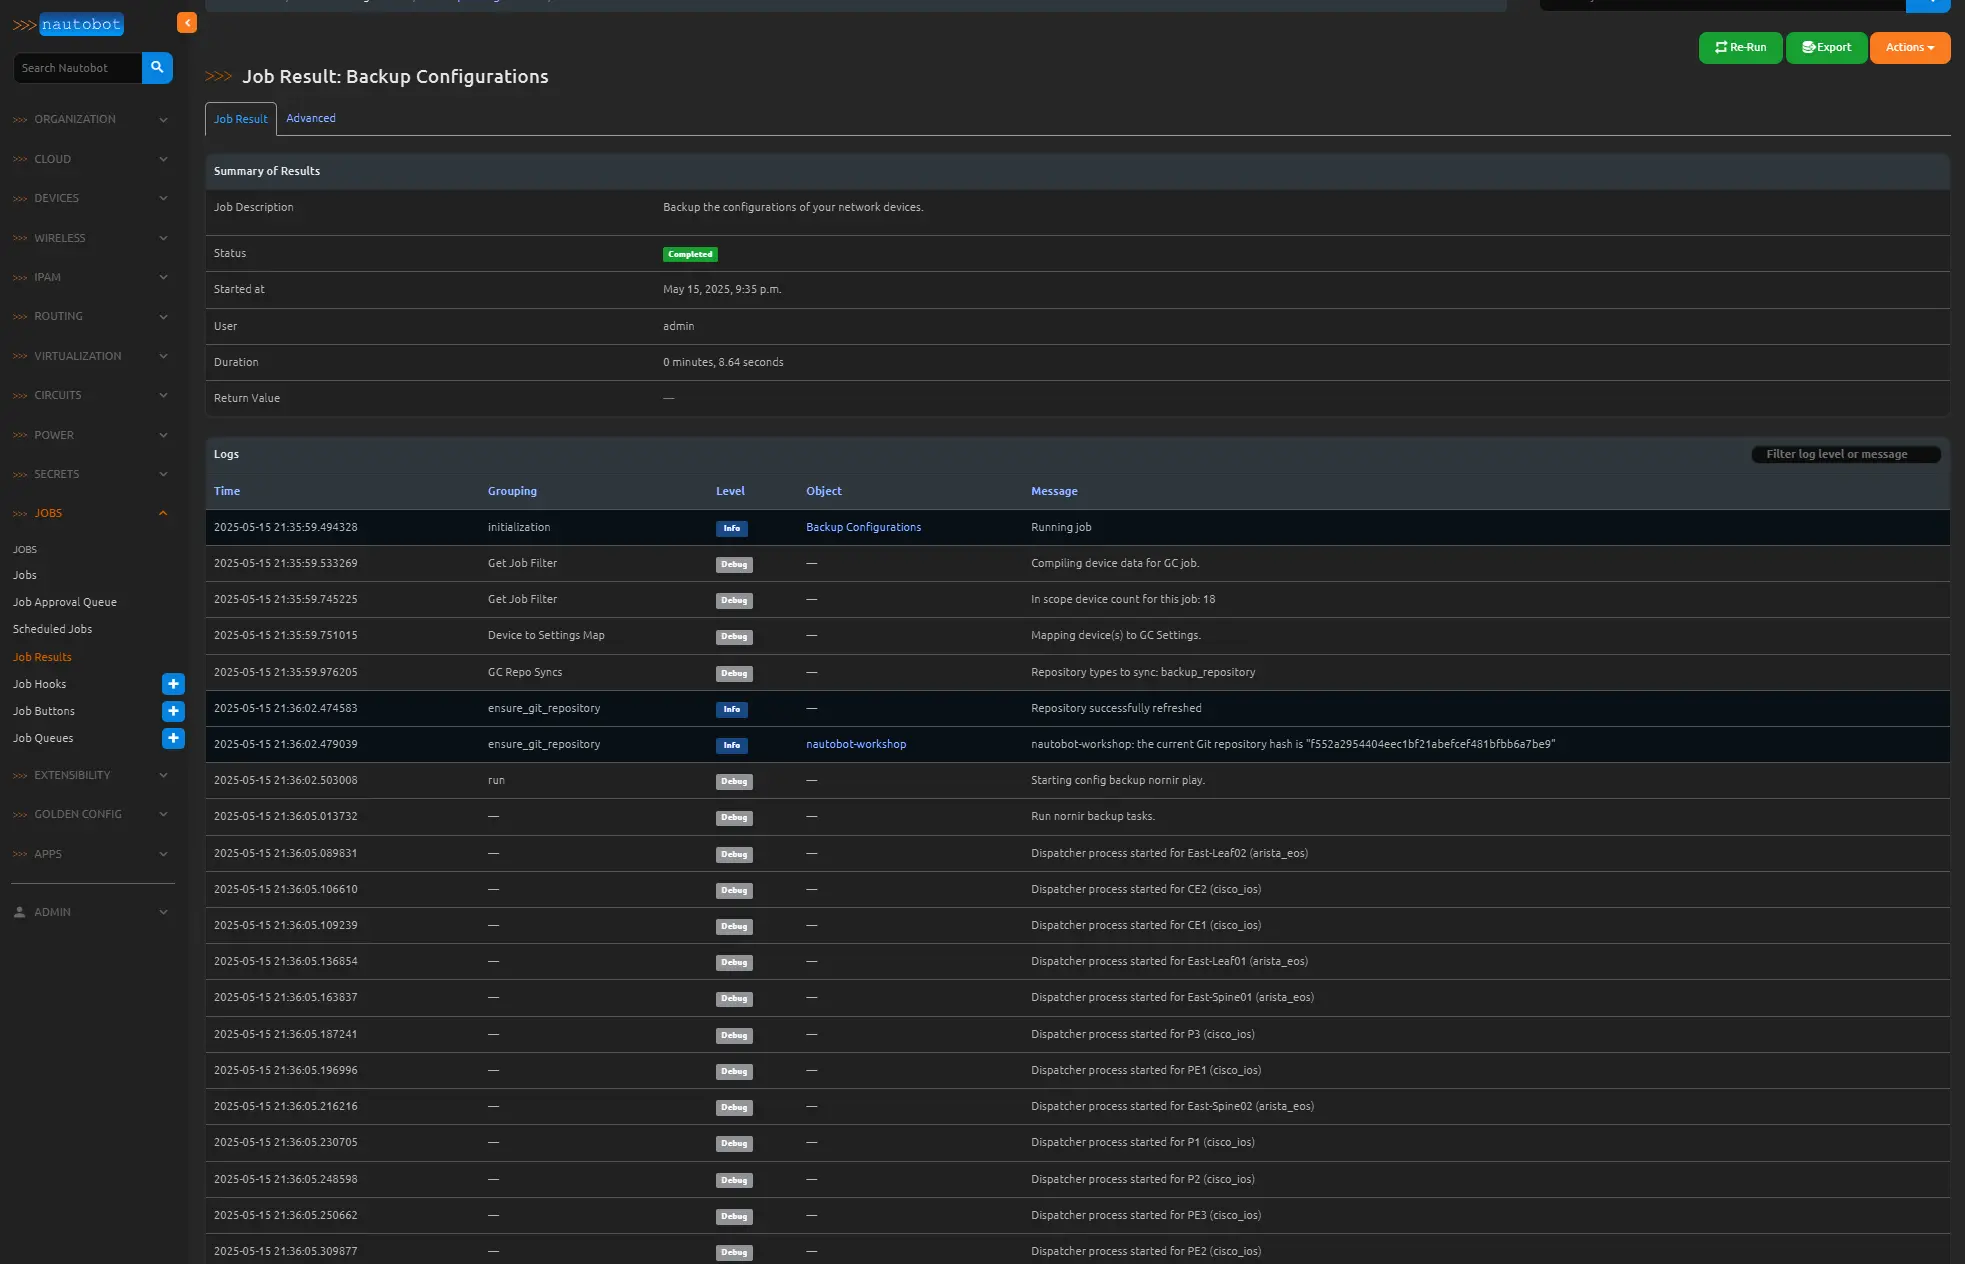
Conclusion
In this post, we demonstrated how to integrate the Nautobot Golden Configuration application into our automated lab environment to perform configuration backups across network devices. By setting up secrets, linking a GitHub repository, creating a GraphQL query, and configuring the Golden Config settings, we established a reliable and repeatable workflow for capturing and storing device configurations. This ensures that our lab remains consistent and version-controlled, while also laying the foundation for future compliance checks and configuration drift detection. With backups now automatically pushed to Git, we’re one step closer to a fully operational, automated network lab built on Nautobot.