Revolutionizing Automation - Harnessing the Potential of Nautobot's Git Repository Integration

Unleashing the Power of Nautobots Git Repository integration
In previous posts, we discussed deploying Nautobot into a Kubernetes cluster and utilizing it as a Dynamic inventory for Ansible. Now, let’s delve into another Nautobot feature: Git integration. In Source-of-Truth-Part 1, I briefly showcased how I used Git to manage config contexts. Let’s now explore how to set up Git integration in our Nautobot Kubernetes deployment.
Adding Secrets to Nautobot and Kubernetes
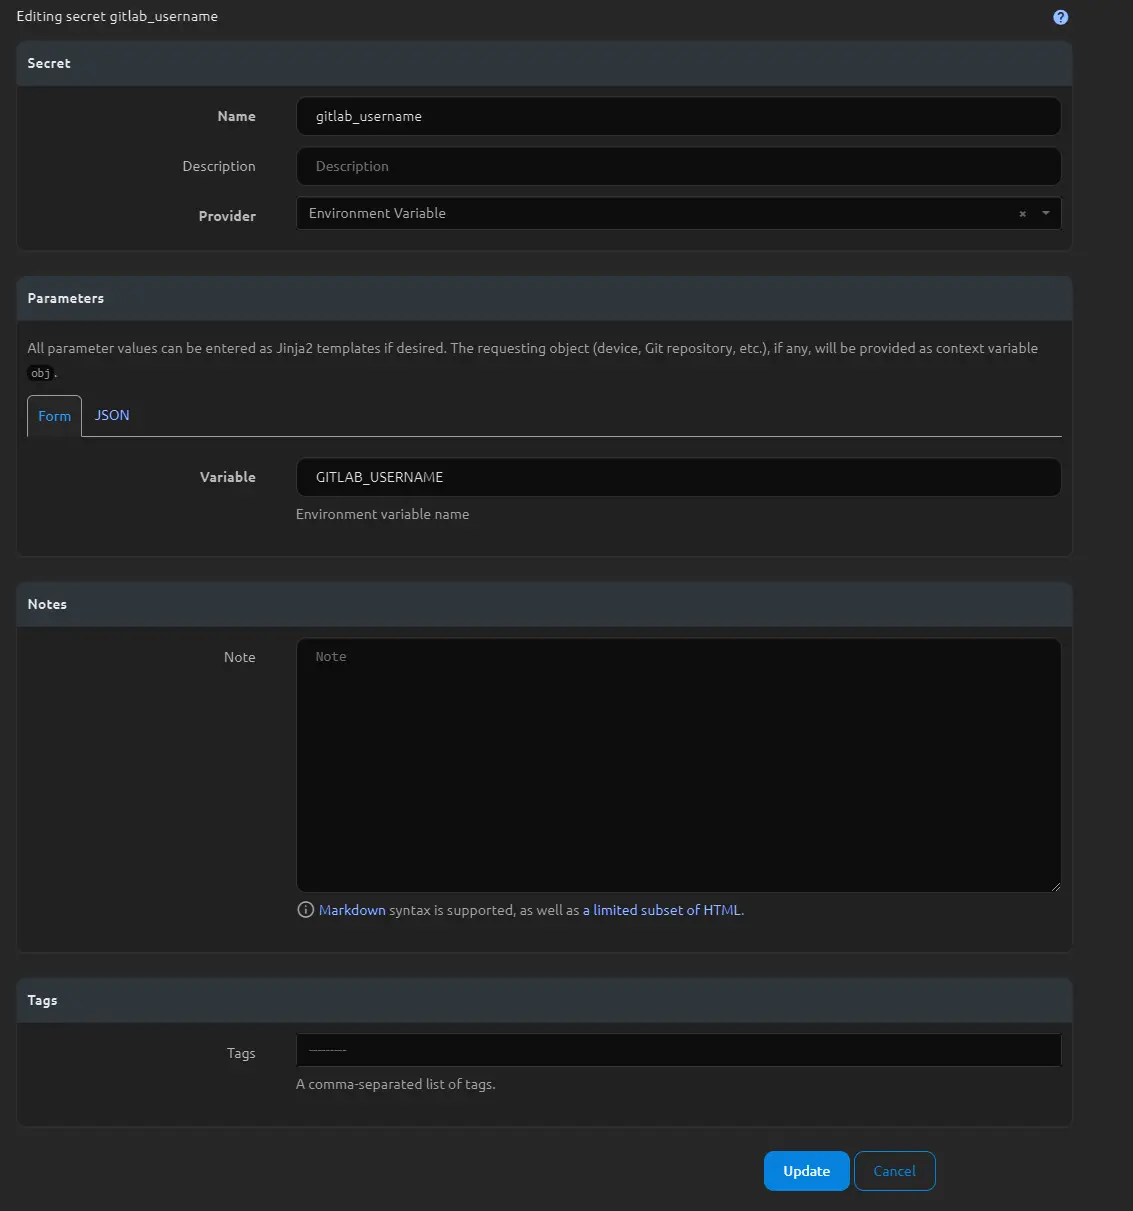
To begin, we need to set up a few things in our Nautobot App before we can add a Git repository. Nautobot uses environment variables to store usernames and passwords. Navigate to Secrets > Secrets and add two new secrets: one for the username of your Git repository and another for the token to your Git repository. I’ve named mine “gitlab_username” and set the provider to “Environment Variable.” In the form, type in the exact name of the environment variable to which this is being mapped.
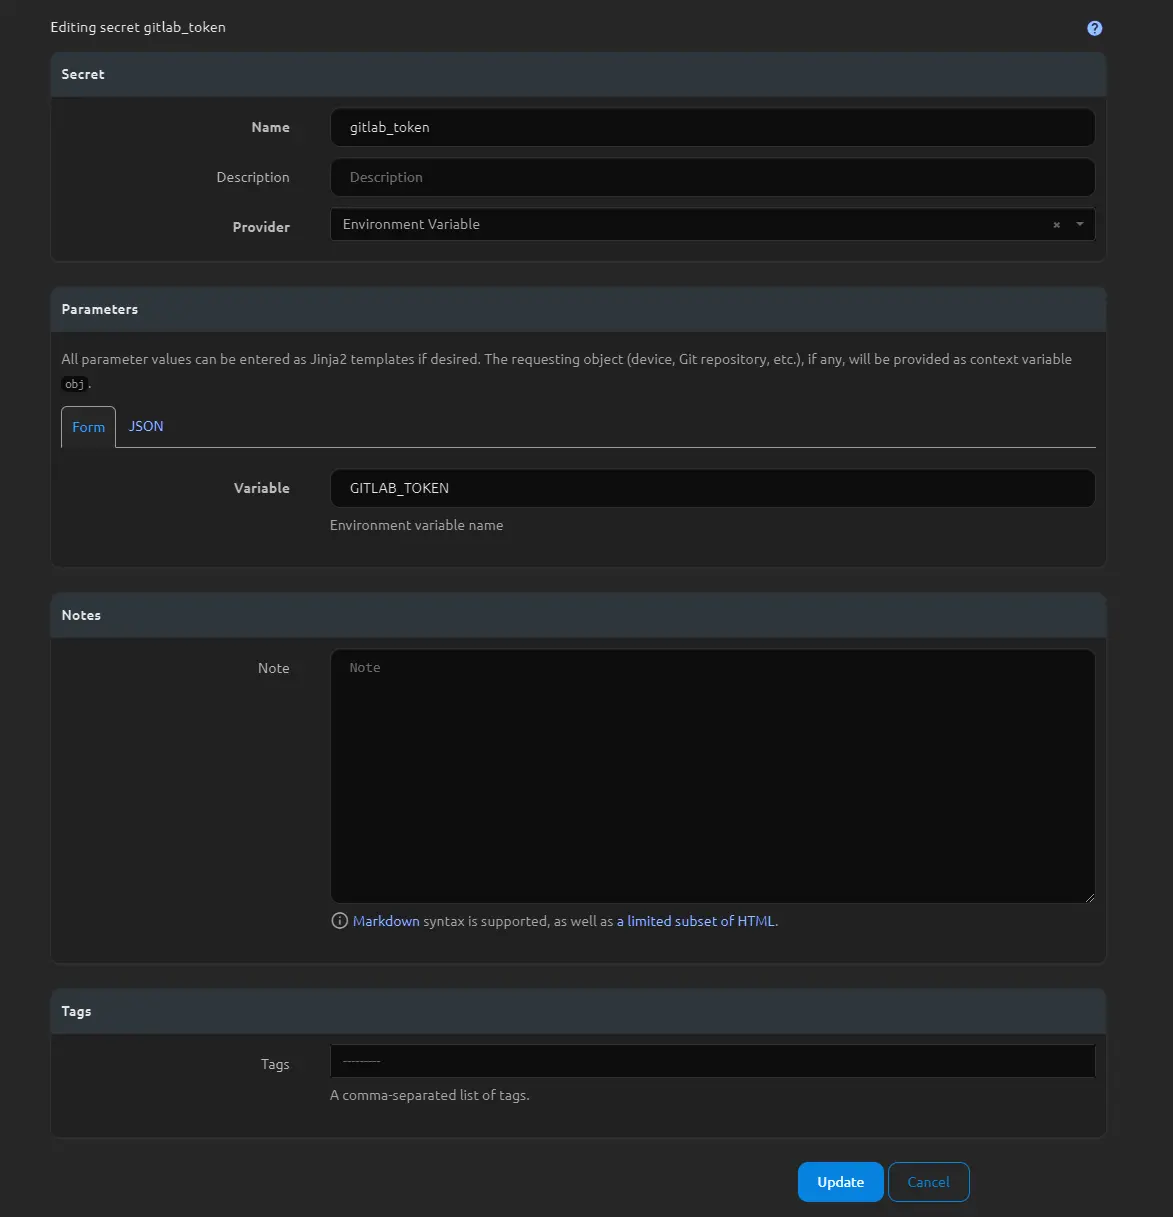
You will follow the same process for your token, creating a new secret similar to the one below.
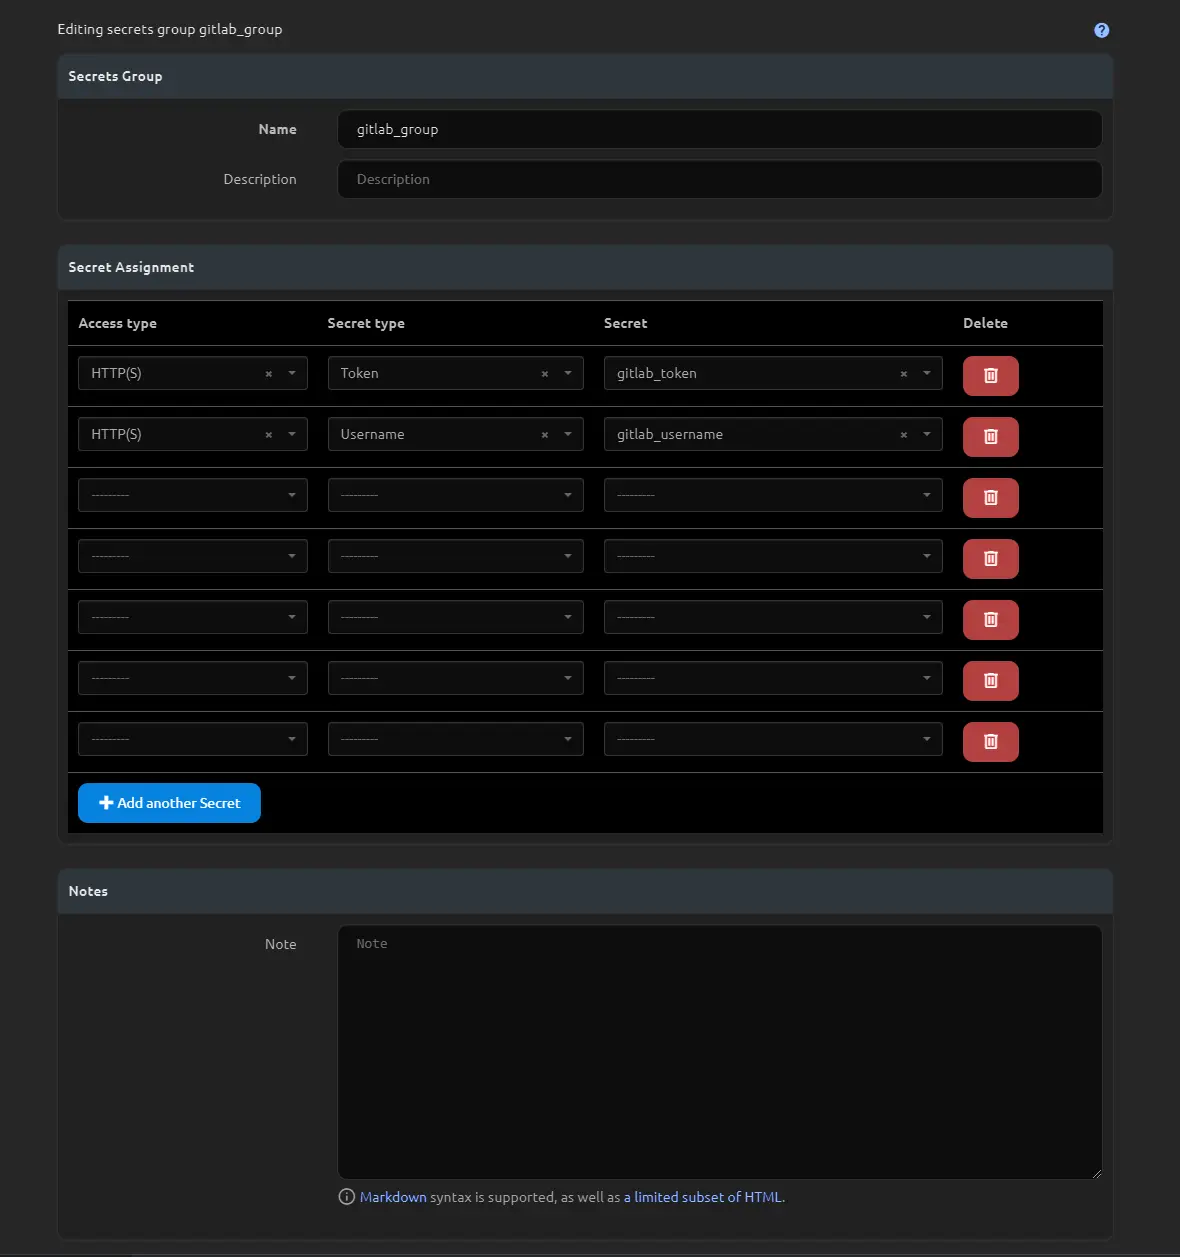
Navigate to Secrets > Secrets Groups and create a new secrets group; in my case, I named it “gitlab_group.” In the Secret Assignments, choose “HTTP(s)” for the access types, and select the secret types that correspond to the environmental variables to which they are mapped.
Now that these are set up, let’s examine how to get those variables into the Kubernetes deployment. Using kubectl, create a new secret:
1
kubectl create secret generic nautobot-git-secret-test --from-literal=GITLAB_USERNAME=<user-name> --from-literal=GITLAB_TOKEN=<token>
This new secret, when described, should display an output similar to the one below. When using the generic key with kubectl, it will create an Opaque secret type in Kubernetes:
1
2
3
4
5
6
7
8
9
10
11
12
$ kubectl describe secrets nautobot-git-secret
Name:         nautobot-git-secret
Namespace:    default
Labels:       <none>
Annotations:  <none>

Type:  Opaque

Data
====
GITLAB_USERNAME:  10 bytes
GITLAB_TOKEN:     26 bytes
If you used Helm to deploy Nautobot into your cluster, you can update the values.yaml file by adding this new secret to the deployment settings. This will ensure that the secret is included in the deployment and can be utilized by Nautobot.
1
2
3
4
5
6
7
8
9
10
11
12
nautobot:
  env:
    - name: GITLAB_USERNAME
      valueFrom:
        secretKeyRef:
          name: nautobot-git-secret
          key: GITLAB_USERNAME
    - name: GITLAB_TOKEN
      valueFrom:
        secretKeyRef:
          name: nautobot-git-secret
          key: GITLAB_TOKEN
Upgrading your Nautobot Deployment
To upgrade Helm charts with new values, you can follow these steps:
- Navigate to the directory where your Helm chart is located.
- Make the necessary changes to the values.yaml file or create a new values file (e.g., new-values.yaml) to include the updated settings.
- Run the helm upgrade command to update the deployment with the new values.
Here’s an example command to upgrade a Helm chart with a new values file:
1
helm upgrade --install nautobot nautobot/nautobot --values values.yaml
After updating your Helm chart, you can describe your deployment to verify that the new values have been assigned to the environment. To do this, use the following command:
1
2
3
4
5
6
7
8
9
10
11
12
13
14
15
16
17
$ kubectl describe deployment nautobot-default | grep -A 6 "Environment:"
    Environment:
      NAUTOBOT_DB_PASSWORD:     <set to the key 'password' in secret 'nautobot-postgresql'>      Optional: false
      NAUTOBOT_REDIS_PASSWORD:  <set to the key 'redis-password' in secret 'nautobot-redis'>     Optional: false
      NAUTOBOT_SECRET_KEY:      <set to the key 'NAUTOBOT_SECRET_KEY' in secret 'nautobot-env'>  Optional: false
    Mounts:
      /opt/nautobot/git from git-repos (rw)
      /opt/nautobot/static from nautobot-static (rw)
--
    Environment:
      NAUTOBOT_K8S_COMPONENT:   nautobot-default
      NAUTOBOT_DB_PASSWORD:     <set to the key 'password' in secret 'nautobot-postgresql'>         Optional: false
      NAUTOBOT_REDIS_PASSWORD:  <set to the key 'redis-password' in secret 'nautobot-redis'>        Optional: false
      NAUTOBOT_SECRET_KEY:      <set to the key 'NAUTOBOT_SECRET_KEY' in secret 'nautobot-env'>     Optional: false
      GITLAB_USERNAME:          <set to the key 'GITLAB_USERNAME' in secret 'nautobot-git-secret'>  Optional: false
      GITLAB_TOKEN:             <set to the key 'GITLAB_TOKEN' in secret 'nautobot-git-secret'>     Optional: false
With the deployment updated, navigate back to the Nautobot app and go to “EXTENSIBILITY” > “Git Repositories.” Add a new repository by providing a name, the remote URL (which should be the same HTTP URL you would use to clone), and selecting a branch to use. Then, select the secrets group you created earlier and choose the types of items you’d like to sync with Nautobot from the “Provides” list.
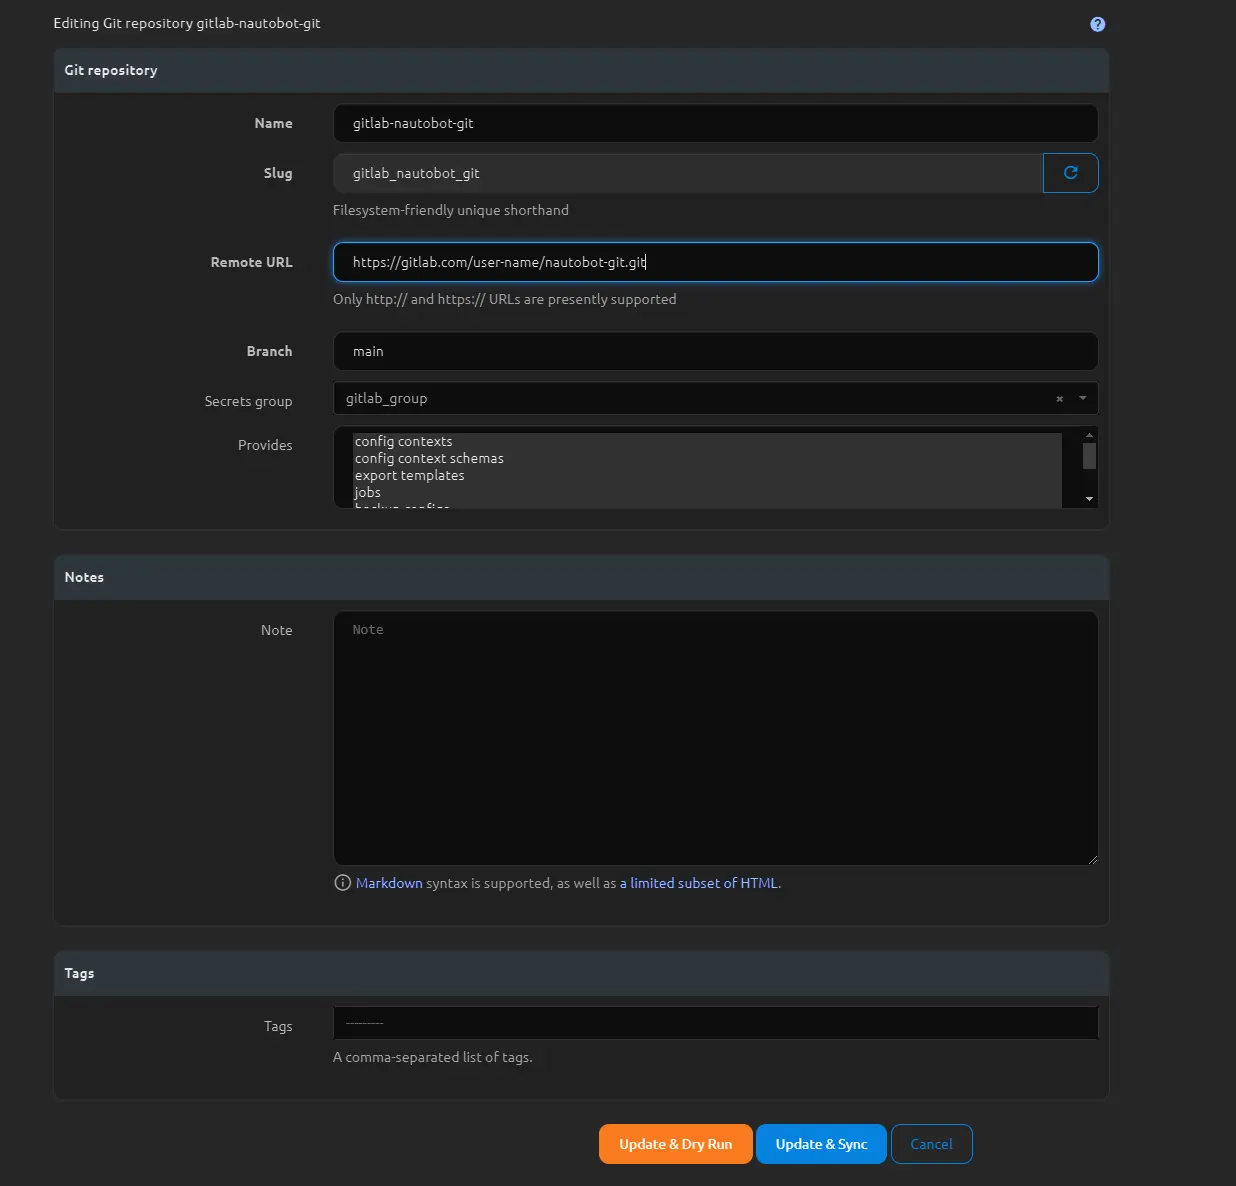
You can sync code for Jobs, create YAML files for config contexts and config context schemas, as well as export templates that can be used within the application. These all require specific folder structures, which you can find here.
Examples of how I use the git integration
Here’s an example of how to use a Git repository to sync config contexts:
If you want to sync a context for all backbone routers based on the “backbone” role, create a folder called config_contexts in your Git repository. Then, create a YAML file called role_backbone_router.yml in this folder. In this file, you can define what should appear in Nautobot and how it should be assigned using a metadata tag.
For example, your role_backbone_router.yml file might look like this:
1
2
3
4
5
6
7
8
9
10
11
12
13
14
15
16
17
18
19
20
21
22
23
---
_metadata:
  name: backbone_config_contexts
  weight: 1000
  description: Group Definitions for Backbone Devices
  is_active: true
  roles:
  - name: backbone_core_router
  - name: backbone_datacenter_router
bgp:
  peer_groups:
    - group: backbone
      maximum_routes: 12000
      remote_as: 100
      update_source: Loopback0
ospf:
  max_lsa: 12000
  passive_interfaces:
  - Loopback0
  process_id: 1
ospfv3:
  address_families:
  - ipv6
This configuration will sync a context called “Backbone Routers” with the specified description, metadata, and data. The nautobot_sync: true metadata ensures that this context is synced with Nautobot.
Once you’ve synced your configuration, navigate to EXTENSIBILITY > Config Contexts in the Nautobot app. The “Backbone Routers” context should appear in the list similar to this:

If you want to assign a context to a specific device, create a new folder under config_contexts called devices in your repo and create a new file that matches exactly to the device this context should appear under, like bbr01.yml. In that file, you can build a simple YAML structure like this. Push the changes in your repo, and sync the repo in Nautobot.
1
2
3
4
5
6
7
8
9
10
11
12
13
14
15
16
17
18
19
20
21
22
23
bgp:
  asn: 100
  neighbors:
  - peer: 172.16.100.129
    peer_group: backbone
  - peer: 172.16.100.130
    peer_group: backbone
  - peer: 172.16.100.131
    peer_group: backbone
  - peer: 172.16.100.132
    peer_group: backbone
  - peer: 172.16.100.133
    peer_group: backbone
  - peer: 2601:100:c800:100::129
    peer_group: backbone
  - peer: 2601:100:c800:100::130
    peer_group: backbone
  - peer: 2601:100:c800:100::131
    peer_group: backbone
  - peer: 2601:100:c800:100::132
    peer_group: backbone
  - peer: 2601:100:c800:100::133
    peer_group: backbone
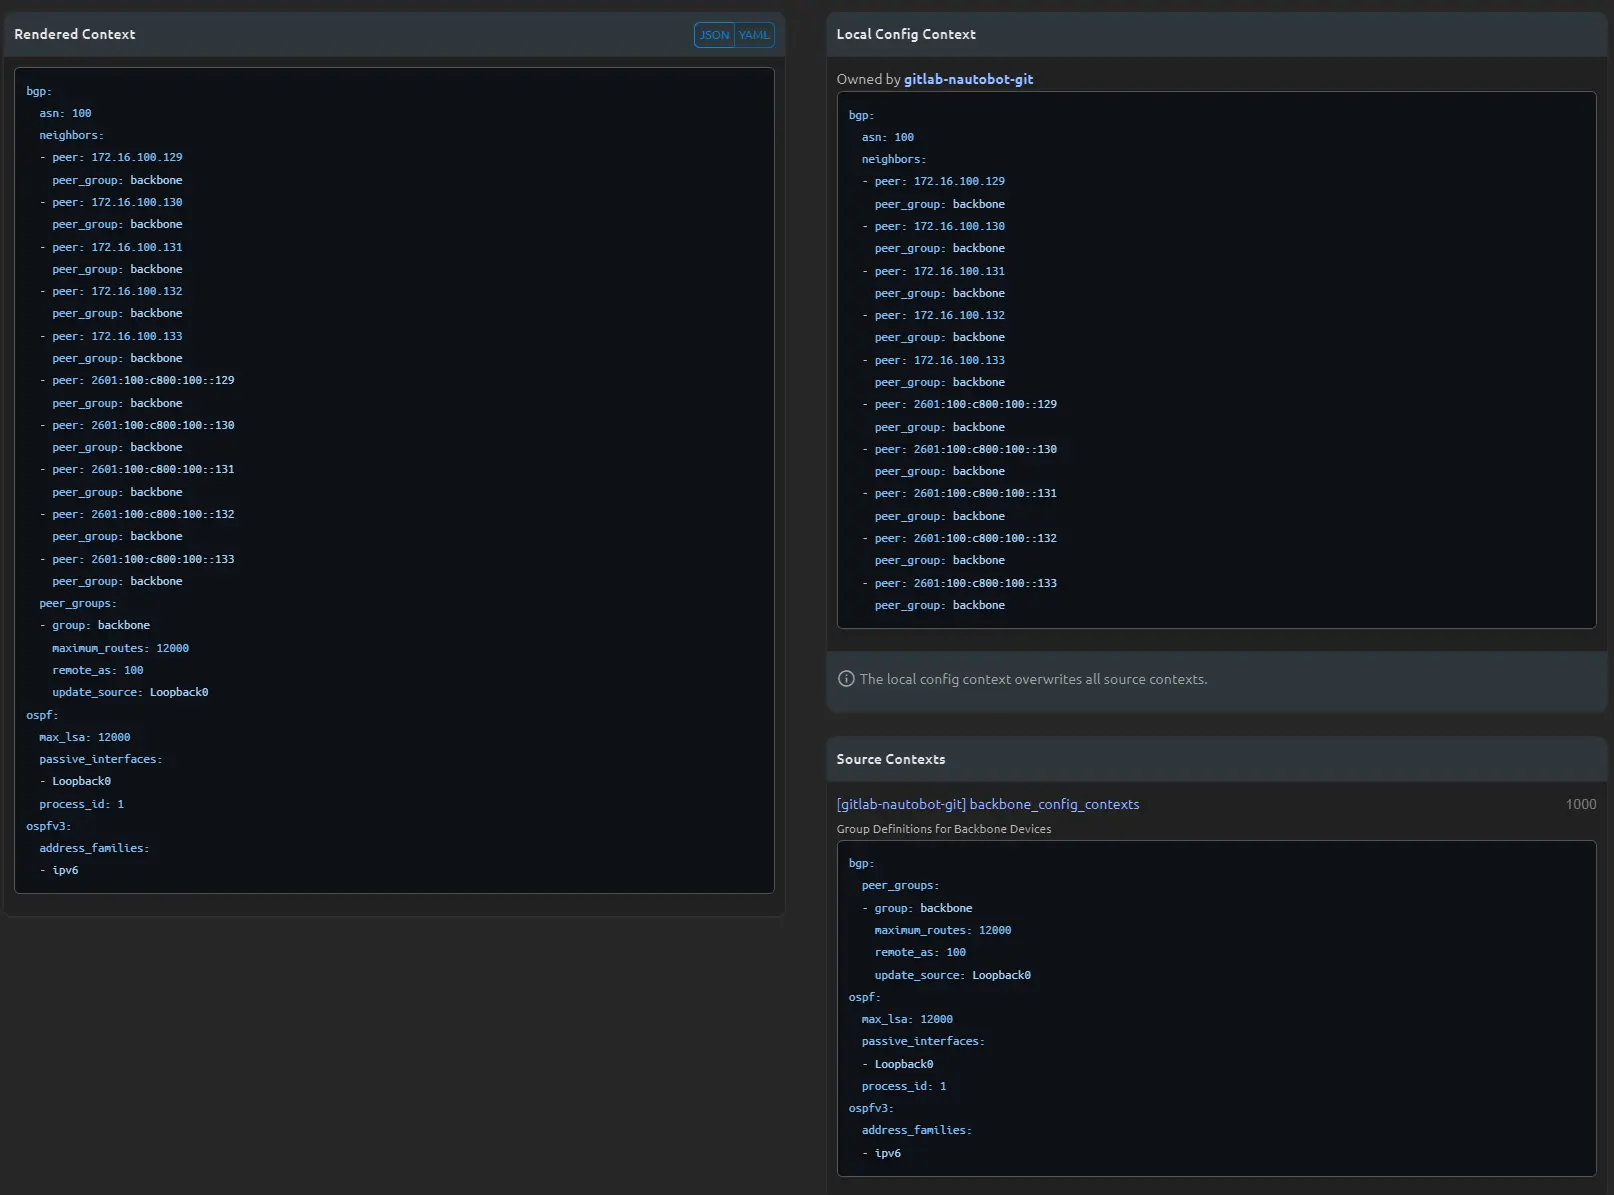
And if you look at a device under the assigned role, you should see all of your config contexts separately (on the right) and rendered (on the left):
This is just one small aspect of how you can integrate other sources of truth with Nautobot.